Comparative graphs in Excel are powerful tools for data analysis, and compare.edu.vn provides the resources to master them. Learn how to create effective visual comparisons, unlocking insights and making data-driven decisions simple, improving comparative analysis and data visualization. Enhance your data storytelling skills today with Excel!
1. Understanding Comparative Graphs in Excel
Comparative graphs, also known as comparison charts, are visual representations of data that highlight the differences and similarities between two or more sets of data. These graphs are essential for anyone needing to analyze trends, compare performance, or present data in an easily understandable format. In Excel, creating comparative graphs involves selecting the right chart type and customizing it to effectively display your data. This introduction provides a comprehensive guide on How To Make Comparative Graphs In Excel, ensuring your data insights are clear and impactful.
1.1. What is a Comparative Graph?
A comparative graph is a chart or diagram that illustrates the relationship between different sets of data, allowing viewers to quickly identify patterns and make informed decisions. These graphs are used to compare qualitative and quantitative data, making them a versatile tool for various applications. Whether you are comparing sales figures, survey results, or scientific data, comparative graphs provide a visual means to understand the data at a glance. Effective comparative graphs reduce the time needed for data analysis, which is why they are crucial in business, education, and research.
1.2. Why Use Excel for Creating Comparative Graphs?
Excel is a widely used spreadsheet program with robust charting capabilities, making it an ideal choice for creating comparative graphs. Its intuitive interface and extensive range of chart types enable users to easily transform raw data into visually appealing and informative graphs. Here are some reasons why Excel is preferred for creating comparative graphs:
- Accessibility: Excel is readily available on most computers, making it a convenient tool for a wide range of users.
- Ease of Use: The software’s user-friendly interface allows even those with limited technical skills to create professional-looking graphs.
- Customization: Excel offers extensive customization options, allowing users to tailor their graphs to meet specific needs.
- Integration: Excel seamlessly integrates with other Microsoft Office applications, facilitating easy sharing and collaboration.
- Data Handling: Excel’s spreadsheet capabilities make it easy to manage, sort, and filter data before creating graphs.
1.3. Common Types of Comparative Graphs in Excel
Excel offers several chart types that are suitable for creating comparative graphs. Each chart type has its strengths and is best suited for different types of data and comparisons. Here are some of the most common types of comparative graphs you can create in Excel:
- Column Charts: Ideal for comparing values across different categories. They are easy to read and understand, making them a popular choice for many applications.
- Bar Charts: Similar to column charts but display data horizontally. They are useful when category labels are long or when comparing a large number of categories.
- Line Charts: Best for showing trends and changes over time. They are particularly effective for comparing multiple data series.
- Scatter Plots: Used to show the relationship between two variables. They are helpful for identifying correlations and outliers in data.
- Area Charts: Similar to line charts but with the area below the lines filled in. They are useful for highlighting the magnitude of changes over time.
- Pie Charts: Used to show how different categories contribute to a whole. They are best used when comparing a small number of categories.
- Doughnut Charts: Similar to pie charts but with a hole in the center, which can be used to display additional information.
2. Preparing Your Data for a Comparative Graph
Before you can create a comparative graph in Excel, you need to prepare your data. Proper data preparation is crucial for creating accurate and effective graphs. This involves organizing your data in a structured format, cleaning it to remove errors, and ensuring it is suitable for the type of graph you want to create.
2.1. Structuring Your Data in Excel
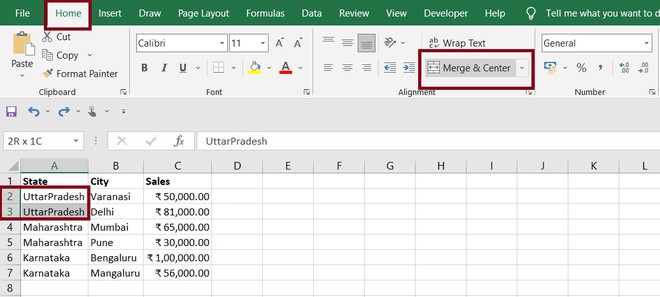
The first step in preparing your data is to structure it properly in Excel. This typically involves organizing your data into columns and rows, with each column representing a variable and each row representing an observation. Here are some tips for structuring your data effectively:
- Use Headers: Label each column with a clear and descriptive header. This makes it easier to understand what each column represents.
- Consistent Data Types: Ensure that each column contains consistent data types. For example, if a column is meant to contain numerical data, make sure that all entries in that column are numbers.
- Avoid Empty Rows and Columns: Remove any empty rows or columns from your data. These can cause problems when creating graphs.
- Use Tables: Convert your data into an Excel table. Tables provide additional functionality, such as automatic filtering and sorting, which can be helpful when preparing your data.
2.2. Cleaning Your Data for Accuracy
Data cleaning is the process of identifying and correcting errors in your data. This is an essential step in preparing your data for a comparative graph. Errors in your data can lead to inaccurate graphs and misleading insights. Here are some common data cleaning tasks:
- Remove Duplicates: Identify and remove any duplicate entries in your data.
- Correct Typos: Check for and correct any typos or spelling errors.
- Handle Missing Values: Decide how to handle missing values in your data. You can either remove the rows with missing values or replace them with estimated values.
- Standardize Data: Ensure that your data is standardized. For example, if you have data in different units, convert them to a common unit.
- Identify Outliers: Look for and handle any outliers in your data. Outliers can skew your graphs and make it difficult to identify trends.
2.3. Choosing the Right Data for Your Graph
Selecting the right data for your graph is crucial for creating an effective comparison. You should choose data that is relevant to your comparison and that will help you answer your research questions. Here are some factors to consider when choosing data for your graph:
- Relevance: Ensure that the data you choose is relevant to your comparison. Irrelevant data can clutter your graph and make it difficult to interpret.
- Completeness: Choose data that is complete. Missing data can lead to inaccurate graphs and misleading insights.
- Comparability: Ensure that the data you choose is comparable. The data should be measured in the same units and collected using the same methods.
- Clarity: Choose data that is easy to understand. Complex or ambiguous data can make it difficult to create an effective graph.
- Focus: Concentrate on data that directly supports your comparison objectives. Avoid including extraneous information that doesn’t contribute to the main message.
3. Step-by-Step Guide to Creating a Column Chart
Column charts are one of the most commonly used types of comparative graphs. They are ideal for comparing values across different categories and are easy to read and understand. This section provides a step-by-step guide on how to create a column chart in Excel.
3.1. Selecting Your Data Range
The first step in creating a column chart is to select the data range you want to include in your graph. This involves highlighting the cells in your Excel sheet that contain the data you want to display. Here’s how to do it:
- Click and Drag: Click on the first cell in your data range and drag your mouse to the last cell in your data range.
- Use Keyboard Shortcuts: Alternatively, you can use keyboard shortcuts to select your data range. Click on the first cell, hold down the Shift key, and use the arrow keys to select the rest of your data range.
- Include Headers: Make sure to include the headers in your data range. The headers will be used to label the categories in your graph.
- Avoid Empty Rows and Columns: Exclude any empty rows or columns from your data range.
3.2. Inserting the Column Chart
Once you have selected your data range, you can insert the column chart. Here’s how to do it:
- Go to the Insert Tab: Click on the “Insert” tab in the Excel ribbon.
- Choose Column Chart: In the “Charts” group, click on the “Column” chart icon.
- Select Chart Type: Choose the type of column chart you want to create. Excel offers several options, including 2-D Column, 3-D Column, and Clustered Column.
- Chart Appears: Excel will automatically create the column chart based on the data you selected. The chart will appear on your Excel sheet.
3.3. Customizing Your Column Chart
After inserting the column chart, you can customize it to make it more visually appealing and informative. Here are some common customization options:
- Add Chart Title: Add a title to your chart to explain what it represents. To add a chart title, click on the chart, go to the “Chart Design” tab, and click on “Add Chart Element” > “Chart Title.”
- Add Axis Titles: Add titles to the x-axis and y-axis to label the categories and values in your chart. To add axis titles, click on the chart, go to the “Chart Design” tab, and click on “Add Chart Element” > “Axis Titles.”
- Change Colors: Change the colors of the columns to make your chart more visually appealing. To change the colors, click on the columns, go to the “Format” tab, and use the “Shape Fill” option.
- Add Data Labels: Add data labels to the columns to display the values they represent. To add data labels, click on the chart, go to the “Chart Design” tab, and click on “Add Chart Element” > “Data Labels.”
- Adjust Axis Scales: Adjust the scales of the x-axis and y-axis to better display your data. To adjust the axis scales, double-click on the axis, and use the “Format Axis” pane to change the minimum, maximum, and major unit values.
- Format the Chart Area: Adjust the background color, borders, and other visual elements of the chart area to match your desired aesthetic.
3.4. Example: Comparing Sales Data with a Column Chart
Let’s say you have sales data for three different products over a period of four months. You can use a column chart to compare the sales performance of these products. Here’s how you can do it:
- Enter Your Data: Enter your sales data into an Excel sheet, with the months in the first column and the product names in the subsequent columns.
- Select Your Data Range: Select the data range, including the headers.
- Insert a Column Chart: Go to the “Insert” tab, choose “Column Chart,” and select “Clustered Column.”
- Add Chart and Axis Titles: Add a chart title (e.g., “Monthly Sales Comparison”) and axis titles (e.g., “Month” for the x-axis and “Sales” for the y-axis).
- Customize Colors and Labels: Change the colors of the columns to represent each product and add data labels to display the sales figures.
- Adjust Axis Scales: Adjust the y-axis scale to better display the range of sales values.
This will give you a clear and effective column chart that compares the sales performance of the three products over the four-month period.
4. Creating a Bar Chart for Comparative Analysis
Bar charts are another popular type of comparative graph, particularly useful when you have long category labels or need to compare a large number of categories. This section guides you through creating and customizing bar charts in Excel.
4.1. When to Use a Bar Chart Over a Column Chart
While both bar and column charts are used for comparisons, bar charts are often preferred in specific scenarios. Here are some situations where a bar chart might be more suitable than a column chart:
- Long Category Labels: Bar charts display category labels horizontally, which makes them easier to read when the labels are long.
- Large Number of Categories: Bar charts can accommodate a large number of categories without becoming cluttered.
- Emphasis on Categories: If you want to emphasize the categories rather than the values, a bar chart can be more effective.
- Negative Values: Bar charts can easily display negative values, which can be useful for showing losses or decreases.
4.2. Steps to Create a Bar Chart in Excel
Creating a bar chart in Excel is similar to creating a column chart. Here’s a step-by-step guide:
- Select Your Data Range: Select the data range you want to include in your graph, including the headers.
- Go to the Insert Tab: Click on the “Insert” tab in the Excel ribbon.
- Choose Bar Chart: In the “Charts” group, click on the “Bar” chart icon.
- Select Chart Type: Choose the type of bar chart you want to create. Excel offers several options, including 2-D Bar, 3-D Bar, and Clustered Bar.
- Chart Appears: Excel will automatically create the bar chart based on the data you selected. The chart will appear on your Excel sheet.
4.3. Customizing Your Bar Chart
After creating the bar chart, you can customize it to enhance its visual appeal and clarity. Here are some common customization options:
- Add Chart Title: Add a title to your chart to explain what it represents. To add a chart title, click on the chart, go to the “Chart Design” tab, and click on “Add Chart Element” > “Chart Title.”
- Add Axis Titles: Add titles to the x-axis and y-axis to label the values and categories in your chart. To add axis titles, click on the chart, go to the “Chart Design” tab, and click on “Add Chart Element” > “Axis Titles.”
- Change Colors: Change the colors of the bars to make your chart more visually appealing. To change the colors, click on the bars, go to the “Format” tab, and use the “Shape Fill” option.
- Add Data Labels: Add data labels to the bars to display the values they represent. To add data labels, click on the chart, go to the “Chart Design” tab, and click on “Add Chart Element” > “Data Labels.”
- Adjust Axis Scales: Adjust the scales of the x-axis and y-axis to better display your data. To adjust the axis scales, double-click on the axis, and use the “Format Axis” pane to change the minimum, maximum, and major unit values.
- Invert Chart Axes: Consider inverting the chart axes so the categories are on the vertical axis and the values are on the horizontal axis. This can make it easier to read long category labels.
4.4. Example: Comparing Customer Satisfaction Scores with a Bar Chart
Imagine you have customer satisfaction scores for several different products. A bar chart can effectively display and compare these scores. Here’s how you can create one:
- Enter Your Data: Enter your data into an Excel sheet, with the product names in the first column and the satisfaction scores in the second column.
- Select Your Data Range: Select the data range, including the headers.
- Insert a Bar Chart: Go to the “Insert” tab, choose “Bar Chart,” and select “Clustered Bar.”
- Add Chart and Axis Titles: Add a chart title (e.g., “Customer Satisfaction Scores”) and axis titles (e.g., “Product” for the y-axis and “Score” for the x-axis).
- Customize Colors and Labels: Change the colors of the bars to represent each product and add data labels to display the satisfaction scores.
- Adjust Axis Scales: Adjust the x-axis scale to better display the range of satisfaction scores.
This will create a clear bar chart that effectively compares the customer satisfaction scores for the different products.
5. Line Charts for Trend Analysis and Comparisons
Line charts are excellent for showing trends and changes over time. They are particularly effective for comparing multiple data series and identifying patterns. This section will guide you through creating and customizing line charts in Excel.
5.1. When Line Charts Are Most Effective
Line charts are most effective in the following scenarios:
- Showing Trends Over Time: Line charts are ideal for displaying how data changes over a period of time.
- Comparing Multiple Data Series: Line charts can easily display multiple data series, making it easy to compare trends.
- Identifying Patterns: Line charts can help you identify patterns in your data, such as seasonality or cycles.
- Continuous Data: Line charts are best suited for continuous data, where the data points are connected.
5.2. Creating a Line Chart in Excel: A Step-by-Step Approach
Creating a line chart in Excel is straightforward. Follow these steps to create an effective line chart:
- Select Your Data Range: Select the data range you want to include in your graph, including the headers.
- Go to the Insert Tab: Click on the “Insert” tab in the Excel ribbon.
- Choose Line Chart: In the “Charts” group, click on the “Line” chart icon.
- Select Chart Type: Choose the type of line chart you want to create. Excel offers several options, including 2-D Line, 3-D Line, and Line with Markers.
- Chart Appears: Excel will automatically create the line chart based on the data you selected. The chart will appear on your Excel sheet.
5.3. Customizing Line Charts for Clarity
Customizing your line chart can significantly enhance its readability and effectiveness. Here are some key customization options:
- Add Chart Title: Add a title to your chart to explain what it represents.
- Add Axis Titles: Add titles to the x-axis and y-axis to label the time periods and values in your chart.
- Change Line Colors: Change the colors of the lines to make your chart more visually appealing and to distinguish between different data series.
- Add Data Markers: Add data markers to the lines to highlight the data points.
- Add Data Labels: Add data labels to the lines to display the values they represent.
- Adjust Axis Scales: Adjust the scales of the x-axis and y-axis to better display your data.
- Add Gridlines: Add gridlines to the chart to make it easier to read the values.
- Smooth Lines: Use smoothed lines to reduce noise and emphasize trends in your data.
5.4. Example: Comparing Website Traffic Over Time with a Line Chart
Suppose you want to compare the website traffic for three different websites over a period of six months. A line chart is perfect for this. Here’s how to create one:
- Enter Your Data: Enter your data into an Excel sheet, with the months in the first column and the website names in the subsequent columns.
- Select Your Data Range: Select the data range, including the headers.
- Insert a Line Chart: Go to the “Insert” tab, choose “Line Chart,” and select “Line with Markers.”
- Add Chart and Axis Titles: Add a chart title (e.g., “Website Traffic Comparison”) and axis titles (e.g., “Month” for the x-axis and “Traffic” for the y-axis).
- Customize Colors and Markers: Change the colors of the lines to represent each website and add data markers to highlight the data points.
- Adjust Axis Scales: Adjust the y-axis scale to better display the range of traffic values.
This will create a clear line chart that effectively compares the website traffic for the three websites over the six-month period.
6. Scatter Plots for Correlation Analysis
Scatter plots, also known as scatter charts or scatter graphs, are used to display the relationship between two variables. They are helpful for identifying correlations and outliers in data. This section provides a guide on how to create and customize scatter plots in Excel.
6.1. Understanding Correlation with Scatter Plots
A scatter plot displays data points on a graph with two axes: the x-axis and the y-axis. Each point on the graph represents a single observation, with the x-coordinate representing the value of one variable and the y-coordinate representing the value of the other variable. By examining the pattern of points on the graph, you can gain insights into the relationship between the two variables.
- Positive Correlation: If the points on the graph tend to rise from left to right, there is a positive correlation between the two variables. This means that as the value of one variable increases, the value of the other variable also tends to increase.
- Negative Correlation: If the points on the graph tend to fall from left to right, there is a negative correlation between the two variables. This means that as the value of one variable increases, the value of the other variable tends to decrease.
- No Correlation: If the points on the graph are scattered randomly, there is no correlation between the two variables. This means that there is no clear relationship between the values of the two variables.
6.2. Creating a Scatter Plot in Excel: Step-by-Step
Creating a scatter plot in Excel is a straightforward process. Here’s how to do it:
- Enter Your Data: Enter your data into an Excel sheet, with one variable in the first column and the other variable in the second column.
- Select Your Data Range: Select the data range you want to include in your graph, including the headers.
- Go to the Insert Tab: Click on the “Insert” tab in the Excel ribbon.
- Choose Scatter Chart: In the “Charts” group, click on the “Scatter” chart icon.
- Select Chart Type: Choose the type of scatter chart you want to create. Excel offers several options, including Scatter, Scatter with Smooth Lines and Markers, and Scatter with Straight Lines and Markers.
- Chart Appears: Excel will automatically create the scatter plot based on the data you selected. The chart will appear on your Excel sheet.
6.3. Customizing Scatter Plots for Better Insights
Customizing your scatter plot can help you gain better insights into the relationship between the two variables. Here are some customization options:
- Add Chart Title: Add a title to your chart to explain what it represents.
- Add Axis Titles: Add titles to the x-axis and y-axis to label the variables.
- Add Trendline: Add a trendline to the chart to show the general direction of the relationship between the two variables. To add a trendline, click on the chart, go to the “Chart Design” tab, and click on “Add Chart Element” > “Trendline.”
- Add Data Labels: Add data labels to the points to display the values they represent.
- Adjust Axis Scales: Adjust the scales of the x-axis and y-axis to better display your data.
- Format Data Points: Customize the appearance of the data points, such as changing their color, size, or shape.
6.4. Example: Analyzing the Relationship Between Study Time and Exam Scores
Consider you want to analyze the relationship between the amount of time students spend studying and their exam scores. A scatter plot can help you visualize this relationship. Here’s how to create one:
- Enter Your Data: Enter your data into an Excel sheet, with the study time in the first column and the exam scores in the second column.
- Select Your Data Range: Select the data range, including the headers.
- Insert a Scatter Chart: Go to the “Insert” tab, choose “Scatter Chart,” and select “Scatter.”
- Add Chart and Axis Titles: Add a chart title (e.g., “Study Time vs. Exam Scores”) and axis titles (e.g., “Study Time (Hours)” for the x-axis and “Exam Score” for the y-axis).
- Add Trendline: Add a trendline to the chart to show the general direction of the relationship between study time and exam scores.
- Adjust Axis Scales: Adjust the scales of the x-axis and y-axis to better display the range of study times and exam scores.
This will create a scatter plot that effectively displays the relationship between study time and exam scores.
7. Enhancing Your Graphs with Advanced Excel Features
Excel provides several advanced features that can help you enhance your comparative graphs and make them more informative and visually appealing. This section explores some of these features.
7.1. Using Conditional Formatting to Highlight Key Data
Conditional formatting allows you to automatically apply formatting to cells based on their values. This can be useful for highlighting key data points in your graph. For example, you can use conditional formatting to highlight the highest and lowest values in your data range. Here’s how to use conditional formatting:
- Select Your Data Range: Select the data range you want to apply conditional formatting to.
- Go to the Home Tab: Click on the “Home” tab in the Excel ribbon.
- Choose Conditional Formatting: In the “Styles” group, click on the “Conditional Formatting” icon.
- Select a Rule: Choose the type of rule you want to apply. Excel offers several options, including “Highlight Cells Rules,” “Top/Bottom Rules,” and “Data Bars.”
- Customize the Rule: Customize the rule to meet your specific needs. For example, you can specify the criteria for highlighting cells and the formatting to apply.
7.2. Adding Error Bars to Show Data Variability
Error bars are graphical representations of the variability of data. They can be useful for showing the range of possible values for each data point in your graph. Here’s how to add error bars:
- Select Your Chart: Click on the chart you want to add error bars to.
- Go to the Chart Design Tab: Click on the “Chart Design” tab in the Excel ribbon.
- Click Add Chart Element: In the “Add Chart Element” dropdown menu, select “Error Bars.”
- Choose an Error Bar Option: Excel offers several options, including standard error, percentage, and standard deviation.
- Customize Error Bars: Customize the error bars to meet your specific needs.
7.3. Incorporating Sparklines for Quick Data Overviews
Sparklines are small, word-sized charts that can be embedded in a cell in your Excel sheet. They can be useful for providing quick overviews of data trends. Here’s how to add sparklines:
- Select a Cell: Select the cell where you want to insert the sparkline.
- Go to the Insert Tab: Click on the “Insert” tab in the Excel ribbon.
- Choose Sparklines: In the “Sparklines” group, choose the type of sparkline you want to create. Excel offers three options: “Line,” “Column,” and “Win/Loss.”
- Select Your Data Range: Select the data range you want to include in the sparkline.
- Customize Sparklines: Customize the sparklines to meet your specific needs.
7.4. Using PivotTables to Summarize and Analyze Data
PivotTables are powerful tools for summarizing and analyzing data in Excel. They can be useful for creating comparative graphs based on aggregated data. Here’s how to use PivotTables:
- Select Your Data Range: Select the data range you want to include in the PivotTable.
- Go to the Insert Tab: Click on the “Insert” tab in the Excel ribbon.
- Choose PivotTable: In the “Tables” group, click on the “PivotTable” icon.
- Create PivotTable: Excel will create a blank PivotTable. Drag the fields from your data range to the “Rows,” “Columns,” and “Values” areas to summarize and analyze your data.
- Create a Graph: Once you have created your PivotTable, you can create a graph based on the aggregated data.
8. Best Practices for Creating Effective Comparative Graphs
Creating effective comparative graphs involves more than just knowing how to use Excel’s charting tools. It also requires an understanding of design principles and best practices for data visualization. This section outlines some key best practices for creating effective comparative graphs.
8.1. Keeping Your Graphs Simple and Clear
Simplicity and clarity are essential for effective data visualization. Avoid cluttering your graphs with unnecessary elements. Here are some tips for keeping your graphs simple and clear:
- Remove Unnecessary Elements: Remove any unnecessary elements from your graph, such as gridlines, legends, and data labels.
- Use Clear and Concise Labels: Use clear and concise labels for your chart title, axis titles, and category labels.
- Choose Appropriate Colors: Choose colors that are easy to distinguish and that do not distract from the data.
- Avoid 3D Effects: Avoid using 3D effects, as they can distort the data and make the graph more difficult to read.
- Use Consistent Formatting: Use consistent formatting throughout your graph, such as font size, font style, and color scheme.
8.2. Choosing the Right Chart Type for Your Data
Choosing the right chart type is crucial for effectively communicating your data. Consider the type of data you have and the message you want to convey when choosing a chart type. Here are some guidelines:
- Column Charts: Use column charts for comparing values across different categories.
- Bar Charts: Use bar charts for comparing values across different categories when the category labels are long.
- Line Charts: Use line charts for showing trends and changes over time.
- Scatter Plots: Use scatter plots for showing the relationship between two variables.
- Pie Charts: Use pie charts for showing how different categories contribute to a whole.
8.3. Using Colors and Labels Effectively
Colors and labels can significantly enhance the readability and effectiveness of your graphs. Here are some tips for using colors and labels effectively:
- Choose Contrasting Colors: Choose colors that are easy to distinguish from each other.
- Use Color to Highlight Key Data: Use color to highlight key data points or trends in your graph.
- Label All Axes and Categories: Label all axes and categories clearly and concisely.
- Use Data Labels Sparingly: Use data labels sparingly, as they can clutter the graph.
- Ensure Labels Are Readable: Ensure that all labels are readable, with an appropriate font size and font style.
8.4. Ensuring Your Graphs Are Accessible
Ensuring your graphs are accessible to all users, including those with disabilities, is an important consideration. Here are some tips for creating accessible graphs:
- Provide Alternative Text: Provide alternative text for all images and graphs, describing the data and message they convey.
- Use High Contrast Colors: Use high contrast colors to make the graph easier to see for people with visual impairments.
- Use Clear and Simple Language: Use clear and simple language in your chart titles, axis titles, and labels.
- Avoid Relying Solely on Color: Avoid relying solely on color to convey information, as some people may be colorblind.
- Test Your Graphs: Test your graphs with users with disabilities to ensure they are accessible.
9. Advanced Chart Types for Specialized Comparisons
While column, bar, line, and scatter charts are commonly used for comparative analysis, Excel also offers more advanced chart types that can be useful for specialized comparisons. This section explores some of these advanced chart types.
9.1. Area Charts for Cumulative Comparisons
Area charts are similar to line charts but with the area below the lines filled in. They are useful for highlighting the magnitude of changes over time and for comparing cumulative totals. Here’s how to create an area chart:
- Select Your Data Range: Select the data range you want to include in your graph, including the headers.
- Go to the Insert Tab: Click on the “Insert” tab in the Excel ribbon.
- Choose Area Chart: In the “Charts” group, click on the “Area” chart icon.
- Select Chart Type: Choose the type of area chart you want to create. Excel offers several options, including 2-D Area, 3-D Area, and Stacked Area.
- Chart Appears: Excel will automatically create the area chart based on the data you selected. The chart will appear on your Excel sheet.
9.2. Radar Charts for Multi-Variable Comparisons
Radar charts, also known as spider charts or web charts, are used to compare multiple variables across different categories. They are useful for identifying strengths and weaknesses in each category. Here’s how to create a radar chart:
- Select Your Data Range: Select the data range you want to include in your graph, including the headers.
- Go to the Insert Tab: Click on the “Insert” tab in the Excel ribbon.
- Choose Radar Chart: In the “Charts” group, click on the “Radar” chart icon.
- Select Chart Type: Choose the type of radar chart you want to create. Excel offers several options, including Radar, Radar with Markers, and Filled Radar.
- Chart Appears: Excel will automatically create the radar chart based on the data you selected. The chart will appear on your Excel sheet.
9.3. Combination Charts for Multi-Type Data Displays
Combination charts combine two or more chart types into a single graph. They are useful for displaying different types of data on the same chart. For example, you can combine a column chart with a line chart to show both values and trends. Here’s how to create a combination chart:
- Create a Chart: Create a chart based on one of the data series.
- Change Chart Type: Select one of the data series in the chart, go to the “Chart Design” tab, and click on “Change Chart Type.”
- Choose Combination Chart: In the “Change Chart Type” dialog box, choose “Combination.”
- Select Chart Types: Select the chart types for each data series.
- Chart Appears: Excel will automatically create the combination chart based on the data you selected. The chart will appear on your Excel sheet.
9.4. Waterfall Charts for Visualizing Cumulative Effects
Waterfall charts are used to show how an initial value is affected by a series of positive and negative values. They are useful for visualizing the cumulative effect of these values. Here’s how to create a waterfall chart:
- Prepare Your Data: Prepare your data with columns for categories, increases, decreases, and totals.
- Select Your Data Range: Select the data range you want to include in your graph, including the headers.
- Go to the Insert Tab: Click on the “Insert” tab in the Excel ribbon.
- Choose Waterfall Chart: In the “Charts” group, click on the “Waterfall” chart icon.
- Chart Appears: Excel will automatically create the waterfall chart based on the data you selected. The chart will appear on your Excel sheet.
10. Real-World Examples of Comparative Graphs
Comparative graphs are used in a wide range of industries and applications. This section provides some real-world examples of how comparative graphs can be used to analyze and present data.
10.1. Comparing Financial Performance
Comparative graphs are commonly used to compare financial performance across different periods, products, or companies. For example, a company might use a column chart to compare its sales revenue for different quarters or a line chart to compare its stock price over time.
- Sales Revenue Comparison: A column chart can compare sales revenue for different products.
- Expense Analysis: Bar charts can illustrate expenses across different departments.
- Profit Margin Comparison: Line charts can show profit margins over several years.