Comparing different versions of a PowerPoint presentation is crucial for collaboration and version control. This guide provides a step-by-step approach on How To Compare Two Powerpoint Files using built-in features, allowing you to efficiently merge changes and manage revisions.
Comparing PowerPoint Presentations in Review Mode
PowerPoint simplifies the process of comparing two presentations with its dedicated comparison feature. Here’s how to utilize it:
Prerequisites:
- Ensure one of the presentations you want to compare is open in PowerPoint.
Steps:
-
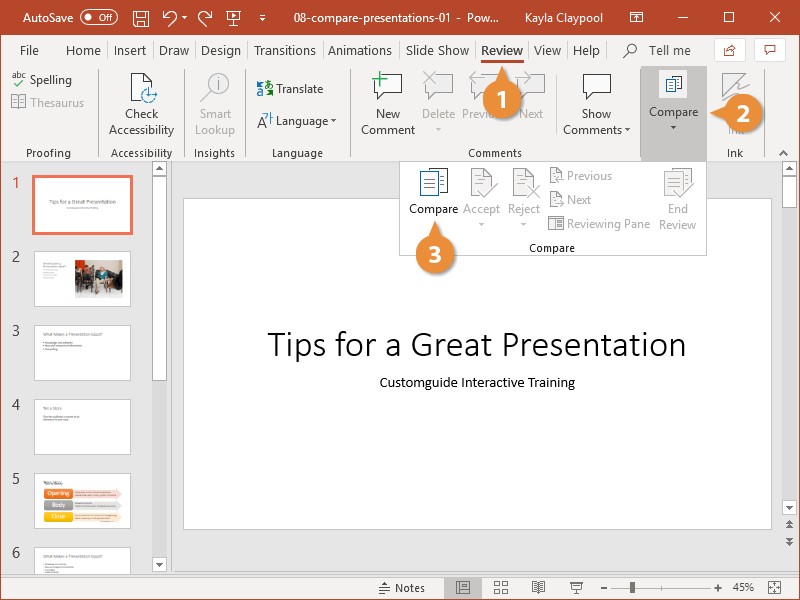
Access the Review Tab: Navigate to the “Review” tab in the PowerPoint ribbon.
-
Locate the Compare Group: Find the “Compare” group within the “Review” tab. You might need to expand the group if it’s collapsed.
-
Initiate Comparison: Click the “Compare” button. A file explorer window will open.
-
Select the Second Presentation: Browse your files and select the PowerPoint presentation you want to compare with the currently open one.
-
Merge the Presentations: Click the “Merge” button. PowerPoint will then merge the chosen presentation with the open one. The merged file will be displayed in Review mode, and the Revisions pane will appear on the right side of the screen, showcasing all modifications.
Understanding the Revisions Pane:
The Revisions pane provides detailed information about the changes between the two PowerPoint files. The “Details” tab within this pane is divided into two sections:
- Slide Changes: This section lists all modifications made to individual slides, such as added, deleted, or modified content.
- Presentation Changes: This section outlines broader changes impacting the entire presentation, like altered slide order or master slide modifications.
Accepting or Rejecting Revisions in PowerPoint
After comparing the two PowerPoint files, you can review the identified changes and decide which ones to incorporate into the final version.
Reviewing Changes:
-
Select a Change: In the “Details” tab of the Revisions pane, click on a specific change. A box will appear on the corresponding slide, highlighting the modifications in detail. To preview the slide with the changes applied, switch to the “Slides” tab in the Revisions pane.
-
Accept or Reject:
- Accept: Check the box next to the change you wish to keep.
- Reject: Leave the box unchecked to discard the change.
Use the “Previous” and “Next” buttons in the “Review” tab to navigate through all revisions.
Finalizing Changes:
-
End Review: In the “Compare” group, click “End Review.” A confirmation dialog will appear.
-
Confirm and Save: Click “Yes” to confirm you want to end the review and discard any rejected changes. Then, click “Save” to preserve the accepted changes in the open presentation.
This process allows you to seamlessly integrate changes from one PowerPoint file into another, ensuring a consistent and up-to-date presentation. By leveraging the compare and merge functionality, you can effectively collaborate on presentations and maintain version control.