Comparing two pivot tables in a single chart is essential for data analysis. At COMPARE.EDU.VN, we provide clear, actionable strategies on using pivot tables effectively and turning complex data into insightful visualizations and we can help you understand which data analysis techniques are best for you. This guide offers a detailed look at visualizing your data, understanding pivot table analysis, and leveraging key performance indicators.
1. Understanding the Basics of Pivot Tables
Pivot tables are powerful tools in spreadsheet software like Microsoft Excel and Google Sheets that allow you to summarize and analyze large datasets. They enable users to reorganize and aggregate data, making it easier to identify trends, patterns, and relationships. Pivot tables are particularly useful for creating summary reports, performing calculations, and exploring data from different perspectives. With pivot tables, you can quickly transform raw data into meaningful insights, facilitating better decision-making and strategic planning.
1.1. What is a Pivot Table?
A pivot table is an interactive data summarization tool used in programs like Excel, Google Sheets, and other spreadsheet applications. It allows you to extract, organize, and summarize information from a dataset to identify patterns and trends. The term “pivot” refers to the ability to rotate or rearrange the data fields to view the data from different angles or perspectives. With a pivot table, you can quickly perform calculations, comparisons, and aggregations without altering the original data source.
1.2. Key Components of a Pivot Table
To effectively use pivot tables, understanding its key components is crucial. These components work together to allow you to analyze and summarize your data effectively. The main components include:
- Data Source: The raw data that the pivot table uses for analysis. This can be a range of cells in a spreadsheet, an external database, or another data source.
- Rows: The categories or fields that are displayed along the rows of the pivot table.
- Columns: The categories or fields that are displayed across the columns of the pivot table.
- Values: The data that is summarized or calculated in the pivot table. This can include sums, averages, counts, percentages, and other calculations.
- Filters: The criteria used to narrow down the data displayed in the pivot table. Filters allow you to focus on specific subsets of the data.
1.3. Benefits of Using Pivot Tables for Data Analysis
Pivot tables offer several benefits that make them indispensable for data analysis:
- Data Summarization: Pivot tables can quickly summarize large datasets, making it easier to identify key trends and patterns.
- Flexibility: You can easily rearrange the layout of a pivot table to view the data from different perspectives.
- Calculations: Pivot tables allow you to perform calculations such as sums, averages, counts, and percentages without writing formulas.
- Interactive Analysis: You can use filters, slicers, and other interactive features to explore the data in real-time.
- Report Generation: Pivot tables can be used to generate summary reports that can be easily shared with others.
2. Preparing Your Data for Pivot Table Analysis
Before you can start comparing pivot tables in one chart, it’s essential to prepare your data correctly. Proper data preparation ensures that your pivot tables are accurate, reliable, and easy to analyze. This section covers the necessary steps for cleaning, structuring, and validating your data.
2.1. Cleaning Your Data
Data cleaning is a critical step in the data analysis process. It involves identifying and correcting errors, inconsistencies, and inaccuracies in your dataset. Here are some common data cleaning tasks:
- Removing Duplicates: Duplicate records can skew your analysis and lead to incorrect conclusions. Use Excel’s “Remove Duplicates” feature to eliminate duplicate rows.
- Handling Missing Values: Missing values can cause problems when performing calculations or comparisons. Decide how to handle missing values, such as filling them with zeros, averages, or other appropriate values.
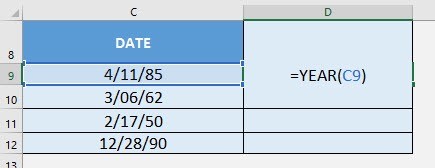
- Correcting Inconsistent Formatting: Ensure that data is formatted consistently across your dataset. For example, dates should be in the same format (e.g., MM/DD/YYYY), and numbers should have the same decimal precision.
- Removing Irrelevant Data: Remove any data that is not relevant to your analysis. This can include columns or rows that do not contribute to your insights.
2.2. Structuring Your Data for Pivot Tables
Properly structuring your data is essential for creating effective pivot tables. The ideal data structure for pivot tables is a tabular format with clear column headers and consistent data types. Here are some guidelines for structuring your data:
- Use Column Headers: Each column should have a descriptive header that explains the type of data in that column.
- Avoid Empty Rows or Columns: Empty rows or columns can cause problems when creating pivot tables. Ensure that your data is continuous and does not contain any gaps.
- Use Consistent Data Types: Ensure that each column contains data of the same type. For example, a column containing dates should not contain text or numbers.
- Normalize Your Data: Normalize your data to reduce redundancy and improve data integrity. This involves breaking down complex tables into smaller, more manageable tables with relationships between them.
2.3. Validating Your Data
Data validation involves checking your data to ensure that it meets certain criteria or constraints. This helps to prevent errors and ensures that your analysis is based on accurate information. Here are some common data validation techniques:
- Data Type Validation: Ensure that each column contains the correct data type. For example, a column containing numbers should not contain text.
- Range Validation: Ensure that data values fall within a specified range. For example, sales figures should not be negative.
- List Validation: Ensure that data values are selected from a predefined list of options. For example, product categories should be selected from a list of valid categories.
- Formula Validation: Use formulas to check for inconsistencies or errors in your data. For example, check that totals match the sum of their components.
3. Creating Two Pivot Tables
Once your data is prepared, the next step is to create two pivot tables that you want to compare. Each pivot table should summarize your data in a way that allows you to identify meaningful trends and patterns. This section provides step-by-step instructions for creating pivot tables in Excel and Google Sheets.
3.1. Creating the First Pivot Table
To create the first pivot table in Excel, follow these steps:
- Select Your Data: Select the range of cells that contains your data, including the column headers.
- Insert Pivot Table: Go to the “Insert” tab on the ribbon and click “PivotTable.”
- Choose Data Source and Location: In the “Create PivotTable” dialog box, confirm the data range and choose where you want to place the pivot table (e.g., a new worksheet or an existing worksheet).
- Design Your Pivot Table: In the PivotTable Fields pane, drag and drop the fields you want to use as rows, columns, values, and filters.
- Customize Your Pivot Table: Adjust the layout, formatting, and calculations of your pivot table as needed.
3.2. Creating the Second Pivot Table
To create the second pivot table, repeat the same steps, but choose different fields or calculations to summarize your data in a different way. For example, you might create one pivot table that shows sales by product category and another that shows sales by region.
3.3. Configuring Each Pivot Table for Comparison
To configure each pivot table for comparison, ensure that they are both using the same data source and have similar structures. This will make it easier to combine them into a single chart. Here are some tips for configuring your pivot tables:
- Use the Same Data Source: Both pivot tables should be based on the same data source to ensure that they are comparable.
- Use Similar Structures: Use similar row and column fields in both pivot tables to make it easier to compare the data.
- Use Consistent Calculations: Use consistent calculations in both pivot tables to ensure that the data is comparable.
- Apply the Same Filters: Apply the same filters to both pivot tables to ensure that you are comparing the same subsets of data.
4. Combining Pivot Tables into a Single Chart
After creating and configuring your pivot tables, the next step is to combine them into a single chart for easy comparison. This section provides step-by-step instructions for creating a combined chart in Excel.
4.1. Creating a Pivot Chart
To create a pivot chart from your pivot tables, follow these steps:
- Select a Pivot Table: Select any cell within one of your pivot tables.
- Insert PivotChart: Go to the “Insert” tab on the ribbon and click “PivotChart.”
- Choose Chart Type: In the “Insert Chart” dialog box, choose the chart type that you want to use (e.g., column chart, line chart, bar chart).
- Design Your PivotChart: In the PivotChart Fields pane, drag and drop the fields you want to use as axes, series, and filters.
4.2. Adding Data from the Second Pivot Table
To add data from the second pivot table to the same chart, follow these steps:
- Select the Chart: Select the pivot chart that you created.
- Select Data: Go to the “Chart Design” tab on the ribbon and click “Select Data.”
- Add Series: In the “Select Data Source” dialog box, click “Add” to add a new series.
- Specify Series Values: In the “Edit Series” dialog box, specify the series name and values from the second pivot table.
- Repeat: Repeat steps 3 and 4 for each additional series that you want to add to the chart.
4.3. Customizing the Chart for Clear Comparison
To customize the chart for clear comparison, adjust the chart type, axis labels, legends, and other formatting options. Here are some tips for customizing your chart:
- Choose an Appropriate Chart Type: Choose a chart type that is appropriate for your data and analysis goals. For example, a column chart is good for comparing discrete values, while a line chart is good for showing trends over time.
- Use Clear Axis Labels: Use clear and descriptive axis labels to explain the meaning of the data.
- Add a Legend: Add a legend to identify the different series in the chart.
- Use Consistent Formatting: Use consistent formatting for all elements of the chart, such as fonts, colors, and gridlines.
- Add Data Labels: Add data labels to show the exact values of each data point.
 DAY Formula in Excel
5. Advanced Charting Techniques for Pivot Tables
Beyond basic chart creation, there are several advanced charting techniques that can enhance your ability to compare pivot tables effectively. These techniques include using combo charts, secondary axes, and dynamic chart titles.
5.1. Using Combo Charts
Combo charts combine two or more chart types into a single chart. This can be useful for comparing different types of data or highlighting relationships between different variables. For example, you might use a combo chart to compare sales revenue (using a column chart) with profit margin (using a line chart).
To create a combo chart, follow these steps:
- Create a Chart: Create a basic chart from your pivot tables.
- Change Chart Type: Select the chart and go to the “Chart Design” tab on the ribbon. Click “Change Chart Type.”
- Choose Combo Chart: In the “Change Chart Type” dialog box, choose “Combo” from the list of chart types.
- Customize Series: Customize the chart type for each series in the chart. For example, you might choose “Clustered Column” for one series and “Line” for another series.
- Adjust Axes: Adjust the axes to ensure that the data is displayed clearly and accurately.
5.2. Utilizing Secondary Axes
Secondary axes allow you to display data with different scales on the same chart. This can be useful for comparing data that has vastly different ranges of values. For example, you might use a secondary axis to compare sales revenue (in millions of dollars) with customer satisfaction (on a scale of 1 to 10).
To use a secondary axis, follow these steps:
- Create a Chart: Create a basic chart from your pivot tables.
- Select Series: Select the series that you want to display on the secondary axis.
- Format Series: Right-click on the series and choose “Format Data Series.”
- Series Options: In the “Format Data Series” pane, select “Secondary Axis” under “Series Options.”
- Adjust Axes: Adjust the axes to ensure that the data is displayed clearly and accurately.
5.3. Implementing Dynamic Chart Titles
Dynamic chart titles automatically update based on the data displayed in the chart. This can be useful for creating interactive dashboards or reports that allow users to drill down into specific subsets of the data.
To implement dynamic chart titles, follow these steps:
- Create a Chart: Create a basic chart from your pivot tables.
- Insert a Text Box: Go to the “Insert” tab on the ribbon and click “Text Box.”
- Link Text Box to Cell: Select the text box and enter
=A1in the formula bar, where A1 is the cell that contains the dynamic title. - Create Dynamic Title: In cell A1, use a formula to create a dynamic title that updates based on the data displayed in the chart. For example, you might use a formula like
="Sales by " & B1, where B1 contains the selected product category.
6. Analyzing and Interpreting Combined Pivot Table Charts
Creating a combined pivot table chart is only the first step. The real value comes from analyzing and interpreting the data to gain meaningful insights. This section provides tips for identifying trends, comparing performance, and making informed decisions based on your analysis.
6.1. Identifying Trends and Patterns
One of the primary goals of data analysis is to identify trends and patterns that can inform strategic decisions. Here are some tips for identifying trends in your combined pivot table charts:
- Look for Consistent Movements: Look for consistent upward or downward movements in the data over time. This can indicate a growing or declining trend.
- Identify Seasonal Patterns: Look for patterns that repeat at regular intervals, such as seasonal sales fluctuations.
- Analyze Correlations: Analyze correlations between different variables to identify relationships between them. For example, you might find that sales increase when you launch a new marketing campaign.
6.2. Comparing Performance Across Different Categories
Combined pivot table charts are particularly useful for comparing performance across different categories, such as product lines, regions, or time periods. Here are some tips for comparing performance:
- Use Benchmarks: Use benchmarks to compare performance against industry standards or internal targets.
- Calculate Variance: Calculate the variance between actual and expected performance to identify areas that need improvement.
- Analyze Ratios: Analyze ratios, such as sales per customer or profit margin, to compare performance across different categories.
6.3. Making Data-Driven Decisions
The ultimate goal of data analysis is to make informed decisions that improve business outcomes. Here are some tips for making data-driven decisions based on your combined pivot table charts:
- Identify Opportunities: Identify opportunities to improve performance based on your analysis. For example, you might identify a new product category that is growing rapidly.
- Address Challenges: Address challenges that are identified in your analysis. For example, you might need to improve customer service in a region where satisfaction is low.
- Prioritize Initiatives: Prioritize initiatives based on their potential impact and feasibility. Focus on the initiatives that are most likely to improve business outcomes.
7. Real-World Examples of Comparing Pivot Tables in Charts
To illustrate the power of comparing pivot tables in charts, let’s look at some real-world examples from different industries.
7.1. Sales Performance Analysis
In the retail industry, comparing pivot tables in charts can be used to analyze sales performance across different product categories, regions, and time periods. For example, a sales manager might create a combined chart that shows sales revenue and profit margin for each product category over the past year. This would allow them to identify which product categories are performing well and which need improvement.
7.2. Marketing Campaign Effectiveness
In the marketing industry, comparing pivot tables in charts can be used to analyze the effectiveness of different marketing campaigns. For example, a marketing manager might create a combined chart that shows the number of leads generated and the conversion rate for each marketing campaign. This would allow them to identify which campaigns are most effective and optimize their marketing budget accordingly.
7.3. Financial Performance Monitoring
In the finance industry, comparing pivot tables in charts can be used to monitor financial performance across different business units, investment portfolios, and time periods. For example, a financial analyst might create a combined chart that shows revenue, expenses, and profit for each business unit over the past quarter. This would allow them to identify which business units are performing well and which need attention.
8. Troubleshooting Common Issues
While pivot tables and charts are powerful tools, they can sometimes be challenging to use. This section provides solutions to some common issues that you may encounter when comparing pivot tables in charts.
8.1. Data Not Displaying Correctly
If your data is not displaying correctly in your pivot table chart, there are several things you can check:
- Data Source: Ensure that your data source is correct and that it contains the data you want to analyze.
- Pivot Table Layout: Ensure that your pivot table layout is correct and that you have placed the fields in the correct rows, columns, and values areas.
- Filters: Ensure that your filters are not excluding the data you want to display.
- Calculations: Ensure that your calculations are correct and that you are using the appropriate formulas.
8.2. Chart Formatting Problems
If you are having problems formatting your chart, there are several things you can try:
- Chart Type: Try changing the chart type to see if that resolves the issue.
- Axis Labels: Ensure that your axis labels are clear and descriptive.
- Legends: Ensure that your legends are accurate and easy to understand.
- Data Labels: Try adding or removing data labels to see if that improves the clarity of the chart.
8.3. Performance Issues with Large Datasets
If you are working with a large dataset and experiencing performance issues, there are several things you can do to improve performance:
- Use a Sample Dataset: Try working with a smaller sample of your data to see if that improves performance.
- Optimize Your Data Source: Optimize your data source by removing unnecessary columns and rows.
- Use Calculated Fields Sparingly: Use calculated fields sparingly, as they can slow down performance.
- Upgrade Your Hardware: Consider upgrading your hardware to improve performance.
9. Best Practices for Effective Pivot Table Chart Comparisons
To get the most out of comparing pivot tables in charts, follow these best practices:
9.1. Keep it Simple
Avoid overcomplicating your pivot tables and charts. Focus on the key metrics and insights that are most important to your analysis.
9.2. Use Clear and Descriptive Labels
Use clear and descriptive labels for your axes, legends, and data labels. This will make it easier for others to understand your charts.
9.3. Choose the Right Chart Type
Choose a chart type that is appropriate for your data and analysis goals. Different chart types are better suited for different types of data.
9.4. Use Consistent Formatting
Use consistent formatting for all elements of your charts, such as fonts, colors, and gridlines. This will make your charts more visually appealing and easier to understand.
9.5. Tell a Story
Use your charts to tell a story about your data. Highlight the key trends, patterns, and insights that you have identified.
10. Conclusion: Enhancing Data Insights with Pivot Table Comparisons
Comparing two pivot tables in one chart is a powerful technique for data analysis that can help you gain deeper insights into your data. By following the steps and best practices outlined in this guide, you can effectively visualize your data, identify trends, and make informed decisions.
Remember, COMPARE.EDU.VN is here to help you master these techniques and more. Visit our website at COMPARE.EDU.VN or contact us at +1 (626) 555-9090 to explore how we can assist you in making better data-driven decisions. Our offices are located at 333 Comparison Plaza, Choice City, CA 90210, United States. Let us help you transform your data into actionable insights today.
10.1. The Power of Visualized Data
Visualizing data through pivot tables and charts transforms raw numbers into understandable information. It allows stakeholders to quickly grasp trends, patterns, and comparisons that would otherwise be buried in spreadsheets.
10.2. Why COMPARE.EDU.VN is Your Go-To Resource
At COMPARE.EDU.VN, we understand the challenges of data analysis. That’s why we provide comprehensive guides, resources, and tools to help you make the most of your data. Our goal is to empower you with the knowledge and skills you need to make data-driven decisions.
10.3. Call to Action
Ready to take your data analysis skills to the next level? Visit COMPARE.EDU.VN today to explore our resources and tools for comparing pivot tables in charts. Contact us at +1 (626) 555-9090 to learn more about how we can help you make better data-driven decisions. Our offices are located at 333 Comparison Plaza, Choice City, CA 90210, United States. Start transforming your data into actionable insights today!
Frequently Asked Questions (FAQ)
How do I update the data in my pivot table?
To update the data in your pivot table, right-click on any cell within the pivot table and select “Refresh.” This will update the pivot table with the latest data from the data source.
Can I create a pivot table from multiple data sources?
Yes, you can create a pivot table from multiple data sources by using the “Power Pivot” add-in in Excel. This allows you to create relationships between different data sources and combine them into a single pivot table.
How do I change the calculation in my pivot table?
To change the calculation in your pivot table, right-click on the field in the values area and select “Value Field Settings.” In the “Value Field Settings” dialog box, you can choose a different calculation, such as sum, average, count, or percentage.
Can I filter data in my pivot table?
Yes, you can filter data in your pivot table by using the filter fields. Drag and drop the field you want to use as a filter into the filter area of the pivot table layout. Then, you can select the values you want to include in the filter.
How do I group data in my pivot table?
To group data in your pivot table, right-click on the field you want to group and select “Group.” In the “Grouping” dialog box, you can specify the grouping criteria, such as grouping by month, quarter, or year.
What chart types are best for comparing pivot tables?
Column charts and line charts are generally the best chart types for comparing pivot tables. Column charts are good for comparing discrete values, while line charts are good for showing trends over time.
How do I add a trendline to my pivot chart?
To add a trendline to your pivot chart, right-click on the data series and select “Add Trendline.” In the “Format Trendline” pane, you can choose the type of trendline you want to add, such as linear, exponential, or logarithmic.
Can I use slicers to filter my pivot chart?
Yes, you can use slicers to filter your pivot chart. Select the pivot table that is associated with the chart and go to the “Insert” tab on the ribbon. Click “Slicer” and choose the fields you want to use as slicers.
How do I create a calculated field in my pivot table?
To create a calculated field in your pivot table, go to the “Analyze” tab on the ribbon and click “Fields, Items, & Sets.” Select “Calculated Field” and enter the formula for the calculated field in the “Insert Calculated Field” dialog box.
Where can I find more resources on pivot tables and charts?
You can find more resources on pivot tables and charts at compare.edu.vn. We offer comprehensive guides, tutorials, and tools to help you master these powerful data analysis techniques.