IntelliJ IDEA is renowned for its robust coding assistance, intelligent code completion, and comprehensive inspections. However, its capabilities extend far beyond code editing. This guide delves into the diverse file comparison features within IntelliJ IDEA, streamlining your workflow and enhancing code analysis.
Comparing Files Within Your Project
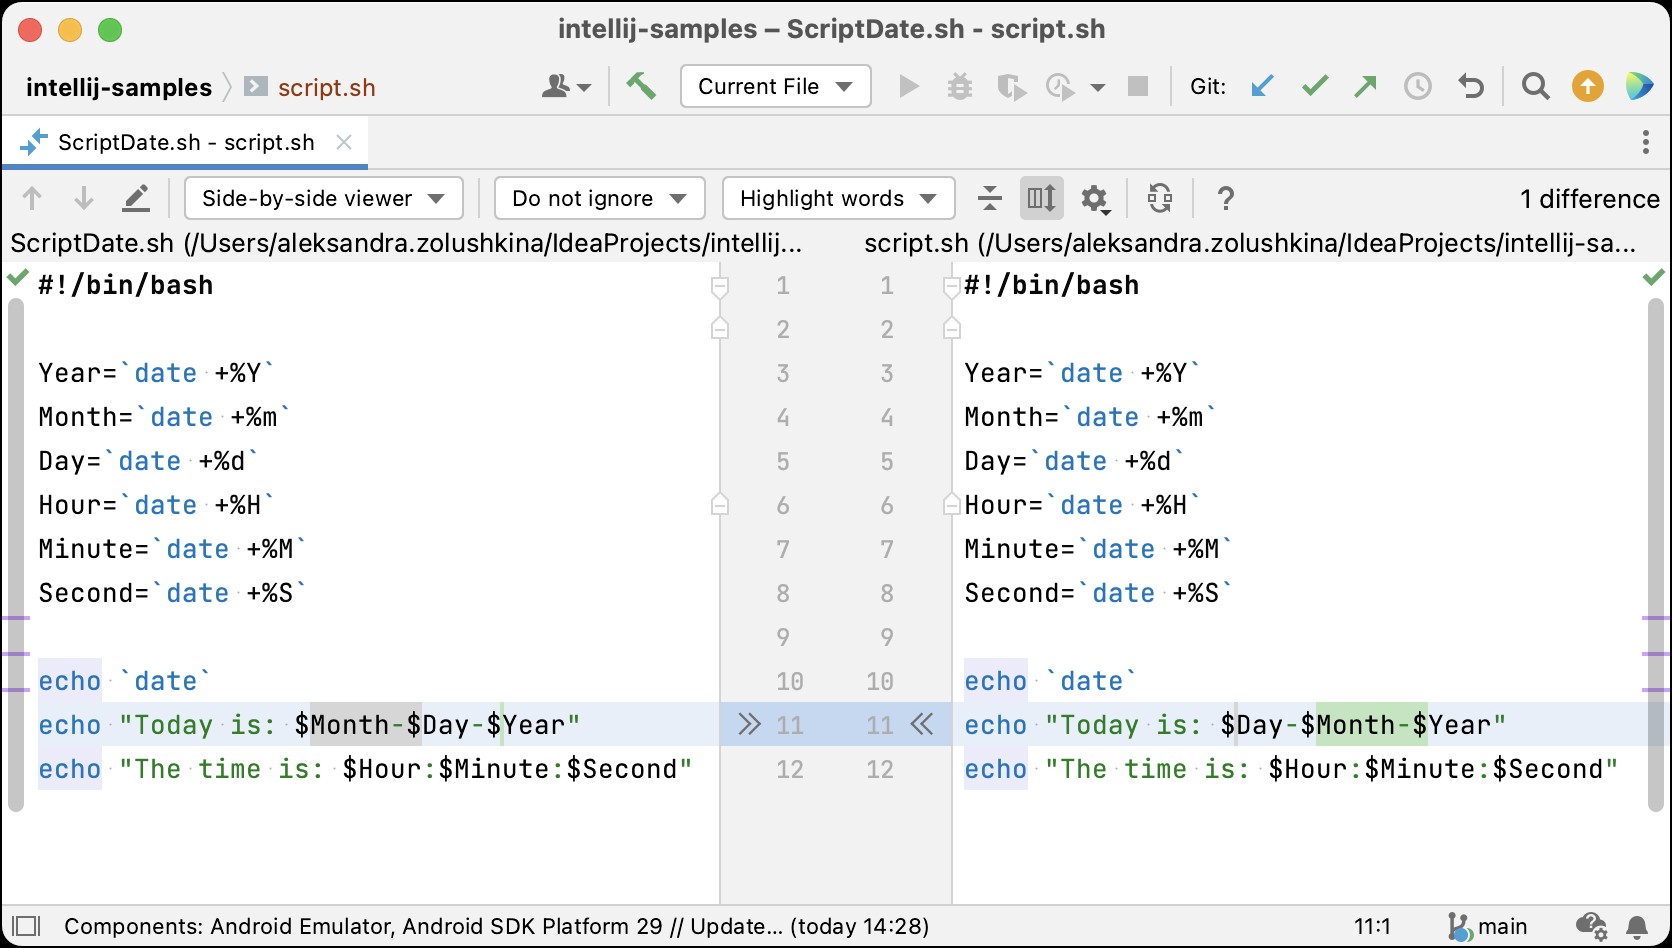
Comparing files within the same project is straightforward. Open the Project tool window (Alt+1 on Windows/Linux, ⌘1 on macOS) or navigate to View | Tool Windows | Project. Select the desired files and press Ctrl+D (Windows/Linux) or ⌘D (macOS). IntelliJ IDEA supports comparing up to three files simultaneously.
The integrated diff viewer will then display, highlighting discrepancies between the selected files and enabling seamless navigation between them. This functionality extends to folder comparisons as well.
Comparing Project and External Files
IntelliJ IDEA facilitates comparisons between project files and those residing outside your project directory. Select the project file within the Project tool window, press Ctrl+D (Windows/Linux) or ⌘D (macOS), and then choose the external file for comparison in the subsequent dialog. The diff viewer will showcase the differences.
Comparing Editor Content with Clipboard
Comparing code snippets in your clipboard against a project file eliminates the need for creating temporary files. Open the target file, right-click within the editor, and select Compare with Clipboard. A new diff viewer tab will present the variations.
Comparing Revisions Using Local History
IntelliJ IDEA’s local history automatically tracks project modifications, providing a built-in version control system. To access this, right-click a file in the Project tool window, choose Local History | Show History. The diff viewer will exhibit changes between revisions, allowing you to revert to previous states using the gutter icons.
Comparing Files Across Branches (Version Control)
For projects under version control, comparing a file with its counterpart in a different branch is invaluable. In the Project tool window, right-click the file and select Git (or your VCS) | Compare with Branch. Choose the target branch, and the diff viewer will highlight differences, enabling you to merge changes using the gutter icons.
Comparing Modified Lines within the Editor (Git)
Utilizing Git blame annotations, quickly identify modifications and their authors. Right-click in the gutter and select Annotate with Git Blame. Hovering over an annotation reveals the changes directly within the editor.
IntelliJ IDEA also offers a blank diff window for comparing arbitrary text. Use the Find Action feature (Ctrl+Shift+A or ⇧⌘A) and type “Open Blank Diff Window”. Paste the text versions into the respective panes for comparison.
Conclusion
IntelliJ IDEA’s versatile comparison tools significantly enhance code understanding, debugging, and collaboration. From simple file comparisons to analyzing revisions and branch differences, these features empower developers with comprehensive insights into their codebase. Leveraging these capabilities streamlines workflows and facilitates efficient code management.