Comparing before and after in Lightroom is crucial for refining your photo editing workflow. COMPARE.EDU.VN offers comprehensive guides to master this technique, ensuring you achieve the desired aesthetic. Discover the power of visual assessment, edit evaluation, and workflow optimization.
1. Understanding the Importance of Before and After Comparisons
The “before and after” comparison is an indispensable tool in Lightroom, serving as a critical checkpoint throughout your editing process. It allows you to objectively assess the impact of your adjustments, ensuring that your creative vision aligns with the final result. This process helps to identify areas where edits may be excessive or insufficient, leading to more balanced and refined images.
1.1. Identifying Over-Editing and Under-Editing
One of the primary benefits of comparing before and after is the ability to spot over-editing or under-editing. It’s easy to get lost in the details and make adjustments that, in isolation, seem beneficial but, in the context of the entire image, are detrimental.
- Over-Editing: This occurs when you push adjustments too far, resulting in an image that looks artificial or unnatural. Signs of over-editing include:
- Excessive Contrast: Highlights are blown out, and shadows are crushed, leading to a loss of detail.
- Unnatural Colors: Colors appear overly saturated or have an unnatural hue.
- Harsh Sharpening: The image looks gritty and pixelated.
- Overly Smooth Skin: Skin appears plastic and lacks texture.
- Under-Editing: Conversely, under-editing leaves the image lacking in impact or failing to meet your creative vision. Signs of under-editing include:
- Flat Colors: Colors appear dull and lack vibrancy.
- Poor Contrast: The image lacks depth and dimension.
- Lack of Detail: The image appears soft and lacks sharpness.
By comparing before and after, you can quickly identify these issues and make necessary corrections to achieve a more balanced and visually appealing image.
1.2. Assessing the Impact of Individual Adjustments
Lightroom allows you to make a wide range of adjustments, from basic exposure and contrast to more advanced color grading and detail enhancements. Comparing before and after each adjustment helps you understand its specific impact on the image.
- Exposure Adjustments: Evaluate how increasing or decreasing exposure affects the overall brightness and mood of the image.
- Color Adjustments: Assess how changes to white balance, saturation, and vibrance impact the colors in the image.
- Detail Adjustments: Determine if sharpening and noise reduction are enhancing detail without introducing artifacts.
- Transformations: Evaluate if perspective corrections and cropping are improving the composition and visual appeal of the image.
Regularly comparing before and after each adjustment ensures that you are making deliberate and informed decisions, leading to a more refined final product.
1.3. Fine-Tuning Your Editing Workflow
Using the before and after comparison tool can significantly improve your editing workflow by helping you identify which adjustments have the most significant impact on your images. This knowledge allows you to prioritize your editing efforts and develop a more efficient and effective process.
- Identifying Key Adjustments: Determine which adjustments consistently improve your images and focus on mastering those techniques.
- Streamlining Your Process: Eliminate unnecessary steps and focus on the adjustments that deliver the most significant results.
- Developing a Consistent Style: Refine your editing style by consistently evaluating the impact of your adjustments and making subtle refinements over time.
By integrating before and after comparisons into your workflow, you can develop a more efficient and effective editing process that consistently delivers high-quality results.
2. Lightroom’s Built-In Comparison Tools
Lightroom offers several convenient methods for comparing before and after, each catering to different preferences and workflows. Mastering these tools allows you to quickly and easily assess your edits and make informed decisions.
2.1. The Backslash Key ( )
The backslash key ( ) is the quickest and simplest way to toggle between the original and edited versions of your image. This method provides an instant before-and-after view, allowing you to quickly assess the overall impact of your adjustments.
- How to Use: Simply press the backslash key while in the Develop module to switch between the original and edited versions of your image. Press it again to return to the edited version.
- Advantages:
- Speed: This is the fastest way to compare before and after.
- Simplicity: It requires only a single keystroke.
- Accessibility: It’s available in both Lightroom Classic and Lightroom CC.
- Disadvantages:
- Limited View: It only provides a full-screen view of either the original or edited version, making it difficult to compare specific areas of the image.
- No Side-by-Side Comparison: It doesn’t allow for a direct side-by-side comparison of the two versions.
Despite its limitations, the backslash key is a valuable tool for quickly assessing the overall impact of your edits and identifying areas that may require further attention.
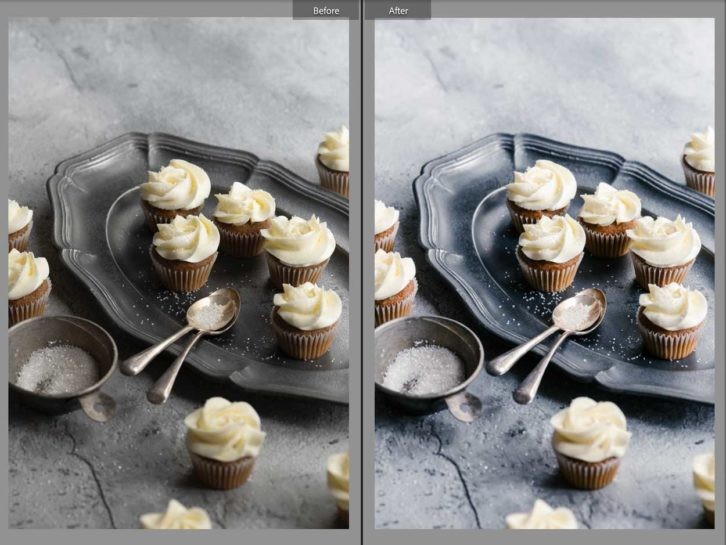
2.2. The “YY” Button (Side-by-Side Comparison)
The “YY” button, located in the Develop module, offers a more comprehensive way to compare before and after. This method allows you to view the original and edited versions of your image side-by-side, making it easier to compare specific areas and details.
- How to Use:
- Go to the Develop module in Lightroom Classic.
- Click the “YY” button located below the image.
- Cycle through different comparison views by clicking the “YY” button repeatedly.
- To exit the comparison mode, click the Loupe View button (or press “D”).
- Comparison Views:
- Side-by-Side (Left/Right): Displays the original image on the left and the edited version on the right.
- Side-by-Side (Top/Bottom): Displays the original image on the top and the edited version on the bottom.
- Split Screen (Left/Right): Displays a split view with the original image on the left and the edited version on the right, separated by a vertical line.
- Split Screen (Top/Bottom): Displays a split view with the original image on the top and the edited version on the bottom, separated by a horizontal line.
- Advantages:
- Detailed Comparison: Allows for a detailed comparison of specific areas and details.
- Multiple Views: Offers different comparison views to suit various needs and preferences.
- Visual Assessment: Facilitates a more visual assessment of the impact of your edits.
- Disadvantages:
- More Steps: Requires more steps than the backslash key method.
- Smaller Image Size: Reduces the size of the image to accommodate the side-by-side view.
The “YY” button is a powerful tool for making detailed comparisons and fine-tuning your edits.
2.3. Keyboard Shortcuts for Comparison Modes (Lightroom Classic)
Lightroom Classic offers several keyboard shortcuts for quickly toggling between different comparison modes. These shortcuts can significantly speed up your workflow and make it easier to assess your edits.
- Comparison Modes:
- Y: Toggles between Left/Right Comparison views.
- Alt + Y (Windows) / Option + Y (Mac): Toggles between Top/Bottom Comparison views.
- Shift + Y: Toggles between full-image comparison and split-screen comparison within the chosen Left/Right or Top/Bottom mode.
- Advantages:
- Speed: Provides quick access to different comparison modes.
- Efficiency: Streamlines your workflow by eliminating the need to click buttons.
- Customization: Allows you to customize your comparison experience based on your preferences.
- Disadvantages:
- Limited to Lightroom Classic: These shortcuts are not available in Lightroom CC.
- Requires Memorization: Requires memorizing the keyboard shortcuts.
By mastering these keyboard shortcuts, you can significantly enhance your editing workflow and make more informed decisions about your adjustments.
3. Optimizing Your Workflow with Before and After Comparisons
Integrating before and after comparisons into your editing workflow is crucial for achieving consistent and high-quality results. By strategically using these tools, you can refine your editing process and develop a more efficient and effective approach.
3.1. Establishing a Baseline
Before you begin editing, it’s essential to establish a baseline for your image. This involves identifying the key aspects of the image that you want to enhance or correct.
- Evaluate the Original Image: Take a moment to assess the original image and identify its strengths and weaknesses.
- Set Your Goals: Determine what you want to achieve with your edits. Do you want to improve the exposure, enhance the colors, or correct any imperfections?
- Create a Mental Roadmap: Develop a mental roadmap of the adjustments you plan to make and the order in which you will make them.
Establishing a baseline helps you stay focused and avoid making unnecessary adjustments that can detract from the overall quality of the image.
3.2. Comparing After Each Adjustment
After making each adjustment, take a moment to compare the edited version to the original. This allows you to assess the impact of the adjustment and determine if it is achieving your desired results.
- Use the Backslash Key: Quickly toggle between the original and edited versions to assess the overall impact of the adjustment.
- Use the “YY” Button: Use the side-by-side comparison tool to compare specific areas and details.
- Ask Yourself Questions: Ask yourself questions such as:
- Is the adjustment improving the image?
- Is the adjustment too strong or too subtle?
- Is the adjustment introducing any unwanted artifacts?
By comparing after each adjustment, you can ensure that you are making deliberate and informed decisions that contribute to the overall quality of the image.
3.3. Taking Breaks and Re-Evaluating
It’s easy to get lost in the details when editing, which can lead to over-editing or making adjustments that you later regret. Taking breaks and re-evaluating your work with fresh eyes can help you avoid these pitfalls.
- Step Away from Your Computer: Take a break from editing and do something else for a few minutes.
- Return with Fresh Eyes: When you return, take a moment to re-evaluate your work and assess the overall impact of your edits.
- Use the Before and After Tools: Use the before and after tools to compare the original and edited versions of your image and identify any areas that may need further attention.
Taking breaks and re-evaluating your work can help you maintain objectivity and avoid making mistakes that can detract from the quality of the image.
4. Advanced Techniques for Before and After Comparisons
Beyond the basic methods, there are advanced techniques that can further enhance your ability to compare before and after in Lightroom. These techniques offer more precise control and detailed analysis of your edits.
4.1. Using Snapshots
Snapshots allow you to save specific versions of your image at different stages of the editing process. This enables you to easily compare multiple versions of your image and track the evolution of your edits.
- How to Create a Snapshot:
- In the Develop module, go to the History panel.
- Click the “+” button at the top of the panel.
- Give your snapshot a descriptive name.
- Click “Create.”
- How to Compare Snapshots:
- In the Develop module, go to the History panel.
- Click on the snapshots you want to compare.
- Use the before and after tools to compare the selected snapshots.
- Advantages:
- Multiple Versions: Allows you to save and compare multiple versions of your image.
- Detailed Tracking: Enables you to track the evolution of your edits over time.
- Experimentation: Provides a safe way to experiment with different editing techniques without losing your original work.
Snapshots are a valuable tool for managing complex editing projects and experimenting with different creative approaches.
4.2. Utilizing the History Panel
The History panel in Lightroom records every adjustment you make to your image. This allows you to easily undo specific adjustments or revert to a previous state.
- How to Use the History Panel:
- In the Develop module, go to the History panel.
- Click on any step in the history to revert to that state.
- Use the before and after tools to compare the current state to the selected history step.
- Advantages:
- Precise Control: Allows you to undo specific adjustments and revert to a previous state.
- Detailed Analysis: Enables you to analyze the impact of individual adjustments on the image.
- Flexibility: Provides a flexible way to experiment with different editing techniques and undo any unwanted changes.
The History panel is an essential tool for making precise adjustments and fine-tuning your edits.
4.3. Creating Virtual Copies
Virtual copies allow you to create multiple versions of your image without duplicating the original file. This is useful for experimenting with different editing styles or creating variations of the same image.
- How to Create a Virtual Copy:
- In the Library module, select the image you want to copy.
- Go to Photo > Create Virtual Copy.
- Edit the virtual copy as desired.
- How to Compare Virtual Copies:
- In the Library module, select the original image and the virtual copy.
- Press “N” to enter Survey mode.
- Compare the two versions side-by-side.
- Advantages:
- Non-Destructive Editing: Allows you to experiment with different editing styles without affecting the original image.
- Multiple Variations: Enables you to create multiple variations of the same image for different purposes.
- Efficient Workflow: Streamlines your workflow by allowing you to work on multiple versions of the same image simultaneously.
Virtual copies are a valuable tool for exploring different creative approaches and creating variations of your images.
5. Common Mistakes to Avoid When Comparing Before and After
While comparing before and after is a crucial step in the editing process, it’s important to avoid common mistakes that can lead to inaccurate assessments and suboptimal results.
5.1. Not Calibrating Your Monitor
An uncalibrated monitor can display colors and brightness levels inaccurately, making it difficult to make accurate assessments of your edits.
- Invest in a Calibration Tool: Purchase a monitor calibration tool to ensure that your monitor is displaying colors and brightness levels accurately.
- Calibrate Regularly: Calibrate your monitor regularly to maintain its accuracy over time.
- Use a Standard Color Space: Use a standard color space such as sRGB or Adobe RGB to ensure that your colors are consistent across different devices.
Calibrating your monitor is essential for making accurate assessments of your edits and achieving consistent results.
5.2. Editing in a Distracting Environment
A distracting environment can make it difficult to focus on the details of your image and make accurate assessments of your edits.
- Find a Quiet Space: Find a quiet space where you can focus on your editing without distractions.
- Minimize Distractions: Minimize distractions such as phone calls, emails, and social media notifications.
- Take Breaks: Take breaks to avoid fatigue and maintain your focus.
Creating a distraction-free environment is essential for making accurate assessments of your edits and achieving optimal results.
5.3. Relying Solely on Visual Assessment
While visual assessment is an important part of the editing process, it’s important to supplement it with other tools and techniques.
- Use Histograms: Use histograms to analyze the tonal range of your image and identify areas that may be overexposed or underexposed.
- Use Color Samplers: Use color samplers to measure the color values of specific areas of your image and ensure that they are accurate.
- Get Feedback: Get feedback from other photographers or editors to get a fresh perspective on your work.
Relying solely on visual assessment can lead to subjective and inaccurate assessments of your edits.
6. Real-World Examples of Before and After Comparisons
To illustrate the power of before and after comparisons, let’s examine some real-world examples of how this technique can be used to improve your images.
6.1. Landscape Photography
In landscape photography, before and after comparisons can help you enhance the colors, contrast, and details of your images.
- Original Image: A landscape image with dull colors, low contrast, and soft details.
- Edits:
- Increased the exposure to brighten the image.
- Increased the contrast to add depth and dimension.
- Increased the saturation to enhance the colors.
- Sharpened the image to enhance the details.
- Before and After Comparison: The edited image has richer colors, greater contrast, and sharper details than the original image.
The before and after comparison reveals the dramatic improvement in the overall quality and impact of the image.
6.2. Portrait Photography
In portrait photography, before and after comparisons can help you smooth skin, enhance eyes, and correct imperfections.
- Original Image: A portrait image with uneven skin tone, dull eyes, and blemishes.
- Edits:
- Smoothed the skin to reduce blemishes and even out the skin tone.
- Enhanced the eyes to make them brighter and more expressive.
- Corrected any imperfections such as stray hairs or distractions.
- Before and After Comparison: The edited image has smoother skin, brighter eyes, and fewer imperfections than the original image.
The before and after comparison highlights the subtle but significant improvements in the overall appearance of the subject.
6.3. Architectural Photography
In architectural photography, before and after comparisons can help you correct perspective distortions, enhance details, and improve the overall composition of your images.
- Original Image: An architectural image with perspective distortions, soft details, and a cluttered composition.
- Edits:
- Corrected the perspective distortions to make the lines straight and parallel.
- Sharpened the image to enhance the details.
- Cropped the image to improve the composition and remove distractions.
- Before and After Comparison: The edited image has corrected perspective distortions, sharper details, and a cleaner composition than the original image.
The before and after comparison demonstrates the transformative power of editing in architectural photography.
7. The Future of Before and After Comparisons
As technology continues to evolve, the tools and techniques for comparing before and after in Lightroom are likely to become even more sophisticated and user-friendly.
7.1. Artificial Intelligence (AI) Integration
AI is already being used in Lightroom to automate certain editing tasks, such as noise reduction and subject selection. In the future, AI could be used to automatically analyze before and after comparisons and provide suggestions for improving your edits.
- Automated Analysis: AI could analyze the tonal range, color balance, and sharpness of your images and provide suggestions for improving these aspects.
- Personalized Recommendations: AI could learn your editing preferences and provide personalized recommendations based on your style.
- Real-Time Feedback: AI could provide real-time feedback as you edit, helping you make more informed decisions.
AI integration has the potential to revolutionize the way we compare before and after in Lightroom and make the editing process more efficient and effective.
7.2. Virtual Reality (VR) and Augmented Reality (AR)
VR and AR technologies could be used to create immersive editing experiences that allow you to view your images in a more realistic and engaging way.
- Immersive Editing: VR could allow you to step inside your images and edit them from a first-person perspective.
- Interactive Comparisons: AR could allow you to overlay the original and edited versions of your image in the real world, making it easier to compare them.
- Collaborative Editing: VR and AR could facilitate collaborative editing sessions where multiple users can work on the same image simultaneously.
VR and AR technologies have the potential to transform the way we interact with our images and make the editing process more intuitive and engaging.
7.3. Cloud-Based Editing
Cloud-based editing platforms are becoming increasingly popular, allowing you to access and edit your images from anywhere in the world.
- Seamless Integration: Cloud-based platforms seamlessly integrate with Lightroom, allowing you to access your images and edits from any device.
- Collaboration Tools: Cloud-based platforms offer collaboration tools that allow you to share your images and edits with others and get feedback in real time.
- Automatic Backups: Cloud-based platforms automatically back up your images and edits, ensuring that your work is safe and secure.
Cloud-based editing platforms offer a convenient and efficient way to compare before and after in Lightroom and collaborate with others on your editing projects.
8. Conclusion: Mastering the Art of Comparison
The ability to effectively compare before and after in Lightroom is a crucial skill for any photographer or editor. By mastering the techniques and tools outlined in this guide, you can refine your editing workflow, improve the quality of your images, and achieve your creative vision.
Remember to establish a baseline, compare after each adjustment, take breaks and re-evaluate, and avoid common mistakes. Experiment with advanced techniques such as snapshots, the History panel, and virtual copies to further enhance your ability to compare before and after.
As technology continues to evolve, embrace new tools and techniques that can help you make more informed decisions about your edits and achieve even better results.
Ready to take your photo editing skills to the next level? Visit COMPARE.EDU.VN today to explore detailed comparisons of Lightroom alternatives, editing techniques, and essential photography equipment. Make informed decisions and unlock your creative potential with the help of COMPARE.EDU.VN.
For inquiries, contact us at:
Address: 333 Comparison Plaza, Choice City, CA 90210, United States
WhatsApp: +1 (626) 555-9090
Website: compare.edu.vn
9. Frequently Asked Questions (FAQ)
Here are some frequently asked questions about comparing before and after in Lightroom:
9.1. Is the Backslash Key Available in All Versions of Lightroom?
The backslash key ( ) is available in both Lightroom Classic and Lightroom CC.
9.2. How Do I Access the “YY” Button in Lightroom?
The “YY” button is located in the Develop module, below the image.
9.3. Can I Customize the Keyboard Shortcuts for Comparison Modes?
No, the keyboard shortcuts for comparison modes cannot be customized in Lightroom.
9.4. What Are Snapshots Used For?
Snapshots are used to save specific versions of your image at different stages of the editing process.
9.5. How Do I Revert to a Previous State Using the History Panel?
In the Develop module, go to the History panel and click on any step in the history to revert to that state.
9.6. What Are Virtual Copies Used For?
Virtual copies are used to create multiple versions of your image without duplicating the original file.
9.7. How Often Should I Calibrate My Monitor?
You should calibrate your monitor regularly, ideally once a month.
9.8. What Is the Best Color Space to Use for Editing?
The best color space to use for editing depends on your workflow and output requirements. sRGB is a good choice for web images, while Adobe RGB is a better choice for print images.
9.9. Can AI Really Help Me Improve My Edits?
Yes, AI can help you improve your edits by automating certain tasks, providing personalized recommendations, and offering real-time feedback.
9.10. Is Cloud-Based Editing Secure?
Yes, cloud-based editing platforms typically use encryption and other security measures to protect your images and edits.