Comparing different versions of a PowerPoint presentation is crucial for collaboration and version control. This guide provides a step-by-step approach on how to compare and merge two PowerPoint presentations effectively using built-in features.
Comparing PowerPoint Presentations: A Step-by-Step Guide
PowerPoint offers a robust comparison feature that allows you to identify differences between two presentations and merge them seamlessly. Here’s how:
Initiating the Comparison
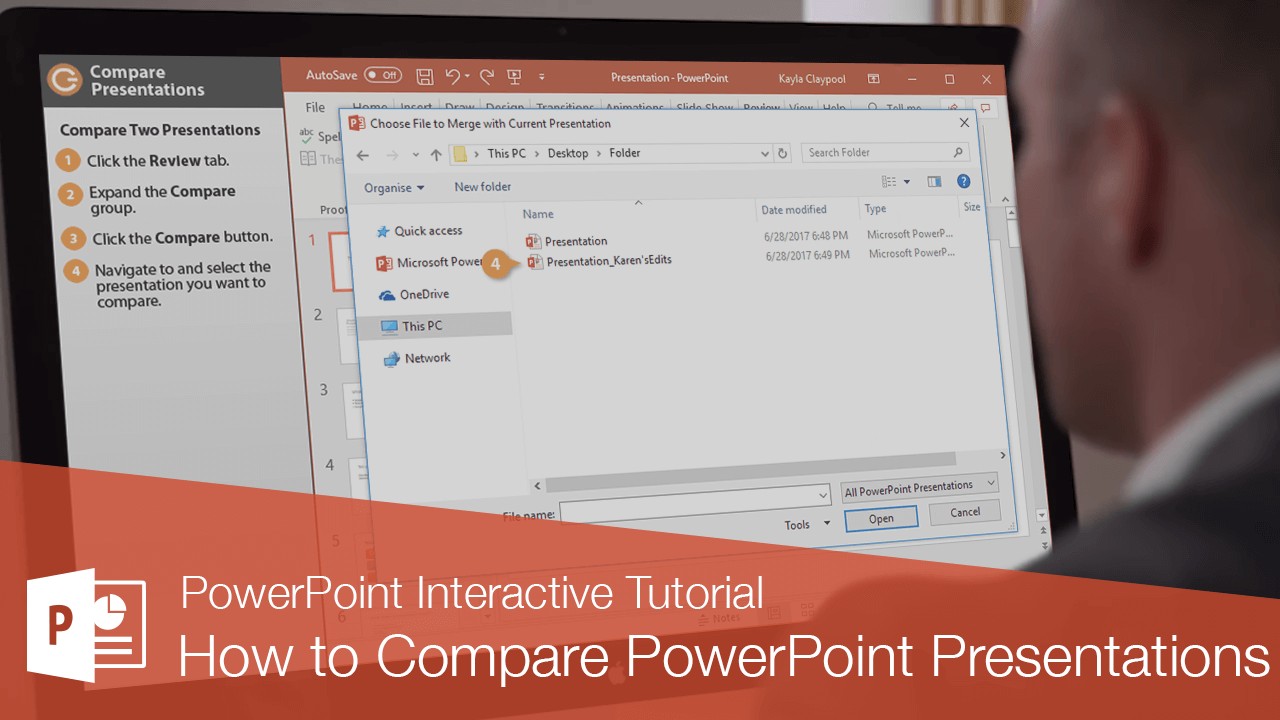
Ensure one of the presentations you want to compare is open in PowerPoint. Then, navigate to the Review tab and locate the Compare group. Click the Compare button. A file explorer window will open.
Browse and select the second PowerPoint presentation you want to compare. Once selected, click Merge.
PowerPoint will then merge the selected presentation with the currently open one, displaying the merged file in Review mode. The Revisions pane will appear on the right side of the screen, detailing all changes between the two presentations.
Understanding the Revisions Pane
The Revisions pane is divided into two key sections within the Details tab:
- Slide Changes: This section lists all modifications made to individual slides, including additions, deletions, and formatting changes.
- Presentation Changes: This section highlights changes made to the overall presentation, such as slide order adjustments or master slide modifications.
Reviewing and Managing Revisions
Within the Revisions pane, you can review each change individually. Selecting a change in the Details tab will highlight the corresponding modification on the slide. A box will appear detailing the specific changes made to text or objects.
To preview the slide with the changes incorporated, click the Slides tab within the Revisions pane. You can then choose to accept or reject each revision:
- Accepting a Change: Select the checkbox next to the change you wish to keep.
- Rejecting a Change: Leave the checkbox next to the change unselected. This will retain the original version.
Use the Previous and Next buttons on the Review tab to navigate through all revisions.
Finalizing and Saving Changes
After reviewing all revisions, click End Review in the Compare group. Confirm your decision to end the review and discard any rejected changes by clicking Yes.
Finally, save the updated presentation with the accepted changes by clicking Save. The modified presentation will now incorporate the approved revisions from the compared presentation. This ensures all desired changes are integrated into a single, cohesive presentation.