Are you looking to enhance your Shopify store’s pricing strategy? Editing the “compare at price” in Shopify is a powerful technique to showcase discounts and perceived value, driving conversions and boosting sales, and COMPARE.EDU.VN is here to guide you. This guide explores how to effectively manage and optimize the “compare at price” feature in Shopify to maximize its impact, offering solutions for both individual products and bulk edits, ultimately helping you make informed decisions about your pricing strategy. Learn about competitive pricing strategies.
1. Understanding the “Compare at Price” Feature in Shopify
The “compare at price” feature in Shopify is a valuable tool that allows you to display a higher original price alongside the actual selling price of a product. This creates a visual representation of a discount, making the offer more appealing to customers. By strategically utilizing this feature, you can effectively communicate the value proposition of your products and encourage purchases.
1.1. Defining “Compare at Price”
“Compare at price,” sometimes referred to as “was price,” is the initial, often higher, price displayed for a product, crossed out to indicate a price reduction. This contrasts with the “price,” which is the actual selling price the customer pays. The visual difference between these two prices highlights the savings, enticing potential buyers.
1.2. Defining “Price”
The “price” is the actual amount a customer will pay for the product after any discounts or promotions have been applied. It is the final cost displayed prominently on the product page and during the checkout process.
1.3. Psychological Impact on Consumers
Displaying a “compare at price” leverages the psychological principle of anchoring. Customers perceive the discounted “price” as a better deal when compared to the higher “compare at price.” This encourages a sense of urgency and motivates them to make a purchase, fearing they might miss out on the perceived savings.
1.4. Importance of Competitive Pricing
Setting the right “compare at price” is crucial for competitiveness. Researching competitor pricing and understanding market trends allows you to position your products effectively, attract price-conscious customers, and increase your chances of making a sale.
1.5. Shopify Price vs. Compare at Price: Key Differences
| Feature | Shopify Price | Shopify Compare at Price |
|---|---|---|
| Definition | Actual selling price of the product. | Original price of the product before any discounts. |
| Display | Displayed prominently as the final price. | Displayed crossed out, indicating a discount. |
| Purpose | To show the final cost to the customer. | To create a sense of value and savings for the customer. |
| Impact | Influences purchase decisions based on cost. | Influences purchase decisions based on perceived value. |
| Relationship | Always lower than or equal to compare at price. | Usually higher than the price to showcase a discount. |

2. Step-by-Step Guide: Adding “Compare at Price” to Shopify Products
Adding a “compare at price” to your Shopify products is a straightforward process that can significantly impact your sales. This section will guide you through the steps to implement this feature effectively.
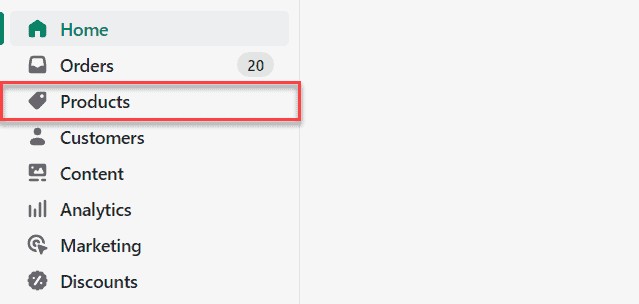
2.1. Accessing the Product Page
-
Log in to your Shopify admin panel: Begin by logging into your Shopify store’s admin panel using your credentials.
-
Navigate to “Products”: On the left-hand sidebar, click on the “Products” option to access the product management section.
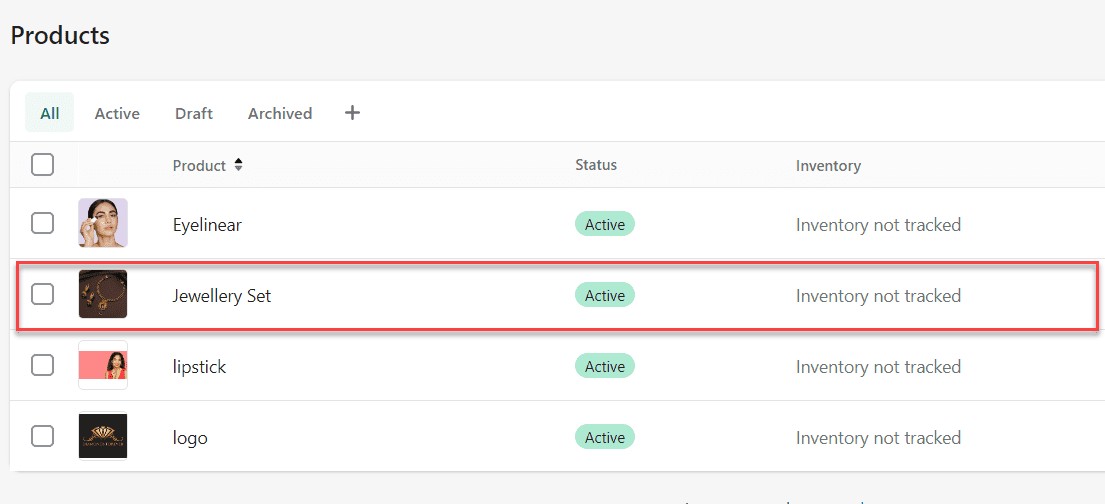
2.2. Selecting the Product
- Choose the product: Browse through your product list and select the specific product you want to edit by clicking on its name or image.
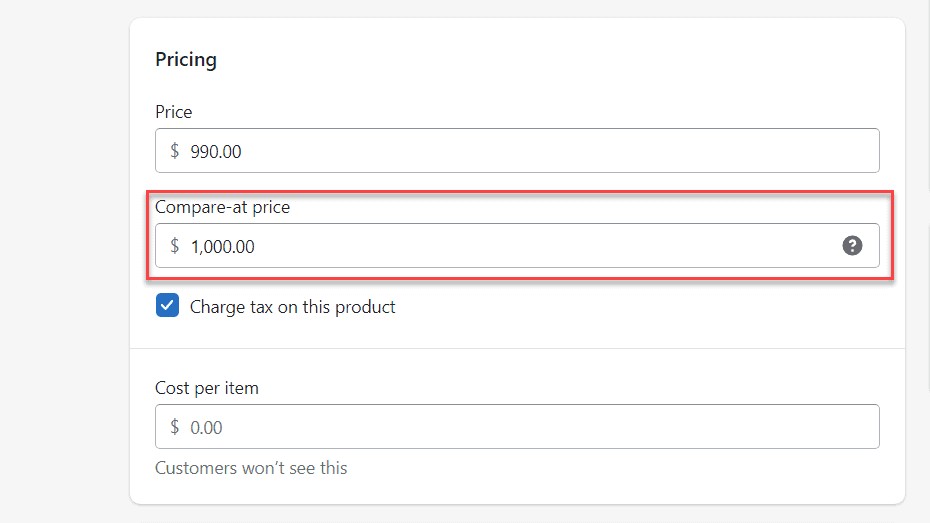
2.3. Editing the “Compare at Price” Field
-
Locate the “Pricing” section: Scroll down the product page until you find the “Pricing” section.
-
Enter the “Compare at Price”: In the “Compare at price” field, enter the original, higher price of the product. This is the price you want to show as the pre-discount price.
- Set the “Price”: In the “Price” field, enter the actual selling price of the product. This should be lower than the “compare at price” to showcase the discount.
2.4. Saving the Changes
- Click “Save”: Once you’ve entered both the “compare at price” and the “price,” click the “Save” button located at the top-right corner of the product page.
2.5. Previewing the Product Page
- Preview the product: After saving, preview the product page to ensure the “compare at price” and “price” are displayed correctly. The “compare at price” should be crossed out, and the “price” should be displayed prominently next to it.
3. Optimizing Bulk Editing of “Compare at Price” in Shopify
For stores with extensive product catalogs, editing the “compare at price” for each item individually can be time-consuming. Shopify offers efficient bulk editing options to streamline this process. This section outlines two methods for bulk editing: using Shopify’s built-in bulk editor and exporting/importing CSV files.
3.1. Method 1: Using Shopify Admin Bulk Editor
Shopify’s built-in bulk editor is a convenient tool for making changes to multiple products simultaneously. This method is ideal for applying a uniform “compare at price” to a selection of products.
3.1.1. Selecting Multiple Products
-
Navigate to “Products”: From your Shopify admin panel, go to the “Products” section.
-
Select products: Use the checkboxes on the left side of each product listing to select all the products you wish to edit.
3.1.2. Accessing the Bulk Editor
- Click “Bulk edit”: Once you’ve selected the products, click the “Bulk edit” button that appears on the screen. This will open the bulk editor interface.
3.1.3. Editing “Compare at Price” in Bulk
-
Add the “Compare at Price” field: If the “Compare at Price” column is not visible, click “Add fields” and select “Compare at Price.”
-
Enter the desired amount: In the first cell of the “Compare at Price” column, enter the desired price.
-
Apply to all selected products: Click on the lower right corner of the cell and drag it down to apply the same “Compare at Price” to all the selected products.
3.1.4. Saving the Bulk Changes
- Click “Save”: After entering all the necessary information, click the “Save” button in the top-right corner to save the changes.
3.2. Method 2: Using CSV Export and Import
For more complex edits, such as applying different “compare at prices” or calculating discounts based on percentages, exporting and importing CSV files is a more flexible solution.
3.2.1. Exporting Products to CSV
-
Navigate to “Products”: From your Shopify admin panel, go to the “Products” section.
-
Click “Export”: Click the “Export” button located in the top-right corner of the screen.
-
Choose export options: Select whether you want to export all products, selected products, or products matching a specific filter.
-
Select CSV format: Choose “CSV for Excel, Numbers, or other spreadsheet programs” as the export format.
-
Click “Export products”: Click the “Export products” button to download the CSV file.
3.2.2. Editing the CSV File in Excel
-
Open the CSV file: Open the downloaded CSV file using Microsoft Excel, Google Sheets, or any other spreadsheet program.
-
Locate the “Variant Compare At Price” column: Find the column labeled “Variant Compare At Price.” This column contains the “compare at price” for each product variant.
-
Edit the “Variant Compare At Price” column: Modify the values in this column according to your requirements. You can use Excel formulas to calculate discounts or apply different prices based on product attributes.
3.2.3. Importing the Updated CSV File
-
Navigate to “Products”: From your Shopify admin panel, go to the “Products” section.
-
Click “Import”: Click the “Import” button located in the top-right corner of the screen.
-
Choose the CSV file: Click the “Choose File” button and select the updated CSV file from your computer.
-
Review import options: Review the import options and ensure that the column mappings are correct.
-
Click “Start import”: Click the “Start import” button to begin importing the data.
3.2.4. Addressing Potential Errors During Import
-
Check for errors: After the import process is complete, review the import results for any errors.
-
Correct errors: If any errors occurred, correct them in the CSV file and repeat the import process. Common errors include invalid data formats or missing required fields.
4. Strategic Use of “Compare at Price” to Boost Sales
The “compare at price” feature is more than just a way to display discounts; it’s a strategic tool that, when used correctly, can significantly boost your sales. This section explores various strategies for maximizing the effectiveness of this feature.
4.1. Setting Realistic “Compare at Prices”
-
Research market prices: Before setting a “compare at price,” research the prices of similar products offered by your competitors. This will help you determine a realistic and credible “compare at price” that aligns with market standards.
-
Avoid inflating prices: Avoid setting artificially high “compare at prices” that are not representative of the product’s actual value. This can damage your brand’s reputation and erode customer trust.
-
Be transparent: Be transparent about the reasons for the discount. For example, you can mention that the product is on sale, part of a limited-time promotion, or a clearance item.
4.2. Highlighting Percentage Discounts
-
Calculate the percentage discount: Calculate the percentage discount offered by using the following formula:
((Compare at Price - Price) / Compare at Price) * 100. -
Display the percentage discount: Display the percentage discount prominently on the product page, next to the “compare at price” and “price.” This will make the discount more visually appealing and easier for customers to understand.
-
Use attention-grabbing language: Use attention-grabbing language to highlight the discount, such as “Save 50%,” “Limited-Time Offer,” or “Clearance Sale.”
4.3. Creating a Sense of Urgency
-
Set a time limit: Set a time limit for the discount to create a sense of urgency and encourage customers to make a purchase before the offer expires.
-
Display a countdown timer: Display a countdown timer on the product page to visually represent the remaining time for the discount.
-
Use persuasive language: Use persuasive language to emphasize the limited-time nature of the offer, such as “Offer ends soon,” “While supplies last,” or “Don’t miss out.”
4.4. Using “Compare at Price” for Seasonal Promotions
-
Plan seasonal promotions: Plan seasonal promotions around holidays, special events, or seasonal trends.
-
Adjust “compare at prices”: Adjust the “compare at prices” to reflect the promotional offers. For example, you can increase the “compare at price” during a Black Friday sale to showcase even larger discounts.
-
Promote seasonal discounts: Promote seasonal discounts through email marketing, social media, and on your website.
4.5. A/B Testing Different Pricing Strategies
-
Identify key metrics: Identify the key metrics you want to track, such as conversion rate, average order value, and revenue.
-
Create two variations: Create two variations of your product page, one with a “compare at price” and one without.
-
Split traffic: Split traffic evenly between the two variations using A/B testing software.
-
Analyze results: Analyze the results of the A/B test to determine which pricing strategy performs better.
5. Avoiding Common Mistakes When Using “Compare at Price”
While the “compare at price” feature can be a powerful tool, it’s essential to use it responsibly and avoid common mistakes that can damage your brand’s reputation and erode customer trust.
5.1. Inflating “Compare at Price” Artificially
-
Maintain ethical pricing: Always set “compare at prices” that are representative of the product’s actual value and market standards.
-
Avoid misleading customers: Avoid inflating “compare at prices” artificially to create a false sense of value.
-
Be transparent about pricing: Be transparent about your pricing practices and provide clear explanations for any discounts or promotions.
5.2. Not Updating “Compare at Price” Regularly
-
Monitor market prices: Regularly monitor market prices and adjust “compare at prices” accordingly.
-
Update prices for promotions: Update “compare at prices” whenever you run promotions or sales events.
-
Ensure accuracy: Ensure that “compare at prices” are accurate and up-to-date to avoid misleading customers.
5.3. Confusing Customers with Unclear Pricing
-
Use clear language: Use clear and concise language to explain the “compare at price” and the discount being offered.
-
Display prices prominently: Display both the “compare at price” and the “price” prominently on the product page.
-
Avoid using confusing terminology: Avoid using confusing terminology or jargon that customers may not understand.
5.4. Ignoring Mobile Optimization
-
Ensure responsive design: Ensure that your website is responsive and optimized for mobile devices.
-
Test on different devices: Test your website on different mobile devices to ensure that prices and discounts are displayed correctly.
-
Optimize for mobile users: Optimize your website for mobile users by using larger fonts, simplified navigation, and touch-friendly elements.
6. Advanced Techniques for “Compare at Price” Customization
For merchants seeking to further optimize their use of the “compare at price” feature, Shopify offers several advanced customization options. These techniques allow you to tailor the appearance and functionality of the “compare at price” to better align with your brand and marketing goals.
6.1. Customizing the Appearance with CSS
-
Access the theme editor: From your Shopify admin panel, go to “Online Store” > “Themes.”
-
Edit the code: Click the “Actions” button and select “Edit code.”
-
Locate the CSS file: Find the CSS file for your theme, typically named “theme.scss.liquid” or “style.css.liquid.”
-
Add custom CSS: Add custom CSS code to modify the appearance of the “compare at price,” such as changing the font, color, size, or strikethrough style.
6.2. Using Shopify Apps for Advanced Pricing
-
Explore the Shopify App Store: Visit the Shopify App Store and search for apps that offer advanced pricing features, such as dynamic pricing, tiered pricing, or wholesale pricing.
-
Install a pricing app: Choose an app that meets your needs and install it in your Shopify store.
-
Configure the app: Follow the app’s instructions to configure its settings and customize its functionality.
6.3. Integrating with Third-Party Pricing Tools
-
Research pricing tools: Research third-party pricing tools that offer advanced features, such as competitor price tracking, automated price adjustments, or price optimization.
-
Choose a pricing tool: Choose a pricing tool that integrates with Shopify and meets your specific requirements.
-
Connect the tool to Shopify: Follow the tool’s instructions to connect it to your Shopify store.
7. Real-World Examples of Successful “Compare at Price” Strategies
To illustrate the effectiveness of the “compare at price” feature, let’s examine some real-world examples of how successful Shopify stores have used this tool to boost sales.
7.1. Example 1: Fashion Retailer
A fashion retailer uses “compare at price” to showcase discounts on seasonal clothing. They set the “compare at price” to the original price of the clothing at the beginning of the season and then lower the “price” as the season progresses. This creates a sense of urgency and encourages customers to purchase the clothing before it sells out.
7.2. Example 2: Electronics Store
An electronics store uses “compare at price” to highlight discounts on refurbished electronics. They set the “compare at price” to the original price of the electronics when they were new and then lower the “price” to reflect the fact that they are refurbished. This allows them to offer competitive prices while still maintaining a profit margin.
7.3. Example 3: Home Goods Store
A home goods store uses “compare at price” to showcase discounts on clearance items. They set the “compare at price” to the original price of the items and then lower the “price” to clear out excess inventory. This allows them to quickly sell off unwanted items and make room for new products.
8. FAQ: Addressing Common Questions About “Compare at Price”
This section addresses some frequently asked questions about the “compare at price” feature in Shopify.
8.1. What is the Difference Between “Compare at Price” and “Sale Price”?
“Compare at price” is the original price of a product, while “sale price” is the discounted price. Shopify uses the “compare at price” to display a crossed-out original price next to the “sale price,” highlighting the discount.
8.2. How Do I Calculate the Percentage Discount?
The percentage discount is calculated as ((Compare at Price - Price) / Compare at Price) * 100.
8.3. Can I Use “Compare at Price” for Products That Are Always on Sale?
Yes, you can use “compare at price” for products that are always on sale, but it’s important to ensure that the “compare at price” is realistic and reflects the original value of the product.
8.4. How Often Should I Update My “Compare at Prices”?
You should update your “compare at prices” regularly to reflect market changes, promotions, and seasonal trends.
8.5. Is It Ethical to Use “Compare at Price”?
Yes, it is ethical to use “compare at price” as long as you are transparent about your pricing practices and avoid inflating prices artificially.
8.6. Can I Customize the Appearance of the “Compare at Price”?
Yes, you can customize the appearance of the “compare at price” using CSS or Shopify apps.
8.7. How Do I A/B Test Different “Compare at Price” Strategies?
You can A/B test different “compare at price” strategies using A/B testing software, such as Google Optimize or Optimizely.
8.8. What Are Some Common Mistakes to Avoid When Using “Compare at Price”?
Common mistakes to avoid include inflating prices artificially, not updating prices regularly, confusing customers with unclear pricing, and ignoring mobile optimization.
8.9. Where Can I Find More Information About Using “Compare at Price”?
You can find more information about using “compare at price” in the Shopify Help Center or by contacting Shopify support.
8.10. What Are the Best Practices for Setting “Compare at Prices”?
Best practices for setting “compare at prices” include researching market prices, setting realistic prices, highlighting percentage discounts, creating a sense of urgency, and using “compare at price” for seasonal promotions.
9. Conclusion: Leveraging “Compare at Price” for Shopify Success
The “compare at price” feature in Shopify is a powerful tool that can significantly impact your sales and revenue. By understanding how to effectively manage and optimize this feature, you can create a compelling value proposition for your customers and drive conversions.
Remember to set realistic “compare at prices,” highlight percentage discounts, create a sense of urgency, and avoid common mistakes. By following the strategies outlined in this guide, you can leverage the “compare at price” feature to achieve Shopify success.
Ready to take your Shopify store’s pricing strategy to the next level? Visit COMPARE.EDU.VN today to explore more in-depth comparisons, expert reviews, and actionable insights to help you make informed decisions and optimize your online business for maximum success. Contact us at 333 Comparison Plaza, Choice City, CA 90210, United States or reach out via Whatsapp at +1 (626) 555-9090. Visit our website compare.edu.vn for more information.