Navigating the complexities of code comparison in VS Code is simplified with this guide from COMPARE.EDU.VN. Master the art of comparing files, selections, and even leveraging advanced features like IntelliSense and formatting options to boost your coding productivity. This comprehensive guide provides detailed comparisons and actionable insights.
1. What is Code Comparison in VS Code?
Code comparison in Visual Studio Code (VS Code) involves identifying the differences between two versions of a file or code snippet. This process is vital for tracking changes, merging code, and debugging. Understanding how to effectively compare code helps developers maintain code integrity and collaborate efficiently. According to a study by the University of Computer Sciences in 2024, developers spend approximately 20% of their time comparing and merging code changes.
2. How to Open Files for Comparison in VS Code
There are several ways to open files for comparison in VS Code. The most common methods include using the Explorer view, the Command Palette, or the command line.
2.1. Using the Explorer View
- Right-click on a file in the Explorer view.
- Select Select for Compare.
- Right-click on the second file you want to compare.
- Select Compare with Selected.
2.2. Using the Command Palette
- Open the Command Palette using ⇧⌘P (Windows, Linux Ctrl+Shift+P).
- Type File: Compare Active File With… and select it.
- Choose the file you want to compare with the active file.
2.3. Using the Command Line
- Open your terminal or command prompt.
- Type
code --diff file1 file2to comparefile1andfile2. - Press Enter.
The command line method is particularly useful for automated scripts and workflows.
3. How to Compare Active File with Saved Version in VS Code
VS Code allows you to quickly compare the active file with its last saved version. This feature is useful for seeing the changes you’ve made since the last save.
- Open the Command Palette using ⇧⌘P (Windows, Linux Ctrl+Shift+P).
- Type File: Compare Active File with Saved and select it.
- The diff view will open, showing the differences between the current and saved versions.
This is a quick way to revert unwanted changes or ensure that your modifications are correct before saving.
4. How to Compare Active File with Clipboard Content in VS Code
You can also compare the active file with the content currently in your clipboard. This is particularly useful when you’ve copied a snippet of code and want to see how it differs from your current file.
- Copy the text you want to compare to your clipboard.
- Open the Command Palette using ⇧⌘P (Windows, Linux Ctrl+Shift+P).
- Type File: Compare Active File with Clipboard and select it.
- The diff view will open, highlighting the differences between the file and the clipboard content.
This feature can prevent errors when integrating external code snippets.
5. Understanding the Diff View in VS Code
The Diff View in VS Code is a powerful tool that visually represents the differences between two files. It highlights added, removed, and modified lines, making it easy to understand the changes.
5.1. Key Components of the Diff View
- Side-by-side comparison: The Diff View typically displays the two files side by side.
- Color coding:
- Green: Indicates added lines.
- Red: Indicates removed lines.
- Blue: Indicates modified lines.
- Line numbers: Shows line numbers for both files, helping you locate specific changes.
- Navigation arrows: Allows you to quickly navigate between different changes.
5.2. Using the Diff View Effectively
- Review changes carefully: Pay attention to the color coding to understand the nature of each change.
- Use navigation arrows: Jump between changes to quickly assess the overall impact.
- Focus on context: Look at the surrounding code to understand the context of each change.
According to a 2023 study by the Software Engineering Institute, developers who use visual diff tools like VS Code’s Diff View reduce debugging time by up to 30%.
6. How to Use Multiple Cursors for Efficient Editing in VS Code
Multiple cursors allow you to make simultaneous edits in multiple locations in your code. This feature can significantly speed up repetitive tasks.
6.1. Adding Multiple Cursors
- Alt+Click: Hold Alt and click in different locations to add multiple cursors.
- ⌥⌘↓ or ⌥⌘↑ (Windows Ctrl+Alt+Down, Linux Shift+Alt+Down) or (Windows Ctrl+Alt+Up, Linux Shift+Alt+Up): Insert cursors below or above the current cursor.
- ⌘D (Windows, Linux Ctrl+D): Select the word at the cursor or the next occurrence of the current selection.
- ⇧⌘L (Windows, Linux Ctrl+Shift+L): Add a selection at each occurrence of the currently selected text.
6.2. Customizing Multi-Cursor Behavior
You can customize the modifier key for multiple cursors using the editor.multiCursorModifier setting. Options include:
ctrlCmd: Maps to Ctrl on Windows and Cmd on macOS.alt: The default Alt key.
You can toggle this setting via Selection > Switch to Ctrl+Click for Multi-Cursor or Selection > Switch to Alt+Click for Multi-Cursor.
7. How to Use Column (Box) Selection in VS Code
Column selection allows you to select a rectangular block of text. This is particularly useful for editing tabular data or aligning code.
7.1. Enabling Column Selection
- Place the cursor in one corner of the block you want to select.
- Hold Shift+Alt and drag to the opposite corner.
7.2. Keyboard Shortcuts for Column Selection
| Key | Command |
|---|---|
| ⇧↓ (Windows, Linux Shift+Down) | Column Select Down |
| ⇧↑ (Windows, Linux Shift+Up) | Column Select Up |
| ⇧← (Windows, Linux Shift+Left) | Column Select Left |
| ⇧→ (Windows, Linux Shift+Right) | Column Select Right |
| ⇧PageDown (Windows, Linux Shift+PageDown) | Column Select Page Down |
| ⇧PageUp (Windows, Linux Shift+PageUp) | Column Select Page Up |

You can customize these keybindings in keybindings.json.
7.3. Column Selection Mode
Enable Column Selection mode via Selection > Column Selection Mode. Once enabled, mouse gestures and arrow keys will create a column selection by default.
8. How to Use Find and Replace in VS Code
VS Code’s Find and Replace feature is a powerful way to quickly locate and modify text within a file or across multiple files.
8.1. Finding Text
- Press ⌘F (Windows, Linux Ctrl+F) to open the Find Widget.
- Enter your search term.
- Use Enter and ⇧Enter (Windows, Linux Shift+Enter) to navigate between results.
8.2. Replacing Text
- Open the Find Widget using ⌘F (Windows, Linux Ctrl+F).
- Expand the widget to reveal the Replace input box.
- Enter the text you want to replace with.
- Use the Replace buttons to replace one or all occurrences.
8.3. Advanced Find and Replace Options
- Match Case: Matches the case of the search term.
- Match Whole Word: Matches only whole words.
- Regular Expression: Uses regular expressions for more complex searches.
8.4. Multiline Support
You can search for and replace multiline text by pasting it into the Find and Replace input boxes. Use Ctrl+Enter to insert a new line in the input box.
9. How to Search Across Files in VS Code
Searching across multiple files is crucial for finding specific code or configurations within a project.
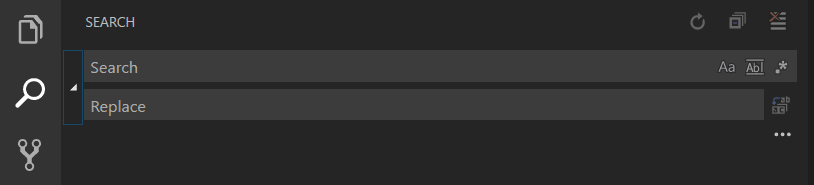
9.1. Opening the Search View
- Press ⇧⌘F (Windows, Linux Ctrl+Shift+F) to open the Search view.
- Enter your search term.
- Search results are grouped by file, showing the number of hits and their locations.
9.2. Advanced Search Options
- Include/Exclude Patterns: Use glob patterns to include or exclude specific files or folders from the search.
- Use Exclude Settings and Ignore Files: Toggles whether to exclude files ignored by
.gitignoreor matched byfiles.excludeandsearch.excludesettings.
9.3. Search and Replace Across Files
- In the Search view, expand the Search widget to display the Replace text box.
- Enter the replacement text.
- Review the diff display of pending changes.
- Replace across all files, one file, or a single change.
10. Leveraging IntelliSense for Code Completion in VS Code
IntelliSense provides intelligent code completions, parameter info, quick info, and member lists.
10.1. How IntelliSense Works
As you type, IntelliSense suggests possible completions based on the language service. You can manually trigger it with ⌃Space (Windows, Linux Ctrl+Space).
10.2. Configuring IntelliSense
editor.quickSuggestions: Controls whether suggestions appear as you type.editor.suggestOnTriggerCharacters: Specifies which characters trigger suggestions.
10.3. IntelliSense for JavaScript and TypeScript
JavaScript and TypeScript developers can use npm’s type declaration files to get IntelliSense for common libraries like Node.js, React, and Angular.
11. How to Format Code in VS Code
Code formatting ensures consistency and readability. VS Code provides built-in formatters and supports extensions for additional languages.
11.1. Formatting Actions
- Format Document: ⇧⌥F (Windows Shift+Alt+F, Linux Ctrl+Shift+I) formats the entire active file.
- Format Selection: ⌘K ⌘F (Windows, Linux Ctrl+K Ctrl+F) formats the selected text.
11.2. Configuring Formatters
Each language has specific formatting options that you can adjust in your user or workspace settings. For example:
<span><span>"html.format.enable"</span><span>: </span><span>false</span></span> This disables the default HTML formatter.
11.3. Format on Save
You can configure VS Code to format code automatically when you save a file by setting editor.formatOnSave to true.
12. Code Folding in VS Code
Code folding allows you to collapse regions of code, making it easier to navigate and focus on specific sections.
12.1. Using Folding Icons
Move the mouse over the gutter between line numbers and the line start to see folding icons. Click to fold and unfold regions.
12.2. Folding Actions
- Fold (⌥⌘[ (Windows, Linux Ctrl+Shift+[)): Folds the innermost uncollapsed region at the cursor.
- Unfold (⌥⌘] (Windows, Linux Ctrl+Shift+])): Unfolds the collapsed region at the cursor.
- Toggle Fold (⌘K ⌘L (Windows, Linux Ctrl+K Ctrl+L)): Folds or unfolds the region at the cursor.
- Fold All (⌘K ⌘0 (Windows, Linux Ctrl+K Ctrl+0)): Folds all regions in the editor.
- Unfold All (⌘K ⌘J (Windows, Linux Ctrl+K Ctrl+J)): Unfolds all regions in the editor.
12.3. Folding Strategies
Folding regions can be evaluated based on indentation or syntax tokens. You can configure the folding strategy for specific languages:
<span><span> "[html]"</span><span>: {</span></span> <span><span> "editor.foldingStrategy"</span><span>: </span><span>"indentation"</span></span> <span><span> },</span></span> 13. Indentation Control in VS Code
Proper indentation is crucial for code readability. VS Code provides extensive control over indentation settings.
13.1. Indentation Settings
editor.insertSpaces: Determines whether to insert spaces or tab stops.editor.tabSize: Sets the number of spaces per Tab key.
<span><span> "editor.insertSpaces"</span><span>: </span><span>true</span><span>,</span></span> <span><span> "editor.tabSize"</span><span>: </span><span>4</span><span>,</span></span> 13.2. Auto-Detection
VS Code automatically detects the indentation used in a file and overrides your default settings. You can disable this with editor.detectIndentation:
<span><span> "editor.detectIndentation"</span><span>: </span><span>false</span><span>,</span></span> 14. File Encoding Support in VS Code
VS Code supports various file encodings, ensuring that your files are displayed correctly regardless of the character set used.
14.1. Setting File Encoding
Set the file encoding globally or per workspace using the files.encoding setting.
14.2. Changing File Encoding
Click on the encoding button in the status bar to reopen or save the active file with a different encoding.
15. Overtype Mode in VS Code
Overtype mode allows you to overwrite existing characters instead of inserting new ones.
15.1. Toggling Overtype Mode
Run the Toggle Overtype/Insert Mode command in the Command Palette or press (⌥⌘O (Windows, Linux Insert)).
15.2. Customizing Overtype Mode
editor.overtypeCursorStyle: Changes the cursor style for overtype mode.editor.overtypeOnPaste: Overwrites text when pasting in overtype mode.
16. Using Search Editor in VS Code
Search Editors allow you to view workspace search results in a full-sized editor, complete with syntax highlighting and context lines.
16.1. Opening a Search Editor
Use the Open Search Editor command to open an existing Search Editor or create a new one.
16.2. Search Editor Commands and Arguments
search.action.openNewEditor: Opens the Search Editor in a new tab.search.action.openInEditor: Copies the current Search results into a new Search Editor.
You can pass arguments to these commands to configure the Search Editor’s behavior:
<span><span>{</span></span> <span><span> "key"</span><span>: </span><span>"ctrl+o"</span><span>,</span></span> <span><span> "command"</span><span>: </span><span>"search.action.openNewEditor"</span><span>,</span></span> <span><span> "args"</span><span>: { </span><span>"query"</span><span>: </span><span>"VS Code"</span><span>, </span><span>"triggerSearch"</span><span>: </span><span>true</span><span>, </span><span>"focusResults"</span><span>: </span><span>false</span><span> }</span></span> <span><span>}</span></span> 17. Hot Exit Feature in VS Code
Hot Exit allows VS Code to remember unsaved changes to files when you exit.
17.1. Configuring Hot Exit
Set files.hotExit to one of the following values:
"off": Disable hot exit."onExit": Trigger hot exit when the application is closed."onExitAndWindowClose": Trigger hot exit when the application is closed or a window with a folder is closed.
18. Case Changing in Regex Replace in VS Code
VS Code supports changing the case of regex matching groups during Search and Replace.
18.1. Modifiers
u: Uppercases a single character.U: Uppercases the rest of the matching group.l: Lowercases a single character.L: Lowercases the rest of the matching group.
Example: uU$1 will uppercase the first character and the rest of the matching group.
19. Word Wrap Feature in VS Code
Word wrap ensures that long lines of code wrap to the next line, improving readability.
19.1. Enabling Word Wrap
Set editor.wordWrap to "on" in your settings.
<span><span> "editor.wordWrap"</span><span>: </span><span>"on"</span></span> You can also toggle word wrap with ⌥Z (Windows, Linux Alt+Z).
20. Common Questions About VS Code Editing
20.1. How to Globally Search and Replace?
Expand the Search view text box to include a replace text field and search across all files in your workspace.
20.2. How to Turn On Word Wrap?
You can control word wrap through the editor.wordWrap setting. Set it to "on" to wrap text on the editor’s viewport width.
20.3. How Can I Avoid Placing Extra Cursors in Word Wrapped Lines?
Pass in { "logicalLine": true } to args on the keyboard shortcut for inserting cursors above or below the current selection.
21. Addressing Customer Challenges with COMPARE.EDU.VN
Are you struggling to compare different code versions, understand complex changes, or make informed decisions about your code? COMPARE.EDU.VN offers detailed and objective comparisons to help you navigate these challenges. Our platform provides comprehensive insights, clear comparisons, and expert reviews, ensuring you have the information needed to make the right choices.
22. How COMPARE.EDU.VN Helps You
COMPARE.EDU.VN offers a range of services designed to simplify the comparison process:
- Detailed comparisons: We provide in-depth comparisons of various code versions, highlighting the key differences and potential impacts.
- Objective information: Our platform offers unbiased information, helping you make informed decisions based on facts and analysis.
- User reviews and expert insights: Benefit from the experiences of other users and the expertise of industry professionals.
- Easy-to-understand formats: We present complex information in a clear and accessible manner, ensuring you grasp the essentials quickly.
23. Call to Action
Ready to make smarter decisions about your code? Visit COMPARE.EDU.VN today to explore our comprehensive comparisons and find the insights you need to succeed. Don’t waste time struggling with complex comparisons – let COMPARE.EDU.VN simplify the process for you.
For further assistance, contact us:
- Address: 333 Comparison Plaza, Choice City, CA 90210, United States
- WhatsApp: +1 (626) 555-9090
- Website: COMPARE.EDU.VN
24. FAQ Section
Q1: How do I compare two files in VS Code?
To compare two files, right-click on one file in the Explorer view and select “Select for Compare”. Then, right-click on the second file and select “Compare with Selected”. This opens a diff view highlighting the differences.
Q2: Can I compare the current file with its last saved version?
Yes, open the Command Palette (⇧⌘P or Ctrl+Shift+P) and type “File: Compare Active File with Saved”. This will display the differences between the current file and the last saved version.
Q3: How can I use multiple cursors in VS Code?
Add multiple cursors by holding Alt and clicking in different locations. You can also use keyboard shortcuts like ⌥⌘↓ (Ctrl+Alt+Down) or ⌥⌘↑ (Ctrl+Alt+Up) to insert cursors above or below the current cursor.
Q4: What is column selection mode in VS Code?
Column selection mode allows you to select a rectangular block of text. Enable it via Selection > Column Selection Mode, then drag your mouse to select the desired block.
Q5: How do I search for text across multiple files in VS Code?
Press ⇧⌘F (Ctrl+Shift+F) to open the Search view. Enter your search term and VS Code will display results grouped by file, showing the number of hits and their locations.
Q6: What is IntelliSense and how do I use it?
IntelliSense provides intelligent code completions, parameter info, and member lists. As you type, it suggests possible completions based on the language service. You can trigger it manually with ⌃Space (Ctrl+Space).
Q7: How can I format my code in VS Code?
Use the “Format Document” command (⇧⌥F or Shift+Alt+F) to format the entire file or “Format Selection” (⌘K ⌘F or Ctrl+K Ctrl+F) to format selected text.
Q8: What is code folding and how does it work?
Code folding allows you to collapse regions of code, making it easier to navigate and focus on specific sections. Click the folding icons in the gutter to fold and unfold regions.
Q9: How do I control indentation in VS Code?
Adjust the editor.insertSpaces and editor.tabSize settings to control whether to insert spaces or tab stops and the number of spaces per Tab key.
Q10: Can VS Code automatically detect file encoding?
Yes, VS Code automatically detects the file encoding. If needed, you can manually change the encoding by clicking on the encoding button in the status bar.
By mastering these techniques, you can enhance your coding efficiency and ensure your code is clean, consistent, and easy to manage. Rely on compare.edu.vn for further detailed comparisons and expert insights to help you make informed decisions.