Notepad++ is a versatile text and code editor favored by many for its lightweight nature and extensive features. However, one functionality it lacks natively is a built-in file comparison tool. This guide will walk you through how to add the Compare plugin to Notepad++, enabling you to effortlessly identify differences between two files.
Installing the Compare Plugin
There are two primary ways to install the Compare plugin: through the Plugins Admin or manually.
Using Plugins Admin
The easiest method is using the Plugins Admin:
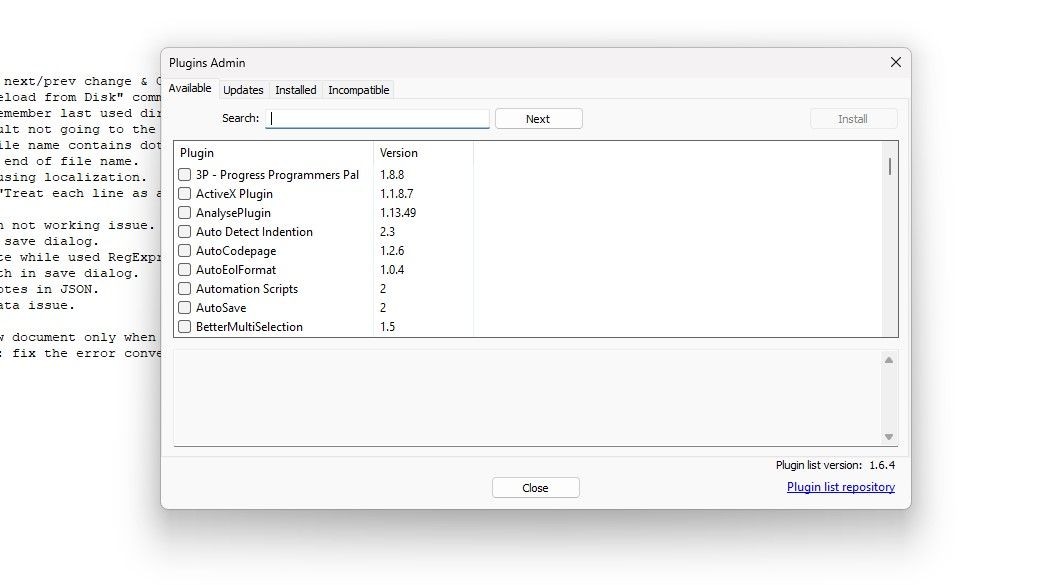
- Open Plugins Admin: In Notepad++, navigate to
Plugins > Plugins Admin. - Search for Compare: Type “Compare” in the search bar within the Plugins Admin window.
- Select and Install: Check the box next to the “Compare” plugin and click “Install.”
- Restart Notepad++: After installation, Notepad++ will restart to activate the plugin.
Note: If you don’t have Plugins Admin installed, you’ll need to reinstall Notepad++ and ensure the “Plugins Admin” component is selected during the installation process. Select the “Custom” installation option to see this component.
Manual Installation
If reinstalling Notepad++ isn’t feasible, you can manually install the Compare plugin:
- Download the Plugin: Download the Compare plugin DLL file from a reliable source like the plugin’s GitHub repository. Choose the correct version for your Notepad++ installation (32-bit or 64-bit).
- Extract the Files: Extract the downloaded archive. You should have a DLL file and potentially a folder containing additional files.
- Create Plugin Folder: Navigate to your Notepad++ installation directory and locate the “Plugins” folder. Inside the “Plugins” folder, create a new folder named “ComparePlugin” (or the exact name matching the DLL file).
- Copy Files: Copy the extracted DLL and any accompanying files into the newly created “ComparePlugin” folder.
- Restart Notepad++: Restart Notepad++ to enable the manually installed plugin.
Using the Compare Plugin
Once installed, using the Compare plugin is straightforward:
- Open Files: Open the two files you want to compare in Notepad++.
- Initiate Comparison: Go to
Plugins > Compare > Compare.
Notepad++ will display the files side-by-side, highlighting differences with color-coding:
- Green: Lines added in the newer file.
- Red: Lines deleted in the newer file.
- Blue: Lines moved to a different location.
- Orange: Lines with modifications.
Exploring Compare Plugin Features
The Compare plugin offers several helpful features:
- Navigation Bar: A visual representation of differences, allowing for quick navigation to changed sections.
- View Modes: Switch between vertical and horizontal split views for easier comparison.
- Settings: Customize colors, ignore whitespace, and control other comparison behaviors via
Plugins > Compare > Settings.
- SVN/Git Diff: Integrate with version control systems to compare against previous revisions.
By adding the Compare plugin, you significantly enhance Notepad++’s functionality, transforming it into a powerful tool for comparing files and identifying changes efficiently. This plugin is a must-have for programmers, writers, and anyone who works with text files regularly.