Comparing two Excel spreadsheets is crucial for data validation, error detection, and ensuring data integrity. At COMPARE.EDU.VN, we offer comprehensive guides and tools to streamline this process. Discover how to effectively compare Excel files, identify differences, and maintain accurate data with our step-by-step instructions.
1. Why Compare Two Excel Spreadsheets?
Comparing two Excel spreadsheets is a critical task in various scenarios, ensuring accuracy, consistency, and data integrity. Whether you’re auditing financial data, merging datasets, or tracking changes in project plans, understanding the differences between spreadsheets is essential. Here are several reasons why comparing Excel files is important:
- Data Validation: Comparing spreadsheets helps ensure that data entries are consistent and accurate across different versions or datasets.
- Error Detection: By identifying discrepancies, you can quickly spot and correct errors, such as typos, incorrect formulas, or missing data.
- Change Tracking: Comparing files allows you to monitor modifications made over time, which is crucial for version control and auditing purposes.
- Data Integration: When merging data from multiple sources, comparing spreadsheets helps identify and resolve conflicts, ensuring a unified and accurate dataset.
- Compliance: In regulated industries, comparing spreadsheets ensures adherence to standards and regulations, reducing the risk of non-compliance.
- Decision Making: Accurate data comparisons provide reliable insights for informed decision-making, whether in finance, operations, or other domains.
Comparing Excel spreadsheets is not just about finding differences; it’s about ensuring data quality, maintaining control over changes, and making informed decisions based on reliable information.
2. Key Considerations Before Comparing Excel Spreadsheets
Before diving into the comparison process, it’s important to consider several factors to ensure accurate and meaningful results. These considerations will help you streamline the comparison and focus on the most relevant aspects of your data:
- Identify the Purpose:
- Clearly define why you are comparing the spreadsheets. Are you looking for specific changes, verifying data accuracy, or merging datasets? Understanding the purpose will guide your comparison strategy.
- Data Structure:
- Ensure that the spreadsheets have a similar structure, including consistent column headers and data types. Inconsistent structures can lead to inaccurate comparisons.
- File Format:
- Verify that both files are in a compatible format (e.g., .xlsx, .xls). Using different file formats can sometimes cause compatibility issues during the comparison process.
- Data Consistency:
- Check for inconsistencies in data entry, such as variations in spelling, abbreviations, or date formats. Standardizing the data beforehand can improve comparison accuracy.
- Hidden Rows and Columns:
- Unhide all rows and columns in both spreadsheets to ensure that no data is overlooked during the comparison.
- Formulas vs. Values:
- Decide whether you want to compare formulas or their calculated values. Comparing formulas can help identify changes in logic, while comparing values focuses on the results.
- Large Datasets:
- For large datasets, consider using specialized tools or add-ins designed for handling extensive data efficiently.
- Password Protection:
- Remove or note any password protection on the spreadsheets, as this can prevent comparison tools from accessing the data.
- Backup:
- Always create a backup of your original spreadsheets before making any changes or comparisons. This ensures you can revert to the original data if needed.
- Define Scope:
- Determine the specific sheets or ranges you need to compare. Comparing only relevant sections can save time and reduce the complexity of the analysis.
By carefully considering these factors before comparing Excel spreadsheets, you can ensure a more accurate, efficient, and meaningful comparison process.
3. Manual Comparison Techniques
While dedicated tools offer advanced features, manual comparison techniques can be useful for smaller datasets or quick spot-checks. Here are several manual methods you can use to compare Excel spreadsheets:
3.1. Side-by-Side Comparison
- Method: Open both Excel files and arrange them side-by-side on your screen. Manually scroll through each sheet, comparing corresponding rows and columns.
- Pros: Simple and requires no additional tools.
- Cons: Time-consuming and prone to human error, especially with large datasets.
- Use Case: Suitable for small datasets or when you need to visually inspect specific sections of the spreadsheets.
3.2. Conditional Formatting
- Method: Use conditional formatting to highlight differences between two columns or ranges.
- Select the first column or range you want to compare.
- Go to Home > Conditional Formatting > New Rule.
- Choose “Use a formula to determine which cells to format.”
- Enter a formula like
=A1<>Sheet2!A1(adjust sheet names and cell references as needed). - Set the formatting to highlight the differences.
- Repeat for other columns or ranges.
- Pros: Highlights differences visually within the spreadsheet.
- Cons: Requires manual setup and can be cumbersome for comparing multiple columns or sheets.
- Use Case: Useful for highlighting specific discrepancies in data values.
3.3. Simple Formulas
- Method: Use Excel formulas to compare values between two sheets.
- In a new column, enter a formula like
=IF(Sheet1!A1=Sheet2!A1,"Match","Mismatch"). - Drag the formula down to apply it to all rows.
- Filter the column to show only “Mismatch” entries.
- In a new column, enter a formula like
- Pros: Quickly identifies matching and mismatching entries.
- Cons: Requires manual formula entry and is not suitable for comparing complex data or formatting differences.
- Use Case: Ideal for verifying data consistency between two simple lists or tables.
3.4. VLOOKUP and MATCH Functions
- Method: Use
VLOOKUPto find matching entries andMATCHto compare positions of data.- VLOOKUP:
=VLOOKUP(A1,Sheet2!A:B,2,FALSE)to find the corresponding value in Sheet2. If it returns an error, the entry is missing.
- MATCH:
=IF(MATCH(A1,Sheet1!A:A,0)=MATCH(A1,Sheet2!A:A,0),"Match","Mismatch")to compare the position of an entry in both sheets.
- VLOOKUP:
- Pros: Useful for identifying missing or repositioned data.
- Cons: Requires understanding of these functions and manual setup.
- Use Case: Helpful for comparing lists and tables to find missing entries or changes in data order.
3.5. Manual Filtering and Sorting
- Method:
- Sort both spreadsheets by a common column.
- Apply filters to identify unique or duplicate entries.
- Visually compare the filtered data for discrepancies.
- Pros: Can quickly identify unique or duplicate entries.
- Cons: Requires careful manual inspection and may not be suitable for large datasets.
- Use Case: Useful for identifying outliers or inconsistencies in specific columns.
While these manual techniques can be helpful, they are best suited for smaller datasets or when you need to perform a quick check. For more complex comparisons, consider using dedicated comparison tools or Excel add-ins.
4. Using Excel’s Built-In Features for Comparison
Excel offers several built-in features that can assist in comparing spreadsheets, though they may not be as comprehensive as dedicated comparison tools. Here are some useful Excel features:
4.1. Go To Special
- Method: Use the “Go To Special” feature to select cells with differences.
- Select the range you want to compare.
- Press
Ctrl+Gto open the “Go To” dialog box. - Click “Special.”
- Choose “Row Differences” or “Column Differences.”
- Click “OK.”
- Pros: Quickly highlights cells with differences within a selected range.
- Cons: Limited to finding differences in the same row or column and doesn’t work across different sheets or files.
- Use Case: Useful for quickly identifying discrepancies in a single row or column.
4.2. Watch Window
- Method: Use the Watch Window to monitor specific cells in different sheets or workbooks.
- Go to Formulas > Watch Window.
- Click “Add Watch.”
- Select the cell you want to monitor and click “Add.”
- Repeat for other cells in different sheets or workbooks.
- Pros: Allows you to monitor cell values in multiple sheets or workbooks simultaneously.
- Cons: Requires manual setup for each cell and is not suitable for comparing large ranges of data.
- Use Case: Useful for monitoring specific cells that are critical for comparison.
4.3. Worksheet Protection
- Method: Compare the protection settings of two worksheets to identify differences in security.
- Go to Review > Protect Sheet.
- Compare the settings for “Protect worksheet” and “Allow users of this worksheet to.”
- Pros: Helps identify differences in worksheet protection settings.
- Cons: Limited to comparing protection settings only.
- Use Case: Useful for ensuring consistent security settings across different versions of a spreadsheet.
4.4. Trace Precedents and Dependents
- Method: Use “Trace Precedents” and “Trace Dependents” to understand formula relationships and identify discrepancies.
- Select a cell with a formula.
- Go to Formulas > Trace Precedents or Trace Dependents.
- Pros: Visualizes the relationships between cells and formulas, helping identify errors or inconsistencies.
- Cons: Can be overwhelming for complex formulas or large datasets.
- Use Case: Useful for auditing formulas and identifying potential errors.
4.5. Inquire Add-In (for Excel 2013 and later)
- Method: Use the Inquire add-in to analyze and compare workbooks.
- Enable the Inquire add-in by going to File > Options > Add-Ins.
- Select “COM Add-ins” and click “Go.”
- Check “Inquire” and click “OK.”
- Use the features in the “Inquire” tab to analyze and compare workbooks.
- Pros: Provides advanced features for analyzing workbook structure, formula relationships, and potential errors.
- Cons: Requires Excel 2013 or later and manual activation of the add-in.
- Use Case: Ideal for in-depth analysis of workbook structure and formula dependencies.
While these built-in features can be helpful, they have limitations and may not provide the comprehensive comparison capabilities offered by dedicated tools or add-ins.
5. Dedicated Spreadsheet Comparison Tools
For more comprehensive and efficient spreadsheet comparison, dedicated tools offer advanced features that streamline the process. Here are some popular options:
5.1. Microsoft Spreadsheet Compare
- Overview: Part of the Office Professional Plus suite, this tool allows you to compare two Excel files and generate a detailed report of differences.
- Features:
- Highlights differences in formulas, values, formats, and cell comments.
- Provides a side-by-side comparison view.
- Generates a report summarizing the changes.
- Pros: Seamless integration with Excel, detailed comparison reports.
- Cons: Requires Office Professional Plus, not available in standard Office versions.
- Use Case: Ideal for users who need a comprehensive comparison tool integrated with Excel.
5.2. Araxis Excel Compare
- Overview: A powerful comparison tool designed specifically for Excel files.
- Features:
- Compares formulas, values, and formatting.
- Highlights differences with color-coding.
- Supports comparing multiple sheets at once.
- Provides detailed reports and change tracking.
- Pros: Advanced comparison features, detailed reporting, user-friendly interface.
- Cons: Paid software, may be overkill for basic comparison needs.
- Use Case: Suitable for professionals who require advanced comparison capabilities and detailed change tracking.
5.3. XL Comparator
- Overview: A free tool for comparing Excel files, highlighting differences in data and formulas.
- Features:
- Compares data, formulas, and formatting.
- Highlights differences with color-coding.
- Provides a summary of changes.
- Pros: Free, easy to use, highlights differences effectively.
- Cons: Limited features compared to paid tools.
- Use Case: Ideal for users who need a simple and free tool for basic spreadsheet comparison.
5.4. Beyond Compare
- Overview: A versatile comparison tool that supports various file types, including Excel spreadsheets.
- Features:
- Compares files and folders.
- Highlights differences with color-coding.
- Supports merging changes.
- Provides detailed reports.
- Pros: Supports multiple file types, advanced comparison features, merging capabilities.
- Cons: Paid software, may be more than needed for simple spreadsheet comparison.
- Use Case: Suitable for users who need to compare various file types in addition to Excel spreadsheets.
5.5. DiffEngineX
- Overview: A specialized tool for comparing and merging Excel files, with a focus on accuracy and efficiency.
- Features:
- Compares data, formulas, and formatting.
- Highlights differences with color-coding.
- Supports merging changes between files.
- Provides detailed reports and audit trails.
- Pros: Advanced merging capabilities, detailed audit trails, high accuracy.
- Cons: Paid software, may be complex for basic users.
- Use Case: Ideal for organizations that require precise merging of Excel files and detailed audit trails for compliance purposes.
Choosing the right spreadsheet comparison tool depends on your specific needs and budget. Free tools like XL Comparator may suffice for basic comparison tasks, while paid tools like Araxis Excel Compare and DiffEngineX offer advanced features for more complex scenarios.
6. Step-by-Step Guide to Comparing Spreadsheets with Microsoft Spreadsheet Compare
Microsoft Spreadsheet Compare is a powerful tool included in Office Professional Plus that allows you to compare two Excel files and generate a detailed report of differences. Here’s a step-by-step guide on how to use it:
Step 1: Open Spreadsheet Compare
- Locate the Tool: On the Start screen, find and click Spreadsheet Compare. If you don’t see it, type “Spreadsheet Compare” in the search bar and select it from the results.
Step 2: Select Files to Compare
- Click Compare Files: In the Spreadsheet Compare window, click Home > Compare Files.
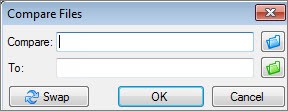
- Choose Earlier Version: In the Compare Files dialog box, click the blue folder icon next to the Compare box. Browse to the location of the earlier version of your workbook. You can select files from your computer, network, or even enter a web address.
- Choose Later Version: Click the green folder icon next to the To box. Browse to the location of the workbook you want to compare to the earlier version, then click OK.
Step 3: Configure Comparison Options
- Select Options: In the left pane, choose the options you want to include in the comparison results. You can check or uncheck options like Formulas, Macros, Cell Format, or simply Select All.
Step 4: Run the Comparison
- Click OK: Once you’ve selected your options, click OK to start the comparison.
Step 5: Understand the Results
- Two-Pane Grid: The results are displayed in a two-pane grid. The workbook on the left corresponds to the “Compare” (older) file, and the workbook on the right corresponds to the “To” (newer) file.
- Details Pane: A pane below the grids provides detailed information about the changes.
- Color-Coding: Changes are highlighted by color, indicating the type of difference. For example, cells with “entered values” (non-formula cells) are often formatted with a green fill.
- Legend: The lower-left pane provides a legend explaining what the colors mean.
Step 6: Analyze the Results
- Navigate Worksheets: If there are multiple worksheets, use the forward and back buttons on the horizontal scroll bar to navigate through them.
- Resize Cells: If the cells are too narrow to show the contents, click Resize Cells to Fit.
Step 7: Handle Password-Protected Files
- Enter Password: If you encounter an “Unable to open workbook” message, it likely means one of the workbooks is password protected. Click OK and enter the workbook’s password when prompted.
By following these steps, you can effectively use Microsoft Spreadsheet Compare to identify and analyze differences between two Excel files, ensuring data accuracy and integrity.
7. Tips for Accurate Spreadsheet Comparison
To ensure accurate and meaningful results when comparing spreadsheets, consider these tips:
- Standardize Data:
- Ensure data is consistently formatted, including date formats, number formats, and text case. Use Excel’s formatting tools to standardize data before comparison.
- Remove Irrelevant Formatting:
- Clear unnecessary formatting that may obscure meaningful differences. Use “Clear Formats” to remove non-essential formatting.
- Verify Data Types:
- Ensure that data types are consistent across spreadsheets. Comparing numbers as text can lead to inaccurate results.
- Check for Hidden Data:
- Unhide all rows and columns to ensure no data is overlooked. Hidden data can skew comparison results.
- Use Consistent Formulas:
- Ensure that formulas are consistent across spreadsheets. Use the same formulas and references to avoid discrepancies.
- Validate Data Entry:
- Check for typos, errors, and inconsistencies in data entry. Use data validation rules to enforce consistency.
- Document Changes:
- Keep a log of changes made to the spreadsheets, including dates, authors, and descriptions of the modifications.
- Use Named Ranges:
- Define named ranges to make formulas and comparisons more readable and maintainable.
- Avoid Volatile Functions:
- Minimize the use of volatile functions like
NOW()andTODAY(), as they can change with each calculation and skew comparison results.
- Minimize the use of volatile functions like
- Test Comparison Methods:
- Test different comparison methods and tools to find the one that best suits your needs. Experiment with manual techniques, built-in features, and dedicated tools to determine the most accurate and efficient approach.
By following these tips, you can improve the accuracy and reliability of your spreadsheet comparisons, ensuring that you identify and address meaningful differences.
8. Addressing Common Issues in Spreadsheet Comparison
When comparing spreadsheets, you may encounter several common issues that can affect the accuracy and efficiency of the process. Here are some tips for addressing these challenges:
- Inconsistent Data Types:
- Issue: Comparing numbers stored as text can lead to inaccurate results.
- Solution: Use Excel’s
VALUE()function to convert text to numbers before comparison. For example,=VALUE(A1)=VALUE(Sheet2!A1).
- Formatting Differences:
- Issue: Formatting differences can obscure meaningful data discrepancies.
- Solution: Remove irrelevant formatting using “Clear Formats” (Home > Editing > Clear > Clear Formats) before comparison.
- Hidden Rows and Columns:
- Issue: Hidden rows and columns can cause data to be overlooked during comparison.
- Solution: Unhide all rows and columns by selecting the entire sheet and right-clicking, then choosing “Unhide.”
- Formula Errors:
- Issue: Errors in formulas can lead to incorrect comparison results.
- Solution: Use Excel’s error checking tools (Formulas > Error Checking) to identify and correct formula errors before comparison.
- Case Sensitivity:
- Issue: Text comparisons may be case-sensitive, leading to mismatches for identical text with different capitalization.
- Solution: Use the
UPPER()orLOWER()functions to convert text to a consistent case before comparison. For example,=UPPER(A1)=UPPER(Sheet2!A1).
- Blank Cells:
- Issue: Blank cells can cause issues when comparing data ranges.
- Solution: Use the
IF()function to handle blank cells. For example,=IF(ISBLANK(A1),"",A1)=IF(ISBLANK(Sheet2!A1),"",Sheet2!A1).
- Large Datasets:
- Issue: Comparing large datasets can be slow and resource-intensive.
- Solution: Use dedicated comparison tools or Excel add-ins designed for handling large datasets efficiently.
- Password-Protected Files:
- Issue: Password protection can prevent comparison tools from accessing the data.
- Solution: Remove or note any password protection on the spreadsheets before comparison.
- Volatile Functions:
- Issue: Volatile functions like
NOW()andTODAY()can change with each calculation, skewing comparison results. - Solution: Avoid using volatile functions or replace them with static values before comparison.
- Issue: Volatile functions like
- Circular References:
- Issue: Circular references can cause inaccurate calculations and comparison results.
- Solution: Use Excel’s circular reference detection tools (Formulas > Error Checking > Circular References) to identify and resolve circular references.
By addressing these common issues, you can improve the accuracy and reliability of your spreadsheet comparisons, ensuring that you identify and resolve meaningful differences.
9. Advanced Techniques for Excel Spreadsheet Comparison
For users who need more sophisticated comparison methods, here are some advanced techniques to consider:
9.1. Using VBA for Custom Comparison
- Method: Write custom VBA (Visual Basic for Applications) code to compare spreadsheets based on specific criteria.
- Benefits:
- Customization: Tailor the comparison to your exact needs, including specific columns, criteria, and output formats.
- Automation: Automate the comparison process for repetitive tasks.
- Flexibility: Handle complex data structures and comparisons that are not possible with standard Excel features.
- Example Code:
Sub CompareSheets()
    Dim ws1 As Worksheet, ws2 As Worksheet
    Dim lastRow As Long, i As Long
    Dim diffCount As Long

    ' Set the worksheets to compare
    Set ws1 = ThisWorkbook.Sheets("Sheet1")
    Set ws2 = ThisWorkbook.Sheets("Sheet2")

    ' Find the last row with data in Sheet1
    lastRow = ws1.Cells(Rows.Count, "A").End(xlUp).Row

    ' Initialize the difference counter
    diffCount = 0

    ' Loop through each row and compare values in column A
    For i = 1 To lastRow
        If ws1.Cells(i, "A").Value <> ws2.Cells(i, "A").Value Then
            Debug.Print "Difference found in row " & i & ": " & _
                        ws1.Cells(i, "A").Value & " vs. " & ws2.Cells(i, "A").Value
            diffCount = diffCount + 1
        End If
    Next i

    ' Display the total number of differences
    MsgBox "Total differences found: " & diffCount
End Sub
- Use Case: Useful for complex comparisons that require custom logic and automation.
9.2. Power Query for Data Transformation and Comparison
- Method: Use Power Query (Get & Transform Data) to clean, transform, and compare data from multiple spreadsheets.
- Benefits:
- Data Cleaning: Clean and transform data to ensure consistency before comparison.
- Data Merging: Merge data from multiple sources into a single table for comparison.
- Automated Updates: Automatically update the comparison when the source data changes.
- Steps:
- Load data from both spreadsheets into Power Query.
- Clean and transform the data as needed.
- Merge the queries based on a common column.
- Compare the merged data to identify differences.
- Use Case: Ideal for comparing data from multiple sources that require cleaning and transformation.
9.3. Using Array Formulas for Complex Comparisons
- Method: Use array formulas to perform complex comparisons across multiple rows or columns.
- Benefits:
- Flexibility: Perform complex comparisons that are not possible with standard Excel formulas.
- Efficiency: Perform comparisons across multiple rows or columns with a single formula.
- Example Formula:
=SUM(--(Sheet1!A1:A10=Sheet2!A1:A10))This formula compares the values in range A1:A10 of Sheet1 with the values in range A1:A10 of Sheet2 and returns the number of matching values.
- Use Case: Useful for complex comparisons that require advanced formula techniques.
9.4. Using Excel Add-Ins for Advanced Comparison
- Method: Use specialized Excel add-ins to enhance your comparison capabilities.
- Benefits:
- Advanced Features: Access advanced comparison features that are not available in standard Excel.
- Ease of Use: Simplify complex comparisons with user-friendly interfaces and automated processes.
- Example Add-Ins:
- Araxis Excel Compare: Provides advanced comparison features and detailed reporting.
- DiffEngineX: Offers specialized tools for comparing and merging Excel files.
- Use Case: Ideal for users who need advanced comparison features and simplified processes.
By using these advanced techniques, you can enhance your Excel spreadsheet comparison capabilities and tackle more complex comparison scenarios with greater efficiency and accuracy.
10. Choosing the Right Approach for Your Needs
Selecting the right approach for comparing Excel spreadsheets depends on several factors, including the size and complexity of the data, the frequency of comparisons, and your specific needs. Here’s a guide to help you choose the best method:
- Small Datasets and Simple Comparisons:
- Method: Manual comparison techniques like side-by-side comparison, conditional formatting, or simple formulas.
- Pros: Simple, quick, and requires no additional tools.
- Cons: Time-consuming and prone to error for larger datasets.
- Use Case: Ideal for small datasets or when you need to perform a quick check.
- Medium-Sized Datasets and Basic Comparisons:
- Method: Excel’s built-in features like “Go To Special,” Watch Window, or Inquire Add-in.
- Pros: Provides basic comparison capabilities without the need for additional tools.
- Cons: Limited features compared to dedicated tools.
- Use Case: Suitable for medium-sized datasets and basic comparison needs.
- Large Datasets and Complex Comparisons:
- Method: Dedicated spreadsheet comparison tools like Microsoft Spreadsheet Compare, Araxis Excel Compare, or DiffEngineX.
- Pros: Provides advanced comparison features, detailed reporting, and efficient handling of large datasets.
- Cons: May require a paid subscription.
- Use Case: Ideal for large datasets, complex comparisons, and professional use.
- Customized Comparisons and Automation:
- Method: VBA for custom comparison or Power Query for data transformation and comparison.
- Pros: Highly customizable, automated, and flexible for handling complex data structures.
- Cons: Requires technical skills and knowledge of VBA or Power Query.
- Use Case: Suitable for complex comparisons that require custom logic and automation.
- Regular and Frequent Comparisons:
- Method: Dedicated spreadsheet comparison tools with automated features or custom VBA scripts.
- Pros: Saves time and reduces the risk of human error.
- Cons: Requires initial setup and may require a paid subscription.
- Use Case: Ideal for scenarios where spreadsheets need to be compared regularly and frequently.
- Collaboration and Version Control:
- Method: Cloud-based spreadsheet tools like Google Sheets with built-in version history or dedicated collaboration tools.
- Pros: Facilitates collaboration and provides detailed version history for tracking changes.
- Cons: May require a subscription and internet access.
- Use Case: Suitable for collaborative projects and version control.
By considering these factors, you can choose the right approach for comparing Excel spreadsheets based on your specific needs and resources.
At COMPARE.EDU.VN, we understand the importance of accurate data comparison. Whether you’re a student, professional, or business owner, our platform provides the resources and guidance you need to make informed decisions. Visit COMPARE.EDU.VN to explore our comprehensive comparison tools and find the perfect solution for your needs.
Need help choosing the right comparison method? Contact us at:
Address: 333 Comparison Plaza, Choice City, CA 90210, United States
WhatsApp: +1 (626) 555-9090
Website: compare.edu.vn
FAQ: Comparing Excel Spreadsheets
1. What is the best way to compare two Excel spreadsheets?
The best way depends on the size and complexity of the data. For small datasets, manual techniques like side-by-side comparison or conditional formatting may suffice. For larger datasets, dedicated comparison tools like Microsoft Spreadsheet Compare or Araxis Excel Compare are more efficient.
2. How can I highlight differences between two Excel sheets?
You can use conditional formatting to highlight differences. Select the range you want to compare, go to Home > Conditional Formatting > New Rule, and use a formula to determine which cells to format.
3. Is there a free tool to compare Excel files?
Yes, XL Comparator is a free tool for comparing Excel files, highlighting differences in data and formulas.
4. How do I use Microsoft Spreadsheet Compare?
Open Spreadsheet Compare, select the two files you want to compare, choose the comparison options, and click OK. The results will be displayed in a two-pane grid with color-coded differences.
5. Can I compare Excel files with different structures?
Comparing files with different structures can be challenging. It’s best to standardize the data and structure before comparison. Power Query can be used to transform data for comparison.
6. How can I compare Excel files with macros?
Microsoft Spreadsheet Compare allows you to compare macros. Select the Macros option in the comparison settings to include macros in the comparison results.
7. How do I compare two versions of the same Excel file?
Use Microsoft Spreadsheet Compare or a dedicated comparison tool to compare the two versions. These tools highlight differences in data, formulas, and formatting.
8. Can I compare Excel files online?
Yes, several online tools can compare Excel files, such as DiffChecker and GroupDocs Comparison.
9. How do I compare Excel files with password protection?
You need to remove or enter the password to compare password-protected Excel files. Comparison tools may prompt you for the password or be unable to open the files.
10. What is the Inquire add-in in Excel?
The Inquire add-in is a built-in Excel tool for analyzing and comparing workbooks. It helps you understand workbook structure, formula relationships, and potential errors. To enable it, go to File > Options > Add-Ins, select “COM Add-ins,” and check “Inquire.”