Excel does have capabilities to compare files, and at compare.edu.vn, we understand the need for accurate comparisons and streamlined decision-making process in data management, so we’re here to show you what Excel can do. You can use Microsoft Spreadsheet Compare to run a report on the differences and problems it finds. Explore other Excel tools and third-party solutions for thorough data analysis.
1. What Is Microsoft Spreadsheet Compare?
Microsoft Spreadsheet Compare is a tool designed to identify and report differences between two Excel workbooks or two versions of the same workbook. It helps users find potential problems, such as manually-entered (instead of calculated) totals or broken formulas. This tool generates a detailed report highlighting the discrepancies it finds.
- Spreadsheet Compare is included with Office Professional Plus 2013, Office Professional Plus 2016, Office Professional Plus 2019, or Microsoft 365 Apps for enterprise.
1.1 Who Can Benefit from Using Spreadsheet Compare?
Spreadsheet Compare is particularly useful for:
- Financial Analysts: Ensuring accuracy in financial models and reports.
- Data Managers: Verifying data integrity across different versions of datasets.
- Auditors: Identifying discrepancies in spreadsheets for compliance purposes.
- Project Managers: Tracking changes in project-related spreadsheets over time.
- Anyone who works with spreadsheets and needs to see differences between multiple versions of the same file.
1.2 Key Features of Spreadsheet Compare
- Side-by-Side Comparison: Displays workbooks in a two-pane grid for easy comparison.
- Highlighting Differences: Uses color-coding to highlight different types of changes (e.g., formulas, values, formats).
- Detailed Reporting: Provides a detailed report of all identified differences in a separate pane.
- Option Selection: Allows users to select specific elements to compare, such as formulas, macros, or cell formats.
- Password Protection Handling: Handles password-protected workbooks by prompting users to enter passwords.
1.3 How to Access Spreadsheet Compare
- Via the Start Menu:
- Click on the Start screen.
- Look for Spreadsheet Compare. If you don’t see it, type Spreadsheet Compare and select the option when it appears.
- Companion Program:
- Along with Spreadsheet Compare, there’s also a companion program for Access called Microsoft Database Compare. This also requires Office Professional Plus versions or Microsoft 365 Apps for enterprise.
2. How to Compare Two Excel Workbooks Using Spreadsheet Compare
To effectively compare two Excel workbooks using Microsoft Spreadsheet Compare, follow these steps:
2.1 Step-by-Step Instructions
- Open Spreadsheet Compare: Launch the application as described above.
- Select Files to Compare:
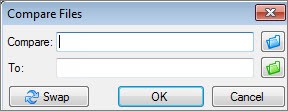
- Click Home > Compare Files. The Compare Files dialog box will appear.
- Click the blue folder icon next to the Compare box to select the earlier version of your workbook. You can browse files on your computer, network, or even enter a web address where the workbooks are saved.
- Click the green folder icon next to the To box to select the workbook you want to compare against the earlier version, then click OK.
- Tip: You can compare files with the same name if they are in different folders.
- Choose Comparison Options:
- In the left pane, select the options you want to include in the comparison results by checking or unchecking the boxes. Options include Formulas, Macros, and Cell Format. To compare everything, select Select All.
- Run the Comparison:
- Click OK to start the comparison.
- If you receive an “Unable to open workbook” message, one of the workbooks might be password protected. Click OK and enter the workbook’s password.
- Note: For more information on how passwords and Spreadsheet Compare work together, refer to Microsoft’s documentation.
2.2 Understanding the Comparison Results
The results of the comparison are displayed in a two-pane grid, with the “Compare” file (typically the older version) on the left and the “To” file (typically the newer version) on the right. A details pane appears below the grids. Changes are highlighted by color, indicating the type of difference.
2.3 Interpreting Color-Coded Highlights
- Worksheet Comparison: Each worksheet in one file is compared to the corresponding worksheet in the other file. If there are multiple worksheets, use the forward and back buttons on the horizontal scroll bar to navigate.
- Note: Hidden worksheets are also compared and displayed in the results.
- Cell Highlighting: Differences are indicated by cell fill color or text font color.
- For example, cells with entered values (non-formula cells) might have a green fill color in the side-by-side grid and a green font in the results list. The legend in the lower-left pane explains what each color means.
- For example, cells with entered values (non-formula cells) might have a green fill color in the side-by-side grid and a green font in the results list. The legend in the lower-left pane explains what each color means.
- Example Scenario:
- In the example provided, the results for Q4 in the earlier version were not final. The latest version contains the final numbers in the E column for Q4.
- Cells E2:E5 in both versions are highlighted with a green fill, indicating that an entered value has changed.
- The calculated results in the YTD column (cells F2:F4 and E6:F6) have a blue-green fill, indicating that the calculated value has changed.
- In cell F5, the calculated result changed, but the more significant issue is that the formula in the earlier version was incorrect (it only summed B5:D5, omitting the value for Q4). The updated workbook corrected the formula in F5 to =SUM(B5:E5).
- Cell Size Adjustment:
- If cells are too narrow to display the contents, click Resize Cells to Fit.
3. What Is The Excel Inquire Add-In?
The Excel Inquire add-in is a tool available in Excel 2013 and later versions, designed to help users analyze, understand, and improve their Excel workbooks. It provides features for auditing, analyzing workbook structure, and identifying potential issues, making it an invaluable tool for maintaining data integrity and ensuring accuracy.
3.1 How to Enable the Inquire Add-In
If you don’t see the Inquire tab in Excel, follow these steps to enable it:
- Go to File > Options > Add-ins.
- In the Manage box, select COM Add-ins, and then click Go.
- In the COM Add-ins dialog box, make sure the Inquire add-in box is checked, and then click OK.
Once enabled, the Inquire tab will appear in the Excel ribbon, providing access to its various features.
3.2 Key Features of the Inquire Add-In
- Workbook Analysis:
- The Inquire add-in allows you to analyze the structure and dependencies within your Excel workbook. This includes identifying relationships between cells, worksheets, and even other workbooks.
- Cell Relationships:
- You can visualize the relationships between cells to understand how data flows through your workbook. This feature is useful for tracing errors and ensuring that formulas are working correctly.
- Worksheet Comparison (via the Compare Files command):
- If you have two workbooks open in Excel that you want to compare, you can run Spreadsheet Compare by using the Compare Files command. This allows you to quickly identify differences between two versions of a workbook.
- Clean Excess Formatting:
- The Inquire add-in can help you remove excess formatting from a worksheet, which can reduce file size and improve performance. This is particularly useful for large, complex spreadsheets.
3.3 Benefits of Using the Inquire Add-In
- Enhanced Data Integrity:
- By analyzing workbook structure and cell relationships, the Inquire add-in helps ensure that your data is accurate and consistent.
- Improved Error Detection:
- The ability to trace cell dependencies makes it easier to identify and correct errors in formulas and calculations.
- Streamlined Workbook Management:
- Features like cleaning excess formatting help you manage and optimize your Excel workbooks more effectively.
- Better Collaboration:
- By providing a clear understanding of workbook structure, the Inquire add-in facilitates better collaboration among team members working on the same spreadsheet.
4. Understanding The Results Of An Excel File Comparison
Understanding the results of an Excel file comparison is crucial for identifying discrepancies and ensuring data integrity. The comparison process, whether using Microsoft Spreadsheet Compare or the Inquire add-in, highlights differences between two versions of a workbook. Here’s how to interpret these results effectively.
4.1 Key Elements of Comparison Results
- Side-by-Side Grid:
- The comparison results are typically displayed in a two-pane grid. The workbook on the left corresponds to the “Compare” file (usually the older version), while the workbook on the right corresponds to the “To” file (usually the newer version).
- Worksheet Navigation:
- Each worksheet in one file is compared to the corresponding worksheet in the other file. If there are multiple worksheets, you can navigate between them using the forward and back buttons on the horizontal scroll bar.
- Color-Coded Highlighting:
- Differences between the files are highlighted using different colors. The type of change (e.g., formula, value, format) determines the color used.
4.2 Interpreting Color Codes
The color codes used in the comparison results provide valuable information about the types of changes that have been made. Here’s a breakdown of common color codes and their meanings:
- Green Fill or Font:
- Indicates that an entered value (a non-formula cell) has changed. This means the actual data in the cell has been modified.
- Blue-Green Fill:
- Indicates that a calculated value has changed. This means the formula in the cell has remained the same, but the result of the calculation has changed due to changes in the input values.
- Other Colors:
- Depending on the comparison tool and settings, other colors may be used to indicate different types of changes, such as changes in formulas, cell formatting, or structural differences (e.g., added or deleted rows/columns). Always refer to the legend provided with the comparison results to understand the specific meanings of each color.
4.3 Analyzing Specific Changes
- Identifying Changed Values:
- When you see a cell with a green fill, it means the value in that cell has been directly modified. Check the corresponding cell in the other version of the workbook to see the original value and understand the change.
- Investigating Formula Changes:
- If a cell has a blue-green fill, it indicates that the calculated value has changed. This could be due to changes in the input values or modifications to the formula itself. To investigate, examine the formula in both versions of the workbook to see if it has been altered.
- Checking for Formula Errors:
- Sometimes, a change in a calculated value can reveal an underlying issue with the formula. For example, a formula might be referencing the wrong cells or omitting a necessary range. By comparing the formulas in both versions, you can identify and correct these errors.
4.4 Example Scenario
Consider a scenario where you are comparing two versions of a sales report. In the earlier version, the Q4 sales numbers were not final. The updated version contains the final numbers in the E column for Q4.
- Cells E2:E5 in both versions have a green fill: This indicates that the entered values in these cells have changed, reflecting the updated Q4 sales figures.
- The calculated results in the YTD column (cells F2:F4 and E6:F6) have a blue-green fill: This means the calculated values in these cells have changed because the input values (Q4 sales) have been updated.
- Cell F5 also changed, and the formula in the earlier version was incorrect (it only summed B5:D5, omitting the value for Q4): The updated workbook corrected the formula in F5 to =SUM(B5:E5). This highlights how the comparison process can reveal and correct errors in formulas.
4.5 Additional Tips
- Use the Legend:
- Always refer to the legend provided with the comparison results to understand the meaning of each color code.
- Resize Cells to Fit:
- If the cells are too narrow to display the contents, click Resize Cells to Fit to see the full data.
- Review Hidden Worksheets:
- Remember that hidden worksheets are also compared and displayed in the results. Make sure to review these sheets as well to identify any changes.
- Document Your Findings:
- Keep a record of the changes you identify and the actions you take to address them. This will help you maintain a clear audit trail and ensure data integrity.
5. How to Use the Compare Files Command in Excel
The Compare Files command in Excel, often used in conjunction with the Inquire add-in, allows you to compare two workbooks directly from within Excel. This feature leverages Microsoft Spreadsheet Compare to provide a detailed analysis of the differences between the two files. Here’s how to use this command effectively.
5.1 Prerequisites
- Excel Version: You need to have Excel 2013 or a later version installed.
- Inquire Add-in: The Inquire add-in must be enabled. To enable it, follow these steps:
- Go to File > Options > Add-ins.
- In the Manage box, select COM Add-ins, and then click Go.
- In the COM Add-ins dialog box, make sure the Inquire add-in box is checked, and then click OK.
5.2 Step-by-Step Instructions
- Open the Two Excel Workbooks:
- Start by opening both Excel workbooks that you want to compare. Ensure that both files are accessible and not password-protected unless you have the password.
- Navigate to the Inquire Tab:
- In the Excel ribbon, click on the Inquire tab. If you don’t see the Inquire tab, make sure the add-in is enabled as described above.
- Select the Compare Files Command:
- In the Inquire tab, locate and click the Compare Files command. This will open the Microsoft Spreadsheet Compare application.
- Specify the Files to Compare:
- In the Microsoft Spreadsheet Compare window, you’ll see two boxes labeled Compare and To.
- Click the blue folder icon next to the Compare box to select the earlier version of your workbook. You can browse files on your computer, network, or enter a web address where the workbooks are saved.
- Click the green folder icon next to the To box to select the workbook you want to compare against the earlier version, then click OK.
- Choose Comparison Options:
- In the left pane, select the options you want to include in the comparison results by checking or unchecking the boxes. Options include Formulas, Macros, and Cell Format. To compare everything, select Select All.
- Run the Comparison:
- Click OK to start the comparison.
- If you receive an “Unable to open workbook” message, one of the workbooks might be password protected. Click OK and enter the workbook’s password.
- Analyze the Results:
- The results of the comparison are displayed in a two-pane grid, with the “Compare” file (typically the older version) on the left and the “To” file (typically the newer version) on the right.
- Differences are highlighted by color, indicating the type of change. Refer to the legend in the lower-left pane to understand what each color means.
- Navigate between worksheets using the forward and back buttons on the horizontal scroll bar.
5.3 Benefits of Using the Compare Files Command
- Direct Comparison from Excel:
- The Compare Files command allows you to initiate the comparison process directly from within Excel, streamlining your workflow.
- Leverages Spreadsheet Compare:
- By using Microsoft Spreadsheet Compare, you benefit from a dedicated tool designed for identifying and reporting differences between Excel files.
- Detailed Analysis:
- The comparison results provide a detailed analysis of changes, including differences in values, formulas, formatting, and more.
- Improved Accuracy:
- By identifying discrepancies, the Compare Files command helps ensure the accuracy and integrity of your data.
5.4 Tips for Effective Comparison
- Ensure Files are Accessible:
- Make sure that both Excel workbooks are accessible and not locked or in use by another user.
- Close Unnecessary Files:
- Close any unnecessary Excel files to avoid confusion and improve performance.
- Review Hidden Worksheets:
- Remember that hidden worksheets are also compared and displayed in the results. Make sure to review these sheets as well to identify any changes.
- Document Your Findings:
- Keep a record of the changes you identify and the actions you take to address them. This will help you maintain a clear audit trail and ensure data integrity.
6. What Are The Alternatives To Excel Compare Function?
While Excel provides built-in features like Spreadsheet Compare and the Inquire add-in to compare files, several alternative tools offer enhanced functionalities and cater to different user needs. Here are some notable alternatives to Excel’s compare function:
6.1 Third-Party Excel Comparison Tools
- Araxis Merge:
- Overview: Araxis Merge is a professional-grade comparison tool that supports Excel files, text files, and even images. It provides a visual interface to compare and merge differences between files.
- Key Features:
- Side-by-side comparison with color-coded highlighting.
- Automatic merging of non-conflicting changes.
- Three-way comparison to merge changes from multiple sources.
- Integration with version control systems like Git, Subversion, and Mercurial.
- Benefits: Araxis Merge is ideal for developers and data analysts who need a robust tool for managing complex changes.
- Beyond Compare:
- Overview: Beyond Compare is a versatile comparison tool that handles various file types, including Excel spreadsheets, text files, images, and binary files. It offers advanced features for synchronizing files and folders.
- Key Features:
- Side-by-side comparison with detailed highlighting.
- Automatic merging of changes.
- Folder comparison to identify differences in directory structures.
- Integration with FTP and cloud storage services.
- Benefits: Beyond Compare is suitable for both personal and professional use, providing a comprehensive solution for file comparison and synchronization.
- Diffchecker:
- Overview: Diffchecker is a simple, web-based tool that allows you to compare text and code snippets quickly. While it doesn’t directly support Excel files, you can copy and paste data from Excel into Diffchecker for comparison.
- Key Features:
- Web-based interface, accessible from any device.
- Side-by-side comparison with color-coded highlighting.
- Support for various text formats and programming languages.
- Option to share comparison results with others.
- Benefits: Diffchecker is useful for quick, on-the-go comparisons of Excel data, especially when you don’t have access to Excel or other desktop tools.
- Draftable:
- Overview: Draftable is a document comparison tool designed for comparing PDF, Word, and Excel files. It provides a clean, intuitive interface for identifying changes in documents.
- Key Features:
- Side-by-side comparison with detailed highlighting.
- Support for PDF, Word, and Excel files.
- Automatic detection of changes in text, formatting, and layout.
- Option to generate comparison reports.
- Benefits: Draftable is ideal for professionals who need to compare documents across different formats, ensuring accuracy and compliance.
- iWork Numbers:
- Overview: If you’re working in a Mac environment, iWork Numbers offers a built-in feature to compare spreadsheets. It’s a part of the iWork suite developed by Apple.
- Key Features:
- User-friendly interface.
- Direct comparison of spreadsheet data.
- Integration with other iWork apps like Pages and Keynote.
- Benefits: Numbers is a great alternative for Mac users who want a simple, integrated solution for spreadsheet comparison.
6.2 Online Comparison Tools
- Google Sheets:
- Overview: Google Sheets, part of Google Workspace, offers real-time collaboration and version history, making it easy to track changes in spreadsheets. While it doesn’t have a dedicated “compare” feature, you can use version history to view and revert to previous versions.
- Key Features:
- Real-time collaboration with multiple users.
- Version history to track changes over time.
- Integration with other Google Workspace apps like Docs and Drive.
- Benefits: Google Sheets is ideal for teams working on shared spreadsheets, providing a collaborative environment and easy access to version history.
- Zoho Sheet:
- Overview: Zoho Sheet is an online spreadsheet application that offers features similar to Google Sheets, including real-time collaboration and version history.
- Key Features:
- Real-time collaboration with multiple users.
- Version history to track changes.
- Integration with other Zoho apps like CRM and Projects.
- Benefits: Zoho Sheet is a good alternative for users who prefer the Zoho ecosystem and need a collaborative spreadsheet tool with version control.
6.3 Choosing the Right Alternative
When selecting an alternative to Excel’s compare function, consider the following factors:
- File Types: Ensure the tool supports the file types you need to compare (e.g., Excel, PDF, Word).
- Features: Look for features that are important to you, such as side-by-side comparison, automatic merging, and integration with other tools.
- Ease of Use: Choose a tool with a user-friendly interface that is easy to learn and use.
- Cost: Consider the cost of the tool and whether it fits your budget. Some tools offer free trials or limited free versions.
7. Common Use Cases For Comparing Excel Files
Comparing Excel files is a common task across various industries and professions. Whether you’re tracking financial data, managing project timelines, or analyzing sales figures, the ability to quickly and accurately identify differences between Excel files is essential. Here are some common use cases for comparing Excel files:
7.1 Financial Analysis
- Budget vs. Actual:
- Financial analysts often compare budget spreadsheets with actual expense spreadsheets to identify variances and areas where spending deviates from the plan.
- Period-over-Period Analysis:
- Comparing financial statements from different periods (e.g., monthly, quarterly, annually) helps track performance trends and identify significant changes in revenue, expenses, and profitability.
- Auditing:
- Auditors use Excel comparison tools to verify the accuracy of financial data and identify discrepancies that may indicate errors or fraud.
- Mergers and Acquisitions (M&A):
- During M&A transactions, comparing financial models and data from different companies is crucial for due diligence and valuation purposes.
7.2 Project Management
- Tracking Project Timelines:
- Project managers compare project schedules from different dates to track progress, identify delays, and assess the impact of changes on project completion dates.
- Resource Allocation:
- Comparing resource allocation spreadsheets helps ensure that resources are being used efficiently and that no resources are over- or under-utilized.
- Change Management:
- When project requirements or scope change, comparing updated project plans with the original plans helps project managers understand the impact of the changes and manage them effectively.
7.3 Sales and Marketing
- Sales Performance Analysis:
- Comparing sales data from different periods, regions, or product lines helps identify trends, measure the effectiveness of sales strategies, and forecast future sales.
- Marketing Campaign Analysis:
- Comparing marketing campaign results with planned targets helps assess the ROI of marketing efforts and identify areas for improvement.
- Customer Relationship Management (CRM):
- Comparing customer data from different sources helps ensure data accuracy and completeness, which is essential for effective customer relationship management.
7.4 Data Management
- Data Validation:
- Comparing data from different sources helps identify inconsistencies and errors, ensuring data quality and reliability.
- Data Migration:
- When migrating data from one system to another, comparing the data in the source and destination systems helps verify that the migration was successful and that no data was lost or corrupted.
- Version Control:
- Comparing different versions of datasets helps track changes over time and ensure that the most up-to-date data is being used.
7.5 Research and Development (R&D)
- Experiment Tracking:
- Comparing experimental data from different trials helps identify trends, validate results, and draw conclusions.
- Data Analysis:
- Researchers compare data from different sources to identify patterns, correlations, and anomalies.
- Reporting:
- Comparing reports from different research projects helps track progress and identify areas for further investigation.
7.6 Human Resources (HR)
- Salary Analysis:
- Comparing salary data across different departments or job titles helps identify pay disparities and ensure fair compensation practices.
- Performance Evaluations:
- Comparing performance evaluations from different periods helps track employee progress and identify areas for improvement.
- Compliance:
- Comparing HR data with regulatory requirements helps ensure compliance with labor laws and regulations.
8. Advanced Tips For Excel File Comparison
To maximize the effectiveness of Excel file comparison, consider these advanced tips that go beyond the basic functionalities:
8.1 Using Conditional Formatting
Conditional formatting can highlight differences directly within Excel, making it easier to spot discrepancies before even using a comparison tool.
- Highlight Unique Values:
- Select the range of cells you want to compare in both spreadsheets.
- Go to Home > Conditional Formatting > Highlight Cells Rules > Duplicate Values.
- Change the dropdown from “Duplicate” to “Unique”.
- Choose a formatting style to highlight the unique values.
- This will highlight cells that are different between the two ranges.
- Highlight Differences Based on Formulas:
- You can use a formula to compare cell values and apply formatting accordingly.
- Select the range of cells in your primary spreadsheet.
- Go to Home > Conditional Formatting > New Rule.
- Select “Use a formula to determine which cells to format”.
- Enter a formula like
=A1<>Sheet2!A1(assuming you are comparing Sheet1 to Sheet2 and starting at cell A1). - Set the desired formatting and click OK.
8.2 Leveraging the VLOOKUP Function
VLOOKUP is a powerful function to compare data across two spreadsheets by searching for values in one sheet and returning corresponding values from another.
- Finding Missing Data:
- In your primary spreadsheet, add a new column.
- Use the
VLOOKUPfunction to search for values from the primary sheet in the secondary sheet. - For example:
=VLOOKUP(A1,Sheet2!A:B,2,FALSE). This searches for the value in A1 of the current sheet within columns A and B of Sheet2 and returns the value from column B if a match is found. - If
VLOOKUPreturns#N/A, the value in the primary sheet is not found in the secondary sheet.
- Comparing Corresponding Values:
- Use
VLOOKUPto retrieve corresponding values and compare them directly. - In a new column, use the formula to fetch the corresponding value and then compare it to the value in the primary sheet.
- For example:
=IF(B1=VLOOKUP(A1,Sheet2!A:B,2,FALSE),"Match","Mismatch").
- Use
8.3 Creating Pivot Tables for Comparison
Pivot tables can summarize and compare data from multiple sources, making it easier to identify differences.
- Consolidating Data:
- If your data is in a consistent format, consolidate it into a single sheet.
- Add a column to indicate the source of the data (e.g., “Version1”, “Version2”).
- Creating the Pivot Table:
- Select your consolidated data.
- Go to Insert > PivotTable.
- Drag the source column to the “Columns” area.
- Drag the categories you want to compare to the “Rows” area.
- Drag the values you want to compare to the “Values” area.
- The pivot table will display the data from each source side-by-side, making it easy to spot differences.
8.4 Using Array Formulas for Complex Comparisons
Array formulas allow you to perform complex calculations and comparisons across multiple cells.
- Comparing Entire Rows or Columns:
- Select a range of empty cells where you want the comparison results to appear.
- Enter the array formula. For example, to compare row 1 in Sheet1 and Sheet2:
={IF(Sheet1!1:1=Sheet2!1:1,"Match","Mismatch")}. - Press
Ctrl + Shift + Enterto enter the formula as an array formula. - This will compare each cell in the row and display “Match” or “Mismatch” accordingly.
- Counting Differences:
- Use an array formula to count the number of differences between two ranges.
- For example:
={SUM(IF(Sheet1!A1:A10<>Sheet2!A1:A10,1,0))}. - Press
Ctrl + Shift + Enterto enter the formula as an array formula. - This will return the number of cells that are different between the two ranges.
8.5 Automating Comparisons with VBA
For repetitive comparison tasks, consider using VBA (Visual Basic for Applications) to automate the process.
- Writing a VBA Script:
- Open the VBA editor by pressing
Alt + F11. - Insert a new module by going to Insert > Module.
- Write a VBA script to compare the two sheets. Here’s a simple example:
- Open the VBA editor by pressing
Sub CompareSheets()
    Dim ws1 As Worksheet, ws2 As Worksheet
    Dim i As Long, lastRow As Long

    Set ws1 = ThisWorkbook.Sheets("Sheet1")
    Set ws2 = ThisWorkbook.Sheets("Sheet2")

    lastRow = ws1.Cells.Find("*", SearchOrder:=xlByRows, SearchDirection:=xlPrevious).Row

    For i = 1 To lastRow
        If ws1.Cells(i, 1).Value <> ws2.Cells(i, 1).Value Then
            Debug.Print "Difference at row " & i
            ' You can add code here to highlight the differences
        End If
    Next i

    MsgBox "Comparison complete. Check the Immediate Window (Ctrl+G) for differences."
End Sub- Run the script by pressing
F5. - The script will compare the values in the first column of Sheet1 and Sheet2 and print the row number where differences are found in the Immediate Window (Ctrl+G).
8.6 Ensuring Data Consistency
- Standardize Data Entry:
- Ensure that data is entered consistently across all spreadsheets. Use data validation rules to enforce standard formats for dates, numbers, and text.
- Use Consistent Formulas:
- Ensure that formulas are consistent across all spreadsheets. Use named ranges to make formulas more readable and less prone to errors.
- Regularly Audit Data:
- Schedule regular audits of your data to identify and correct any inconsistencies or errors. Use Excel’s built-in auditing tools to trace dependencies and identify potential problems.
9. FAQ About Excel Compare Function
Here are some frequently asked questions about the Excel compare function, along with detailed answers to help you better understand how to compare Excel files effectively:
9.1 Does Excel have a built-in compare tool?
Yes, Excel includes a built-in compare tool called Microsoft Spreadsheet Compare. This tool is available with Office Professional Plus 2013, Office Professional Plus 2016, Office Professional Plus 2019, or Microsoft 365 Apps for enterprise. It allows you to compare two Excel workbooks and identify differences in data, formulas, and formatting.
9.2 How do I access the compare function in Excel?
To access the compare function in Excel, you need to open the Microsoft Spreadsheet Compare application, which is separate from Excel. You can find it by:
- Clicking on the Start screen and searching for Spreadsheet Compare.
- Typing Spreadsheet Compare in the search bar and selecting the application.
Once opened, you can select the two Excel files you want to compare.
9.3 Can I compare two Excel files with different names?
Yes, you can compare two Excel files with different names. In the Spreadsheet Compare tool, you can select the files you want to compare, regardless of their names. The tool compares the content of the files, not their names.
9.4 Can I compare two worksheets within the same Excel file?
Microsoft Spreadsheet Compare is designed to compare two separate Excel files. To compare two worksheets within the same Excel file, you can use alternative methods such as:
- Using conditional formatting to highlight differences.
- Using formulas like VLOOKUP to compare data between the two sheets.
- Copying one of the worksheets to a new Excel file and then using Spreadsheet Compare.
9.5 How does Excel highlight differences in the compare function?
Excel highlights differences in the compare function using color-coded highlighting. Different colors indicate different types of changes, such as changes in values, formulas, or formatting. The legend in the lower-left pane of the Spreadsheet Compare window explains what each color means.
9.6 What types of differences can the Excel compare function identify?
The Excel compare function can identify various types of differences, including:
- Changes in values (numbers, text, dates).
- Changes in formulas.
- Changes in cell formatting (font, color, alignment).
- Differences in macros.
- Structural differences (added or deleted rows/columns).
9.7 Can I use the Excel compare function on password-protected files?
Yes, you can use the Excel compare function on password-protected files. When you select a password-protected file, the tool will prompt you to enter the password to open the file and perform the comparison.