Can You Compare 2 Pivot Tables to gain deeper insights into your data? COMPARE.EDU.VN provides a comprehensive guide to unlock the power of pivot table comparison. This detailed exploration will cover comparing values, identifying differences, and leveraging advanced techniques for data analysis, offering a solution to streamline your data-driven decisions. Discover how to compare pivot table data, analyze variances, and interpret data trends with ease, and find the best data comparison techniques, variance analysis strategies, and data trend interpretation methods.
1. Understanding Pivot Table Comparisons
Pivot tables are powerful tools in data analysis, allowing you to summarize and analyze large datasets. However, sometimes you need to compare two or more pivot tables to gain deeper insights. This section explores why and how to effectively compare pivot tables, revealing underlying trends and patterns that might otherwise remain hidden.
1.1. Why Compare Pivot Tables?
Comparing pivot tables offers several advantages:
- Identifying Trends: By comparing data across different time periods or categories, you can identify trends and patterns that would be difficult to spot otherwise.
- Variance Analysis: Comparing pivot tables allows you to easily identify variances between datasets, highlighting areas of significant change.
- Performance Evaluation: Comparing pivot tables can help evaluate the performance of different products, regions, or teams.
- Decision Making: The insights gained from comparing pivot tables can inform strategic decision-making.
1.2. Key Elements for Effective Comparison
To effectively compare pivot tables, consider these key elements:
- Consistent Data: Ensure that the data used to create the pivot tables is consistent and accurate.
- Matching Fields: The pivot tables should have matching fields for rows, columns, and values.
- Clear Objectives: Define clear objectives for the comparison to focus your analysis.
- Appropriate Metrics: Choose appropriate metrics to compare, such as sums, averages, or percentages.
2. Methods for Comparing Two Pivot Tables
There are several methods for comparing two pivot tables, each with its own strengths and weaknesses. This section explores some of the most effective techniques, including manual comparison, using formulas, and leveraging advanced features.
2.1. Manual Comparison
Manual comparison involves visually inspecting two pivot tables side-by-side and noting any differences.
Pros:
- Simple and straightforward
- Requires no special tools or skills
Cons:
- Time-consuming and tedious
- Prone to errors, especially with large datasets
- Not suitable for complex comparisons
Manual comparison is best suited for small datasets and simple comparisons where accuracy is not critical.
2.2. Using Formulas
You can use formulas in Excel to compare the values in two pivot tables. This method involves referencing the cells in each pivot table and using formulas to calculate the differences.
Steps:
- Create two pivot tables with matching layouts.
- In a separate area of the worksheet, enter formulas to subtract the values in one pivot table from the corresponding values in the other pivot table.
- Use conditional formatting to highlight significant differences.
Example Formula:
=A1-B1 (where A1 and B1 are the corresponding cells in the two pivot tables)
Pros:
- More accurate than manual comparison
- Can handle larger datasets
Cons:
- Requires knowledge of Excel formulas
- Can be time-consuming to set up
- Not suitable for complex comparisons
2.3. Using the “Show Values As” Feature
Excel’s “Show Values As” feature allows you to display values as a percentage of a row, column, or total. This can be useful for comparing the relative proportions of data in two pivot tables.
Steps:
- Create two pivot tables with matching layouts.
- Right-click on a value in one of the pivot tables.
- Select “Show Values As” and choose the appropriate option, such as “% of Row Total” or “% of Column Total”.
- Repeat for the other pivot table.
- Compare the resulting percentages.
Pros:
- Easy to use
- Provides insights into relative proportions
Cons:
- Not suitable for comparing absolute values
- Can be difficult to interpret with complex pivot tables
2.4. Power Query for Data Transformation
Power Query is a powerful data transformation tool in Excel that can be used to combine and reshape data from multiple sources. This can be useful for preparing data for pivot table comparisons.
Steps:
- Import the data for both pivot tables into Power Query.
- Use Power Query to transform the data into a common format.
- Combine the data into a single table.
- Create a pivot table from the combined data.
Pros:
- Can handle complex data transformations
- Automates the data preparation process
Cons:
- Requires knowledge of Power Query
- Can be time-consuming to set up
2.5. Power Pivot for Large Datasets
Power Pivot is an Excel add-in that allows you to analyze large datasets using a data model. This can be useful for comparing pivot tables with millions of rows of data.
Steps:
- Import the data for both pivot tables into Power Pivot.
- Create relationships between the tables.
- Create measures to calculate the metrics you want to compare.
- Create a pivot table from the Power Pivot data model.
Pros:
- Can handle very large datasets
- Provides advanced analytical capabilities
Cons:
- Requires knowledge of Power Pivot
- Can be complex to set up
3. Step-by-Step Guide: Calculating the Difference Between Two Pivot Tables
This section provides a detailed, step-by-step guide on how to calculate the difference between two pivot tables in Excel.
3.1. Preparing the Data
Before you can compare pivot tables, you need to ensure that your data is properly structured.
- Data Source: Verify that your data source is clean and consistent. Remove any errors or inconsistencies.
- Matching Fields: Ensure that both datasets have the same fields for rows, columns, and values.
- Data Types: Make sure that the data types are consistent across both datasets. For example, if one dataset stores dates as text, convert them to date format.
3.2. Creating the Pivot Tables
Next, create the two pivot tables that you want to compare.
- Insert Pivot Table: Select your data and go to
Insert > Pivot Table. - Choose Data Source: Select the table range and choose whether to create the pivot table in a new worksheet or an existing one.
- Layout Pivot Table: Drag the appropriate fields to the Rows, Columns, and Values areas.
Repeat these steps to create the second pivot table. Ensure that both pivot tables have the same layout for accurate comparison.
3.3. Calculating the Difference
Now, calculate the difference between the values in the two pivot tables.
-
Create a Formula: In a separate area of the worksheet, create a formula to subtract the values in one pivot table from the corresponding values in the other pivot table.
=PivotTable1!B5 - PivotTable2!B5Replace
PivotTable1!B5andPivotTable2!B5with the actual cell references of the values you want to compare. -
Copy the Formula: Copy the formula down and across to cover all the values in the pivot tables.
-
Format Results: Format the results as numbers, currency, or percentages, as appropriate.
3.4. Enhancing the Comparison
To enhance the comparison, consider using conditional formatting to highlight significant differences.
- Select Results: Select the range of cells containing the calculated differences.
- Conditional Formatting: Go to
Home > Conditional Formatting. - Choose Rule: Choose a rule, such as “Highlight Cells Rules” or “Color Scales”, to highlight the differences.
- Customize: Customize the rule to suit your needs. For example, you might highlight cells with differences greater than a certain threshold.
4. Advanced Techniques for Pivot Table Comparison
For more sophisticated analysis, consider these advanced techniques.
4.1. Using Calculated Fields
Calculated fields allow you to create new fields in your pivot table based on existing fields. This can be useful for calculating differences or ratios between values.
Steps:
-
Select Pivot Table: Select your pivot table.
-
Calculated Field: Go to
PivotTable Analyze > Fields, Items, & Sets > Calculated Field. -
Enter Formula: Enter a name for the calculated field and enter a formula to calculate the difference between the values.
=Sales2 - Sales1Replace
Sales2andSales1with the names of the fields you want to compare. -
Add to Pivot Table: Add the calculated field to the Values area of the pivot table.
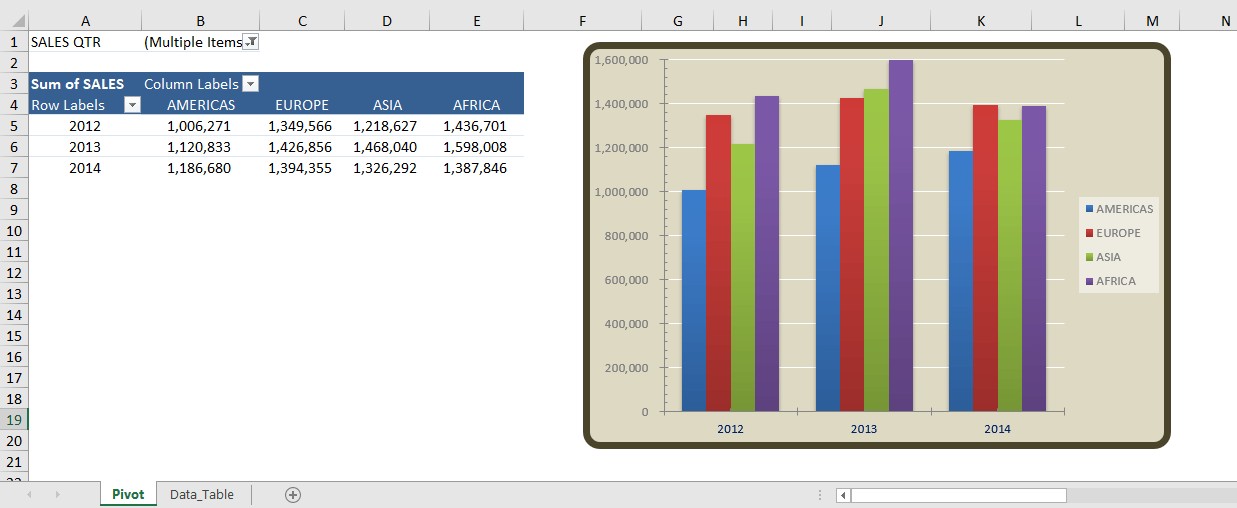
4.2. Creating Pivot Charts
Pivot charts provide a visual representation of your pivot table data, making it easier to spot trends and patterns.
Steps:
- Select Pivot Table: Select your pivot table.
- Insert Pivot Chart: Go to
Insert > PivotChart. - Choose Chart Type: Choose a chart type that is appropriate for your data, such as a column chart, line chart, or pie chart.
- Customize Chart: Customize the chart to suit your needs, such as adding labels, titles, and legends.
4.3. Using Slicers and Timelines
Slicers and timelines allow you to filter your pivot table data interactively. This can be useful for focusing on specific subsets of data.
Steps:
- Select Pivot Table: Select your pivot table.
- Insert Slicer: Go to
PivotTable Analyze > Insert Slicer. - Choose Field: Choose the field you want to use as a slicer.
- Insert Timeline: Go to
PivotTable Analyze > Insert Timeline. - Choose Date Field: Choose the date field you want to use as a timeline.
- Interact: Use the slicers and timelines to filter the data in the pivot table.
4.4. Advanced Filtering Techniques
Filtering is essential for focusing on relevant data.
- Value Filters: Use value filters to show items that meet certain criteria, such as values greater than a certain number.
- Label Filters: Use label filters to show items that match certain text patterns.
- Top 10 Filters: Use top 10 filters to show the top or bottom items based on a specified value.
4.5. Grouping and Ungrouping Data
Grouping allows you to combine related items into a single group.
- Group Dates: Group dates by day, month, quarter, or year.
- Group Numbers: Group numbers into ranges.
- Group Text: Group text items into custom groups.
- Ungroup: Ungroup data to revert to the original data structure.
5. Real-World Applications of Comparing Pivot Tables
Comparing pivot tables has numerous real-world applications across various industries. This section explores some common use cases.
5.1. Financial Analysis
In financial analysis, comparing pivot tables can help identify trends in revenue, expenses, and profits.
- Budget vs. Actual: Compare budgeted amounts to actual amounts to identify variances.
- Year-over-Year Analysis: Compare financial performance from one year to the next.
- Product Profitability: Compare the profitability of different products or services.
5.2. Sales Performance Analysis
Comparing pivot tables can help analyze sales performance by region, product, or salesperson.
- Sales Trends: Identify trends in sales over time.
- Regional Performance: Compare sales performance across different regions.
- Product Performance: Compare the sales performance of different products.
5.3. Marketing Campaign Analysis
Comparing pivot tables can help analyze the effectiveness of marketing campaigns.
- Campaign Performance: Compare the performance of different marketing campaigns.
- Channel Effectiveness: Compare the effectiveness of different marketing channels.
- Customer Acquisition Cost: Compare the cost of acquiring new customers through different channels.
5.4. Operations Management
In operations management, comparing pivot tables can help identify inefficiencies and optimize processes.
- Production Costs: Compare production costs across different factories or production lines.
- Inventory Levels: Compare inventory levels over time to identify trends and optimize inventory management.
- Delivery Times: Compare delivery times across different regions or carriers.
5.5. Human Resources
Comparing pivot tables can help analyze employee demographics, performance, and turnover.
- Employee Demographics: Analyze employee demographics by age, gender, and ethnicity.
- Performance Metrics: Compare employee performance metrics across different departments or teams.
- Turnover Rates: Analyze employee turnover rates to identify trends and potential issues.
6. Common Errors and Troubleshooting
When comparing pivot tables, you may encounter some common errors. This section provides tips for troubleshooting these issues.
6.1. Mismatched Data
Mismatched data is one of the most common causes of errors when comparing pivot tables.
- Data Types: Ensure that the data types are consistent across both datasets.
- Missing Values: Handle missing values appropriately. You may need to replace them with zeros or use a different approach.
- Inconsistent Formats: Ensure that the data formats are consistent across both datasets.
6.2. Incorrect Formulas
Incorrect formulas can lead to inaccurate results.
- Cell References: Double-check the cell references in your formulas.
- Operator Errors: Ensure that you are using the correct operators (+, -, *, /).
- Order of Operations: Be aware of the order of operations and use parentheses to group calculations as needed.
6.3. Pivot Table Settings
Incorrect pivot table settings can also cause errors.
- Filters: Check that you have not applied any filters that are excluding data from the comparison.
- Calculated Fields: Ensure that your calculated fields are defined correctly.
- Value Field Settings: Verify that the value field settings are appropriate for your data.
6.4. Power Query Errors
If you are using Power Query, you may encounter errors during the data transformation process.
- Data Source Errors: Check that your data sources are accessible and that you have the necessary permissions.
- Transformation Errors: Review the transformation steps to identify any errors.
- Load Errors: Ensure that you are loading the data correctly into the pivot table.
6.5. Power Pivot Errors
If you are using Power Pivot, you may encounter errors related to the data model.
- Relationship Errors: Check that the relationships between the tables are defined correctly.
- Measure Errors: Ensure that your measures are defined correctly.
- Calculation Errors: Review the calculations to identify any errors.
7. Best Practices for Pivot Table Comparison
To ensure accurate and efficient pivot table comparisons, follow these best practices.
7.1. Data Preparation
Proper data preparation is essential for accurate comparisons.
- Clean Data: Clean the data to remove any errors or inconsistencies.
- Consistent Data: Ensure that the data is consistent across both datasets.
- Document Data: Document the data to provide context and ensure that everyone understands the data.
7.2. Pivot Table Design
Design your pivot tables carefully to facilitate comparisons.
- Matching Layouts: Ensure that both pivot tables have the same layout.
- Appropriate Fields: Use appropriate fields for rows, columns, and values.
- Clear Labels: Use clear labels to identify the data.
7.3. Formula Usage
Use formulas carefully to calculate differences and ratios.
- Accurate References: Double-check the cell references in your formulas.
- Correct Operators: Use the correct operators (+, -, *, /).
- Order of Operations: Be aware of the order of operations.
7.4. Conditional Formatting
Use conditional formatting to highlight significant differences.
- Appropriate Rules: Choose appropriate rules for highlighting the differences.
- Clear Formatting: Use clear formatting to make the differences easy to see.
- Meaningful Thresholds: Use meaningful thresholds to identify significant differences.
7.5. Documentation
Document your pivot table comparisons to provide context and ensure that everyone understands the analysis.
- Objectives: State the objectives of the comparison.
- Methods: Describe the methods used to compare the pivot tables.
- Results: Present the results of the comparison clearly and concisely.
- Conclusions: Draw conclusions based on the results of the comparison.
8. The Future of Pivot Table Comparisons
The future of pivot table comparisons will likely involve more automation, advanced analytics, and integration with other tools.
8.1. Automation
Automation will make it easier to compare pivot tables and identify trends.
- AI-Powered Analysis: AI algorithms will be used to automatically analyze pivot table data and identify trends.
- Automated Reporting: Automated reporting tools will generate reports that summarize the results of pivot table comparisons.
8.2. Advanced Analytics
Advanced analytics will provide deeper insights into the data.
- Predictive Analytics: Predictive analytics will be used to forecast future trends based on historical pivot table data.
- Machine Learning: Machine learning algorithms will be used to identify patterns and anomalies in pivot table data.
8.3. Integration with Other Tools
Integration with other tools will make it easier to share and collaborate on pivot table comparisons.
- Cloud-Based Platforms: Cloud-based platforms will allow users to share and collaborate on pivot table comparisons in real-time.
- Data Visualization Tools: Integration with data visualization tools will make it easier to create interactive dashboards that display the results of pivot table comparisons.
9. Pivot Table Comparison in Google Sheets
While Excel is a popular choice, Google Sheets also offers robust pivot table functionalities. Let’s explore how to compare pivot tables in Google Sheets.
9.1. Creating Pivot Tables in Google Sheets
The process is similar to Excel.
- Select Data: Highlight your data range.
- Insert Pivot Table: Go to
Data > Pivot table. - Configure: Drag fields to Rows, Columns, and Values.
9.2. Comparing Pivot Tables Using Formulas
Just like Excel, you can use formulas to calculate differences between two pivot tables.
-
Reference Cells: In a separate area, reference cells from both pivot tables.
-
Subtract: Use the subtraction formula to find the difference.
=Sheet1!A1 - Sheet2!A1 -
Apply: Drag the formula to cover all relevant cells.
9.3. Conditional Formatting in Google Sheets
Highlight significant differences.
- Select Range: Select the range with calculated differences.
- Conditional Formatting: Go to
Format > Conditional formatting. - Set Rules: Define rules to highlight cells based on specific criteria.
9.4. Exploring the GETPIVOTDATA Function
Google Sheets offers the GETPIVOTDATA function, which can be handy for extracting specific values from pivot tables.
=GETPIVOTDATA("Sales",A1,"Region","North","Product","A")
This function retrieves the sales for Product A in the North region from the pivot table starting at cell A1.
9.5. Advantages of Google Sheets for Collaboration
Google Sheets shines when it comes to collaboration.
- Real-Time Collaboration: Multiple users can work on the same sheet simultaneously.
- Sharing: Easy sharing options with different permission levels.
- Accessibility: Access your sheets from any device with an internet connection.
10. Case Studies: Successful Pivot Table Comparisons
Let’s look at some case studies to illustrate how pivot table comparisons can be used in practice.
10.1. Retail Sales Analysis
A retail company used pivot table comparisons to analyze sales data across different stores and product categories.
- Objective: Identify underperforming stores and product categories.
- Method: Compared sales data from the current year to the previous year.
- Results: Identified several underperforming stores and product categories.
- Conclusions: Implemented targeted marketing campaigns to boost sales in the underperforming areas.
10.2. Healthcare Operations Analysis
A healthcare organization used pivot table comparisons to analyze patient data and identify areas for improvement.
- Objective: Identify areas for improving patient care and reducing costs.
- Method: Compared patient data across different departments and procedures.
- Results: Identified several areas where patient care could be improved and costs could be reduced.
- Conclusions: Implemented new protocols and procedures to improve patient care and reduce costs.
10.3. Manufacturing Efficiency Analysis
A manufacturing company used pivot table comparisons to analyze production data and identify inefficiencies.
- Objective: Identify inefficiencies in the production process and reduce costs.
- Method: Compared production data across different factories and production lines.
- Results: Identified several inefficiencies in the production process.
- Conclusions: Implemented new procedures and technologies to improve efficiency and reduce costs.
11. Frequently Asked Questions (FAQ)
11.1. How Do I Add a Year Column to My Pivot Table?
To add a Year column to your pivot table, start by ensuring your data source has a date column. If it doesn’t, you may need to first insert the dates manually. Then, add a new column adjacent to your data, and label it “Year.” In the first cell of this new column, use a formula like =YEAR(date_cell) where date_cell is the cell reference containing the date. Drag this formula down to fill the rest of the cells in the column with the corresponding years.
Afterward, refresh your pivot table data source to include the newly added Year column. When you open the PivotTable Field List, you should now see the Year field available. You can then add this to the Rows or Columns area of your pivot table layout to start analyzing your data by year.
Remember, this Year column is crucial for performing year-over-year analysis, so having it in your pivot table setup is essential.
11.2. Can Pivot Tables Calculate Percentage Differences Automatically?
Absolutely, pivot tables can automatically calculate percentage differences without you needing to do the math. Once you have your pivot table set up, you can use the “Show Values As” feature to compare two periods. For example, to show the percent difference in sales between two years, you would:
- Add your Sales data to the Values area of the pivot table twice.
- Right-click on the second instance of your Sales data in the pivot table.
- Choose “Show Values As” then select “% Difference From.”
- In the dialog box that appears, select the base field, such as the Year, and choose the specific year or “(previous)” to compare against the previous period.
Your pivot table will now display the percentage differences for you. This is particularly useful for analyzing trends over time, giving you a clear view of growth or decline.
11.3. How Do I Deal with Different Row or Column Labels?
When comparing pivot tables, you might encounter different row or column labels. The key is to standardize these labels for effective comparison.
- Standardize Labels: Ensure that the labels are consistent across both datasets. Use the same naming conventions and terminology.
- Grouping: Use grouping to combine related items into a single group. This can help to reduce the number of different labels and make the comparison easier.
- Lookup Tables: Use lookup tables to map different labels to a common set of labels.
11.4. What If My Data Sources Have Different Granularity?
Sometimes, your data sources might have different levels of detail.
- Aggregate Data: Aggregate the data to a common level of granularity. For example, if one data source is daily and the other is monthly, aggregate the daily data to monthly.
- Use Calculated Fields: Use calculated fields to calculate metrics at the desired level of granularity.
- Power Query: Use Power Query to transform the data into a common format.
11.5. How Can I Compare Pivot Tables with Missing Data?
Missing data can be a challenge when comparing pivot tables.
- Fill Missing Values: Fill missing values with zeros or other appropriate values.
- Exclude Missing Values: Exclude missing values from the comparison.
- Use Calculated Fields: Use calculated fields to handle missing values in a meaningful way.
11.6. Can I Automate Pivot Table Comparisons?
Yes, you can automate pivot table comparisons using macros or scripting.
- Macros: Use macros to automate the steps involved in creating and comparing pivot tables.
- Scripting: Use scripting languages such as Python to automate the data preparation, pivot table creation, and comparison process.
11.7. What Are Some Alternatives to Excel for Pivot Table Comparisons?
While Excel is a popular choice, there are other tools that can be used for pivot table comparisons.
- Google Sheets: Google Sheets is a free, web-based spreadsheet program that offers similar pivot table capabilities to Excel.
- Tableau: Tableau is a powerful data visualization tool that can be used to create interactive dashboards and reports.
- Power BI: Power BI is a business intelligence tool from Microsoft that can be used to analyze data from multiple sources.
11.8. How Do I Present My Pivot Table Comparisons?
Present your pivot table comparisons in a clear and concise way.
- Visualizations: Use visualizations such as charts and graphs to highlight key trends and patterns.
- Executive Summaries: Provide an executive summary that summarizes the key findings of the comparison.
- Recommendations: Make recommendations based on the results of the comparison.
11.9. What Are the Limitations of Pivot Table Comparisons?
While pivot table comparisons are a powerful tool, they do have some limitations.
- Data Size: Pivot tables can be slow to process large datasets.
- Complexity: Pivot tables can be complex to set up and use.
- Flexibility: Pivot tables are not as flexible as some other data analysis tools.
11.10. How Can I Improve My Pivot Table Skills?
Improve your pivot table skills by practicing and learning from others.
- Practice: Practice creating and comparing pivot tables with different datasets.
- Online Courses: Take online courses to learn more about pivot tables.
- Tutorials: Watch tutorials to learn how to use specific pivot table features.
12. Conclusion: Leveraging Pivot Table Comparisons for Enhanced Data Insights
In conclusion, mastering pivot table comparisons is essential for anyone seeking to extract deeper insights from their data. By understanding the various methods, advanced techniques, and best practices outlined in this guide, you can transform raw data into actionable intelligence. Whether you’re analyzing financial performance, sales trends, marketing campaign effectiveness, or operational efficiencies, pivot table comparisons provide a powerful framework for making informed decisions.
Remember, the key to successful pivot table comparisons lies in careful data preparation, thoughtful pivot table design, and a clear understanding of your objectives. By following the step-by-step guides and troubleshooting tips provided, you can avoid common errors and ensure accurate results. Embrace the automation and advanced analytics capabilities that are emerging in the field, and continuously strive to improve your skills through practice and learning.
Ready to take your data analysis to the next level? Visit COMPARE.EDU.VN today to explore more resources and tools for mastering pivot table comparisons. Our comprehensive guides, tutorials, and case studies will help you unlock the full potential of your data and drive better outcomes for your organization. Don’t just analyze data – transform it into a strategic advantage with COMPARE.EDU.VN.
For more information, contact us at:
- Address: 333 Comparison Plaza, Choice City, CA 90210, United States
- WhatsApp: +1 (626) 555-9090
- Website: COMPARE.EDU.VN
Start comparing and start succeeding with compare.edu.vn today data-driven insights, analytical techniques, and strategic decision-making.