Whether you are a developer meticulously reviewing code changes, a system administrator ensuring configuration consistency, or simply a user managing documents, the ability to compare files is indispensable in Linux. Identifying differences between files allows you to track modifications, merge updates, and troubleshoot issues effectively.
Linux provides a rich ecosystem of tools for comparing files, ranging from command-line utilities to feature-rich graphical interfaces. This article explores a selection of the most useful tools for comparing files and directories in Linux, catering to various needs and preferences.
Note: The tools listed below are not ranked in any specific order. The best tool for you will depend on your individual requirements and workflow.
1. Diff Command: The Foundational Utility
The diff command is the bedrock of file comparison in Linux. Standing for “difference,” this command-line utility analyzes files line by line to pinpoint the exact changes required to make them identical. As a core UNIX utility dating back to the 1970s, diff is pre-installed on virtually every Linux distribution, making it universally accessible.
diff outputs its findings using a specific format that highlights added, deleted, and changed lines. While the initial output might seem cryptic to newcomers, it provides a precise representation of file differences.
Key Features of Diff:
- Line-by-line comparison: Ensures thorough identification of even minor discrepancies.
- Standard UNIX utility: Available on almost all Linux systems without additional installation.
- Versatile output formats: Supports various output formats, including context diff and unified diff, for different applications like patching.
While diff is powerful, its command-line nature and output format can present a learning curve. Fortunately, extensive resources are available to help you master this essential tool, such as detailed guides on using the diff command.
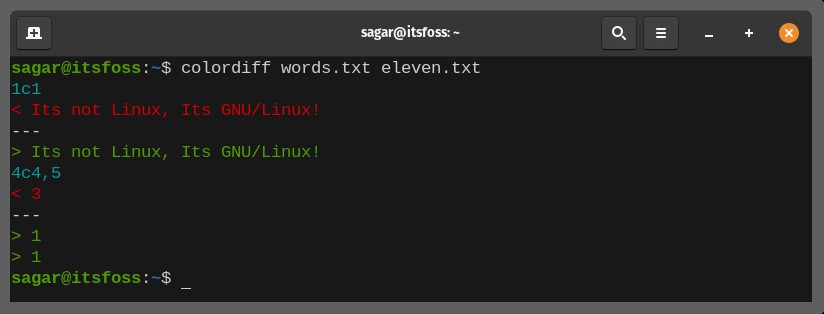
2. Colordiff Command: Enhancing Readability with Color
For users who find the standard diff output visually challenging, colordiff offers a more user-friendly alternative. Colordiff is essentially a colorized wrapper around the diff command, enhancing readability through syntax highlighting. It uses distinct colors to represent added, removed, and changed lines, making it easier to quickly grasp the differences between files.
Key Features of Colordiff:
- Syntax highlighting: Employs colors to differentiate types of changes, improving visual clarity.
- Enhanced readability: Makes
diffoutput significantly easier to interpret at a glance. - Customizable colors: Allows users to adjust color schemes to their preferences.
- GPL licensed and digitally signed: Ensures open-source transparency and software integrity.
Installation:
Colordiff is readily available in the package repositories of most Linux distributions. On Debian-based systems like Ubuntu, you can install it using the following command:
sudo apt install colordiff3. Wdiff Command: Word-by-Word Precision
Wdiff takes a different approach to file comparison by focusing on word-level differences. As a command-line front-end for diff, wdiff analyzes files on a word-by-word basis, providing a more granular view of changes within lines. It operates by creating temporary files and then running diff on them, ultimately presenting the differences in terms of words.
Key Features of Wdiff:
- Word-by-word comparison: Highlights changes at the word level, useful for detailed text analysis.
- Multi-language support: Adaptable to various languages, making it suitable for comparing documents in different locales.
- Colorized output integration: Can be combined with
colordiffto produce color-highlighted word differences.
Installation:
Similar to colordiff, wdiff is commonly found in Linux distribution repositories. For Ubuntu and similar systems, installation is straightforward:
sudo apt install wdiff4. Vimdiff Command: Integrated into the Vim Editor
For users of the Vim text editor, vimdiff offers a powerful and integrated file comparison solution. Whether you use Vim in the terminal or the GUI, vimdiff seamlessly integrates file comparison directly into the editor environment. It leverages Vim’s buffer management and command system to provide an advanced diffing experience.
Key Features of Vimdiff:
- Vim editor integration: Provides a familiar and efficient workflow for Vim users.
- HTML export: Allows saving comparison results as an HTML web page for sharing or archiving.
- Git integration: Works effectively with Git for comparing versions within repositories.
- Highly customizable: Benefits from Vim’s extensive customization options for appearance and behavior.
- Both CLI and GUI modes: Accessible within both terminal and graphical Vim instances.
vimdiff starts the Vim editor with the diff output displayed, but its true strength lies in its interactive capabilities. Familiarity with basic Vim commands and Vim buffers greatly enhances the effectiveness of vimdiff.
Installation:
To use vimdiff, you need Vim installed on your system. Instructions for installing the latest Vim version on Ubuntu are readily available here. Alternatively, a general Vim installation command for Debian-based distributions is:
sudo apt install vim5. Gitdiff Command: Version Control Focused Comparison
Gitdiff is specifically designed for comparing changes within Git repositories. It utilizes the underlying diff command but operates on Git data sources, such as commits, branches, and files within the staging area or working directory. This makes it an invaluable tool for developers working with Git for version control.
Key Features of Gitdiff:
- Git repository integration: Optimized for comparing changes within Git version control systems.
- Comparison across Git objects: Enables comparison between commits, branches, staged files, and more.
- Binary file support: Can handle comparisons of binary files in addition to text files.
- Color highlighting: Enhances output readability with color-coded differences.
Installation:
Gitdiff is part of the Git suite, so no separate installation is required if Git is already installed on your system. For those without Git, installation instructions for the latest Git version on Ubuntu can be found here. A basic Git installation command for Ubuntu-based systems is:
sudo apt install git6. Kompare: A Feature-Rich GUI Tool
Kompare, developed by KDE, is a graphical file comparison tool that goes beyond basic diffing. It provides a comprehensive set of features, including the ability to create and apply patches, making it suitable for more advanced file management tasks. While primarily intended for comparing source code, Kompare’s versatility extends to various file types and directory comparisons.
Key Features of Kompare:
- GUI interface: Offers a visually intuitive way to compare files and directories.
- Patch creation and application: Facilitates the creation and application of patches for efficient code or configuration updates.
- Statistics on differences: Provides quantitative data about the number and types of differences found.
- Bézier connection widget: Visually represents file relationships and change flow.
- Multiple diff format support: Compatible with various diff formats for interoperability.
- Customizable appearance: Allows some degree of UI customization.
Installation:
As a KDE application, Kompare is readily available in the repositories of most Linux distributions and through software centers. Installation via the command line on Ubuntu-based systems is:
sudo apt install kompare7. Meld: Simplicity and Three-Way Comparison
Meld strikes a balance between functionality and ease of use. This GUI tool provides a clean and straightforward interface for comparing files and directories, including support for three-way comparisons. Its integration with version control systems further enhances its utility for developers. For a more in-depth look, refer to a detailed guide on how to compare files using Meld.
Key Features of Meld:
- User-friendly GUI: Offers an intuitive and accessible interface for users of all levels.
- Three-way file comparison: Enables simultaneous comparison of three file versions, crucial for merging branches or resolving conflicts.
- Directory comparison: Visually highlights differences between directory structures and file contents.
- Version control system support: Integrates with popular VCS like Git, Mercurial, Bazaar, and Subversion.
- Syntax highlighting: Improves readability of code and structured text files.
- Text filtering: Allows focusing on specific types of changes or content.
Installation:
Meld’s popularity ensures its presence in the default repositories of most Linux distributions. Installation on Ubuntu is easily achieved with:
sudo apt install meldAdditional: Sublime Merge (Non-FOSS)
Sublime Merge, from the creators of the Sublime Text editor, is a powerful, albeit non-open-source, option tailored for developers who heavily rely on version control, particularly Git. It prioritizes seamless Git workflow integration, offering features like command-line integration, advanced search capabilities, and Git flow support.
While Sublime Merge is not open source, it is free to download and use indefinitely, although purchasing a license is encouraged for continued support and to remove occasional nag screens.
Choosing the Right Tool for Your Needs
Beyond the tools highlighted, other options like P4Merge and Beyond Compare exist, offering further choices, including non-open-source alternatives.
For many users, the command-line diff and the GUI-based Meld provide a sufficient combination of power and ease of use for most file comparison tasks. However, specific scenarios, such as working extensively with Git repositories, might benefit from specialized tools like Gitdiff or the enhanced features of Kompare.
Ultimately, the best tool for comparing Linux files depends on your individual workflow, technical comfort level, and specific requirements. Experiment with different tools to discover which best streamlines your file comparison tasks and enhances your productivity. Share your preferred file comparison tools and experiences in the comments below!