Collaborating on documents often means receiving feedback from multiple reviewers. Instead of manually sifting through numerous documents to piece together edits, Microsoft Word offers a handy feature to combine all those suggestions and revisions into a single, unified document. This process simplifies your workflow, allowing you to efficiently review and reconcile feedback in one place.
This guide will walk you through the steps to use Word’s “Combine” function, making document review a breeze. Whether you’re working on a report, proposal, or any collaborative document, mastering this feature will save you time and effort.
Merging Two Document Versions
Let’s start with the scenario of merging two versions of a document – your original and a revised copy you’ve received back. Here’s how to do it:
-
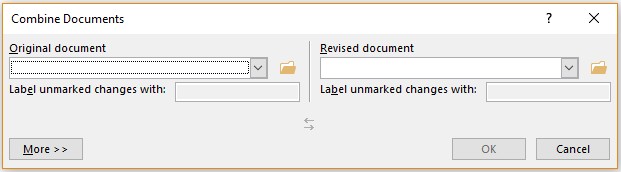
Navigate to the Review tab on the Word ribbon, then click on Compare, and select Combine from the dropdown menu. This action opens the “Combine Documents” dialog box, prompting you to select your original and revised files.
Alt Text: Combine Documents dialog box in Microsoft Word, prompting users to select original and revised documents for merging.
-
In the Original document field, use the dropdown arrow to choose the initial document you sent out for review. If needed, click the folder icon to browse and locate the file. Remember, the original document is your starting point, the version without any tracked changes.
-
Next, in the Revised document field, select the document containing the revisions you want to merge into your original. This is typically the copy you received back from a reviewer.
Alt Text: Revised document field highlighted in the Combine Documents dialog box, indicating where to select the reviewed document.
-
In the Label unmarked changes with box, type a descriptive name or phrase. This label will help you identify the source of the revisions within the combined document, especially useful when merging feedback from multiple individuals.
-
For more control over the merging process, click More. This expands the dialog box to reveal additional options.
-
Under Show changes in, ensure New document is selected. This option is generally recommended as it keeps your original documents untouched and presents the combined changes in a fresh, easy-to-review document.
Alt Text: “New document” option selected under “Show changes in” within the expanded Combine Documents dialog box, instructing Word to display merged changes in a separate file.
-
Click OK. Word will then generate a new document that intelligently merges the original and revised documents. The screen will typically split into three panes:
- Revisions Pane: Displays a summary of all tracked changes.
- Combined Document Pane: Shows the merged document with tracked changes incorporated.
- Source Documents Pane: (Split into two) Displays both the Original and Revised documents for direct comparison.
If you find the three-pane view overwhelming, you can simplify it by clicking Compare > Show Source Documents > Hide Source Documents to focus solely on the combined document and revisions. Notice the red vertical lines in the combined document, visually indicating where modifications were made. These lines serve as quick indicators of changes for efficient review.
Alt Text: Tracked changes highlighted with red vertical lines in the combined document, visually representing modifications and revisions.
-
Once you have reviewed and addressed all the combined changes, save the newly created document. This saved document becomes your consolidated version, incorporating feedback from the merged sources.
Tip: For future collaborations, consider leveraging the power of cloud-based document sharing. Services like OneDrive allow real-time co-authoring and commenting, potentially eliminating the need for merging versions later. Sharing your document on OneDrive and inviting collaborators to directly edit and comment streamlines the review process from the outset.
Merging Additional Copies
What if you have more than two versions to combine? No problem. Word allows you to sequentially merge additional copies. Here’s how:
- After merging the first two versions, save the resulting combined document. This document now becomes your new “original” for the next merge.
- Repeat the Review > Compare > Combine steps.
- This time, in the Original document field, select the saved combined document from the previous merge.
- In the Revised document field, choose the next copy you want to merge.
- Again, provide a label in the Label unmarked changes with box to identify the source of these new revisions.
- Click More.
- Under Show changes in, for subsequent merges, you might choose Original document to directly integrate the changes into your previously combined document, rather than creating a new one each time.
- Click OK to merge the additional revisions. Repeat this process for all remaining copies, each time merging into the accumulating combined document.
See also
View and compare documents side by side
Compare document differences using the legal blackline option
By using the “Combine” feature in Microsoft Word, you can effectively consolidate feedback from multiple reviewers, making the document review process significantly more organized and efficient. This powerful tool helps you compare and integrate suggestions, ultimately leading to a refined and collaborative final document.