How To Compare Two Workbooks In Excel 2010 is a skill that boosts productivity and accuracy, essential for effective data analysis. At COMPARE.EDU.VN, we provide expert guidance on side-by-side comparisons and alternative methods to streamline your workflow and enable data comparison, ensuring you make informed decisions. Leverage Excel’s features for efficient spreadsheet comparison, data reconciliation, and document analysis.
1. Understanding the Need for Workbook Comparison in Excel 2010
Excel 2010, though a slightly older version, remains a powerful tool for data management and analysis. Comparing two workbooks is often necessary for several reasons. Whether you are merging data, auditing spreadsheets, or identifying discrepancies, knowing how to efficiently compare workbooks in Excel 2010 is crucial. This section delves into why this skill is important and sets the stage for exploring different comparison methods. Understanding data reconciliation and spreadsheet auditing will significantly enhance your ability to manage and analyze data effectively.
1.1. Scenarios Requiring Workbook Comparison
Several situations necessitate comparing two workbooks in Excel 2010:
- Data Consolidation: Combining data from multiple sources into a single, comprehensive report.
- Auditing: Ensuring the accuracy and integrity of financial or operational data.
- Version Control: Identifying changes between different versions of a workbook.
- Error Detection: Locating and correcting discrepancies in data entries.
- Reporting: Creating comparative reports for analysis and decision-making.
These scenarios highlight the versatility and importance of being proficient in workbook comparison techniques. Mastering data validation techniques and understanding cell comparison will allow you to handle these situations with greater ease and accuracy.
1.2. Challenges in Manually Comparing Workbooks
Manually comparing two workbooks can be a daunting task, especially with large datasets. Some common challenges include:
- Time Consumption: Manually scrutinizing each cell is time-intensive and inefficient.
- Error Proneness: The risk of overlooking subtle differences is high, leading to potential errors.
- Complexity with Large Datasets: Managing and comparing large volumes of data can be overwhelming.
- Difficulty in Identifying Changes: Spotting modifications between versions can be challenging.
- Inconsistency: Manual comparisons may lack consistency and standardization.
These challenges underscore the need for efficient and reliable methods for comparing workbooks, such as those provided by COMPARE.EDU.VN. Exploring advanced Excel functions and conditional formatting techniques can provide more streamlined approaches.
2. Method 1: Using the View Side by Side Feature
Excel 2010 offers a built-in feature called “View Side by Side,” which allows you to compare two workbooks simultaneously on the screen. This method is straightforward and useful for visual inspection and quick comparisons. This section details the steps to use this feature effectively and its advantages and limitations. Mastering Excel’s ribbon interface and window management will help you utilize this feature more efficiently.
2.1. Step-by-Step Guide to View Side by Side
Follow these steps to compare two workbooks using the “View Side by Side” feature:
-
Open the Workbooks: Open both Excel workbooks that you want to compare. Ensure that the worksheets you intend to compare are active in each workbook.
-
Navigate to the View Tab: Click on the “View” tab in the Excel ribbon. This tab contains various options for controlling how your workbook is displayed.
-
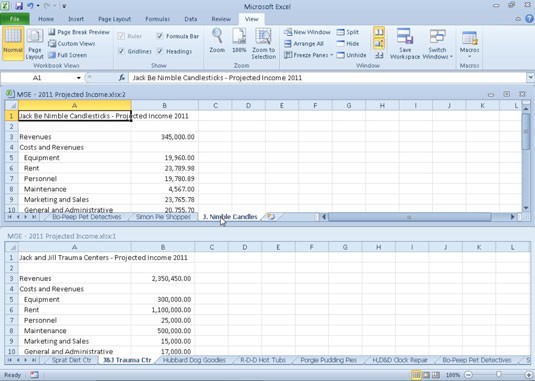
Click View Side by Side: In the “Window” group, click the “View Side by Side” button. Excel will automatically arrange the two workbooks side by side on your screen.
 Excel View Side by Side button
 -
Synchronous Scrolling: By default, Excel enables synchronous scrolling, which means that when you scroll in one workbook, the other workbook scrolls simultaneously. This feature is helpful for comparing data that aligns row by row.
-
(Optional) Disable Synchronous Scrolling: If you want to scroll through each workbook independently, click the “Synchronous Scrolling” button in the “Window” group to turn it off.
-
(Optional) Reset Window Position: If you resize or move the windows, you can click the “Reset Window Position” button to restore the default arrangement.
-
Complete the Comparison: Once you have compared the workbooks, you can click the “View Side by Side” button again to return to the normal view.
This method offers a quick and easy way to visually compare two workbooks, particularly when you need to inspect data manually. Understanding window tiling options and Excel’s display settings can further enhance this method.
2.2. Advantages and Limitations of View Side by Side
The “View Side by Side” feature offers several advantages:
- Visual Comparison: Allows for easy visual inspection of data in two workbooks simultaneously.
- Quick Setup: Simple and straightforward to set up with just a few clicks.
- Synchronous Scrolling: Facilitates row-by-row comparison with synchronized scrolling.
- Built-in Feature: No need to install additional add-ins or software.
However, it also has limitations:
- Manual Effort: Requires manual scrutiny, which can be time-consuming for large datasets.
- Limited Functionality: Does not automatically highlight or identify differences.
- Not Suitable for Complex Comparisons: Less effective for detailed analysis or identifying specific discrepancies.
Despite these limitations, the “View Side by Side” feature is a useful starting point for workbook comparison. For more complex and automated comparisons, consider exploring other methods provided by COMPARE.EDU.VN. Utilizing Excel’s zoom functions and customizing the ribbon can also improve your experience with this feature.
3. Method 2: Using Conditional Formatting to Highlight Differences
Conditional formatting in Excel 2010 allows you to automatically highlight cells that meet specific criteria. By using conditional formatting, you can quickly identify differences between two workbooks. This section explains how to set up conditional formatting rules to compare data and its benefits and drawbacks. This method is particularly useful for highlighting discrepancies in large datasets. Proficiency in Excel’s formula syntax and cell referencing is essential for this method.
3.1. Setting Up Conditional Formatting Rules
Follow these steps to use conditional formatting for comparing two workbooks:
-
Open the Workbooks: Open both Excel workbooks that you want to compare. Ensure that the worksheets you intend to compare are active in each workbook.
-
Select the Data Range: In the first workbook, select the data range that you want to compare with the corresponding data range in the second workbook.
-
Navigate to Conditional Formatting: Click on the “Home” tab in the Excel ribbon. In the “Styles” group, click the “Conditional Formatting” button.
-
Create a New Rule: Select “New Rule” from the dropdown menu. This opens the “New Formatting Rule” dialog box.
-
Use a Formula to Determine Which Cells to Format: In the “Select a Rule Type” section, choose “Use a formula to determine which cells to format.”
-
Enter the Formula: In the “Format values where this formula is true” field, enter a formula that compares the selected cell in the first workbook with the corresponding cell in the second workbook. For example, if you are comparing cell A1 in the first workbook with cell A1 in the second workbook, the formula would be:
=A1<>'[Book2]Sheet1'!A1(replace “Book2” and “Sheet1” with the actual names of your second workbook and worksheet). -
Set the Formatting: Click the “Format” button to set the formatting that will be applied to cells where the formula is true (i.e., where the values are different). Choose a fill color, font style, or any other formatting option that makes the differences easily visible.
-
Apply the Rule: Click “OK” to close the “Format Cells” dialog box and “OK” again to close the “New Formatting Rule” dialog box. The conditional formatting rule is now applied to the selected data range.
-
Repeat for Other Ranges: Repeat these steps for other data ranges that you want to compare.
By using conditional formatting, you can quickly highlight cells with different values, making it easier to identify discrepancies between the two workbooks. Familiarity with relative and absolute cell referencing is critical for accurate comparisons.
3.2. Advantages and Limitations of Conditional Formatting
Conditional formatting offers several advantages:
- Automatic Highlighting: Automatically highlights cells with different values, making it easy to spot discrepancies.
- Customizable: Allows you to customize the formatting (e.g., fill color, font style) to suit your preferences.
- Visual Clarity: Enhances visual clarity and makes it easier to identify differences in large datasets.
- Dynamic: Automatically updates as data changes, ensuring that differences are always highlighted.
However, it also has limitations:
- Formula Complexity: Requires understanding of Excel formulas, which can be challenging for some users.
- Cell-by-Cell Comparison: Compares data on a cell-by-cell basis, which may not be suitable for all types of comparisons.
- Potential Performance Issues: Can slow down Excel if applied to very large datasets.
- Limited to Visual Cues: Only provides visual cues and does not offer detailed analysis or reporting.
Despite these limitations, conditional formatting is a powerful tool for quickly identifying differences between two workbooks. For more advanced analysis and reporting, consider exploring other methods provided by COMPARE.EDU.VN. Understanding Excel’s error checking features and using named ranges can complement this method.
4. Method 3: Using Excel Formulas to Compare Data
Excel formulas provide a flexible and powerful way to compare data between two workbooks. By using formulas, you can perform various types of comparisons and retrieve specific information about the differences. This section discusses different formulas for comparing data and their applications. This method is essential for users who need precise control over the comparison process. A strong understanding of Excel’s logical functions and array formulas is beneficial.
4.1. Common Formulas for Comparing Data
Here are some common Excel formulas that you can use to compare data between two workbooks:
IFFunction: TheIFfunction allows you to perform logical tests and return different values based on the results. For example, you can use theIFfunction to check if two cells have the same value and return a specific message if they don’t.- Formula:
=IF(A1='[Book2]Sheet1'!A1, "Match", "Mismatch") - Explanation: This formula checks if the value in cell A1 of the first workbook is equal to the value in cell A1 of the second workbook. If they are equal, it returns “Match”; otherwise, it returns “Mismatch.”
- Formula:
EXACTFunction: TheEXACTfunction compares two text strings and returnsTRUEif they are exactly the same (case-sensitive) andFALSEotherwise.- Formula:
=EXACT(A1,'[Book2]Sheet1'!A1) - Explanation: This formula compares the text in cell A1 of the first workbook with the text in cell A1 of the second workbook. It returns
TRUEif they are exactly the same (including case) andFALSEotherwise.
- Formula:
VLOOKUPFunction: TheVLOOKUPfunction searches for a value in the first column of a range and returns a value in the same row from another column in the range. You can useVLOOKUPto check if a value exists in another workbook and retrieve corresponding data.- Formula:
=IFERROR(VLOOKUP(A1,'[Book2]Sheet1'!A:B,2,FALSE),"Not Found") - Explanation: This formula searches for the value in cell A1 of the first workbook in the first column of the range A:B in the second workbook. If it finds a match, it returns the value from the second column (column B). If it doesn’t find a match, it returns “Not Found.”
- Formula:
COUNTIFFunction: TheCOUNTIFfunction counts the number of cells in a range that meet a specified criterion. You can useCOUNTIFto check how many times a value appears in another workbook.- Formula:
=COUNTIF('[Book2]Sheet1'!A:A,A1) - Explanation: This formula counts how many times the value in cell A1 of the first workbook appears in column A of the second workbook.
- Formula:
- Array Formulas: Array formulas allow you to perform complex calculations on multiple values at once. You can use array formulas to compare entire ranges of data and return an array of results.
- Formula:
{=SUM(IF(A1:A10='[Book2]Sheet1'!A1:A10,1,0))}(enter this formula by pressing Ctrl+Shift+Enter) - Explanation: This array formula compares the values in the range A1:A10 of the first workbook with the values in the range A1:A10 of the second workbook. It returns the number of cells that have the same value in both ranges.
- Formula:
By using these formulas, you can perform various types of comparisons and retrieve specific information about the differences between two workbooks. Understanding Excel’s error handling functions and using named ranges can further enhance this method.
4.2. Examples of Data Comparison Using Formulas
Here are a few examples of how you can use Excel formulas to compare data:
- Identifying Mismatched Values: Use the
IFfunction to identify cells that have different values in two workbooks. For example, if you want to compare the values in column A of two workbooks, you can enter the following formula in column B of the first workbook:=IF(A1='[Book2]Sheet1'!A1, "Match", "Mismatch"). - Finding Missing Values: Use the
VLOOKUPfunction to check if a value exists in another workbook. For example, if you want to check if the values in column A of the first workbook exist in column A of the second workbook, you can enter the following formula in column B of the first workbook:=IFERROR(VLOOKUP(A1,'[Book2]Sheet1'!A:A,1,FALSE),"Not Found"). - Comparing Lists: Use the
COUNTIFfunction to compare two lists and identify values that are unique to each list. For example, if you want to compare the lists in column A of two workbooks, you can enter the following formula in column B of the first workbook:=IF(COUNTIF('[Book2]Sheet1'!A:A,A1)>0, "Common", "Unique"). - Calculating Differences: Use simple arithmetic formulas to calculate the differences between corresponding values in two workbooks. For example, if you want to calculate the difference between the values in column A of two workbooks, you can enter the following formula in column B of the first workbook:
=A1-'[Book2]Sheet1'!A1.
These examples illustrate the versatility of Excel formulas for comparing data. By combining different formulas and techniques, you can perform complex comparisons and retrieve valuable insights. Utilizing Excel’s data analysis tools and pivot tables can also provide additional analytical capabilities.
4.3. Advantages and Limitations of Using Formulas
Using formulas for data comparison offers several advantages:
- Precision: Allows for precise control over the comparison process.
- Flexibility: Can be customized to perform various types of comparisons.
- Automation: Automates the comparison process, saving time and reducing errors.
- Detailed Analysis: Provides detailed analysis and specific information about the differences.
However, it also has limitations:
- Complexity: Requires understanding of Excel formulas, which can be challenging for some users.
- Time-Consuming Setup: Setting up the formulas can be time-consuming, especially for complex comparisons.
- Potential for Errors: Errors in the formulas can lead to incorrect results.
- Manual Interpretation: Requires manual interpretation of the results.
Despite these limitations, using formulas is a powerful way to compare data between two workbooks. For more advanced analysis and reporting, consider exploring other methods provided by compare.edu.vn. Incorporating data validation techniques and using the INDEX function can complement this method.
5. Method 4: Using VBA Macros for Advanced Comparisons
For more complex comparison tasks, you can use VBA (Visual Basic for Applications) macros in Excel 2010. VBA allows you to write custom code to automate the comparison process and perform advanced analysis. This section explores how to create VBA macros for comparing workbooks and their advantages and limitations. This method is ideal for users with programming knowledge who need to automate complex tasks. A solid understanding of VBA syntax and the Excel object model is essential.
5.1. Creating VBA Macros for Workbook Comparison
Follow these steps to create a VBA macro for comparing two workbooks:
- Open the VBA Editor: Open the Excel workbook where you want to create the macro. Press Alt + F11 to open the VBA editor.
- Insert a New Module: In the VBA editor, click on “Insert” in the menu bar and select “Module.” This will insert a new module where you can write your VBA code.
- Write the VBA Code: Write the VBA code to compare the two workbooks. Here’s an example of a VBA macro that compares the values in column A of two workbooks and highlights the differences:
Sub CompareWorkbooks()
    Dim Wb1 As Workbook, Wb2 As Workbook
    Dim Ws1 As Worksheet, Ws2 As Worksheet
    Dim LastRow As Long, i As Long

    ' Set references to the workbooks and worksheets
    Set Wb1 = ThisWorkbook
    Set Ws1 = Wb1.Sheets("Sheet1") ' Change "Sheet1" to your sheet name

    ' Open the second workbook
    Set Wb2 = Workbooks.Open("C:PathToYourWorkbook2.xlsx") ' Change the path to your workbook
    Set Ws2 = Wb2.Sheets("Sheet1") ' Change "Sheet1" to your sheet name

    ' Find the last row with data in the first worksheet
    LastRow = Ws1.Cells(Rows.Count, "A").End(xlUp).Row

    ' Loop through each row and compare the values
    For i = 1 To LastRow
        If Ws1.Cells(i, "A").Value <> Ws2.Cells(i, "A").Value Then
            ' Highlight the cell if the values are different
            Ws1.Cells(i, "A").Interior.Color = RGB(255, 0, 0) ' Red color
            Ws2.Cells(i, "A").Interior.Color = RGB(255, 0, 0) ' Red color
        End If
    Next i

    ' Close the second workbook (optional)
    Wb2.Close SaveChanges:=False

    MsgBox "Comparison complete. Differences highlighted in red.", vbInformation
End Sub- Modify the Code: Modify the code to suit your specific comparison needs. You may need to change the workbook and worksheet names, the data ranges, and the comparison criteria.
- Run the Macro: To run the macro, click anywhere within the code and press F5, or click the “Run” button in the VBA editor.
- Save the Workbook: Save the Excel workbook as a macro-enabled workbook (.xlsm) to preserve the VBA code.
This VBA macro provides a basic example of how to compare two workbooks and highlight the differences. You can customize the code to perform more complex comparisons and analysis. Understanding Excel’s event procedures and using the Application.ScreenUpdating property can optimize macro performance.
5.2. Example VBA Code for Different Comparison Scenarios
Here are a few example VBA codes for different comparison scenarios:
- Comparing Multiple Columns: This VBA code compares multiple columns in two workbooks and highlights the differences:
Sub CompareMultipleColumns()
    Dim Wb1 As Workbook, Wb2 As Workbook
    Dim Ws1 As Worksheet, Ws2 As Worksheet
    Dim LastRow As Long, i As Long, j As Integer
    Dim NumColumns As Integer

    ' Set references to the workbooks and worksheets
    Set Wb1 = ThisWorkbook
    Set Ws1 = Wb1.Sheets("Sheet1") ' Change "Sheet1" to your sheet name

    ' Open the second workbook
    Set Wb2 = Workbooks.Open("C:PathToYourWorkbook2.xlsx") ' Change the path to your workbook
    Set Ws2 = Wb2.Sheets("Sheet1") ' Change "Sheet1" to your sheet name

    ' Find the last row with data in the first worksheet
    LastRow = Ws1.Cells(Rows.Count, "A").End(xlUp).Row

    ' Set the number of columns to compare
    NumColumns = 3 ' Change this to the number of columns you want to compare

    ' Loop through each row and column and compare the values
    For i = 1 To LastRow
        For j = 1 To NumColumns
            If Ws1.Cells(i, j).Value <> Ws2.Cells(i, j).Value Then
                ' Highlight the cell if the values are different
                Ws1.Cells(i, j).Interior.Color = RGB(255, 0, 0) ' Red color
                Ws2.Cells(i, j).Interior.Color = RGB(255, 0, 0) ' Red color
            End If
        Next j
    Next i

    ' Close the second workbook (optional)
    Wb2.Close SaveChanges:=False

    MsgBox "Comparison complete. Differences highlighted in red.", vbInformation
End Sub- Comparing Specific Ranges: This VBA code compares specific ranges in two workbooks and highlights the differences:
Sub CompareSpecificRanges()
    Dim Wb1 As Workbook, Wb2 As Workbook
    Dim Ws1 As Worksheet, Ws2 As Worksheet
    Dim Range1 As Range, Range2 As Range
    Dim Cell As Range

    ' Set references to the workbooks and worksheets
    Set Wb1 = ThisWorkbook
    Set Ws1 = Wb1.Sheets("Sheet1") ' Change "Sheet1" to your sheet name

    ' Open the second workbook
    Set Wb2 = Workbooks.Open("C:PathToYourWorkbook2.xlsx") ' Change the path to your workbook
    Set Ws2 = Wb2.Sheets("Sheet1") ' Change "Sheet1" to your sheet name

    ' Set the ranges to compare
    Set Range1 = Ws1.Range("A1:C10") ' Change this to the range you want to compare
    Set Range2 = Ws2.Range("A1:C10") ' Change this to the range you want to compare

    ' Loop through each cell in the range and compare the values
    For Each Cell In Range1
        If Cell.Value <> Range2.Cells(Cell.Row - Range1.Row + 1, Cell.Column - Range1.Column + 1).Value Then
            ' Highlight the cell if the values are different
            Cell.Interior.Color = RGB(255, 0, 0) ' Red color
            Range2.Cells(Cell.Row - Range1.Row + 1, Cell.Column - Range1.Column + 1).Interior.Color = RGB(255, 0, 0) ' Red color
        End If
    Next Cell

    ' Close the second workbook (optional)
    Wb2.Close SaveChanges:=False

    MsgBox "Comparison complete. Differences highlighted in red.", vbInformation
End Sub
These VBA code examples provide a starting point for automating complex comparison tasks. By customizing the code to suit your specific needs, you can perform advanced analysis and retrieve valuable insights. Familiarity with the VBA object model and using the With statement can improve code readability and efficiency.
5.3. Advantages and Limitations of Using VBA Macros
Using VBA macros for workbook comparison offers several advantages:
- Automation: Automates the comparison process, saving time and reducing errors.
- Customization: Allows for highly customized comparisons and analysis.
- Advanced Analysis: Enables advanced analysis and retrieval of specific information.
- Flexibility: Can be adapted to various comparison scenarios.
However, it also has limitations:
- Programming Knowledge: Requires programming knowledge and familiarity with VBA.
- Complexity: Can be complex to set up and debug.
- Security Concerns: Macros can pose security risks if not properly vetted.
- Maintenance: Requires ongoing maintenance and updates.
Despite these limitations, using VBA macros is a powerful way to automate complex comparison tasks and perform advanced analysis. For users with programming knowledge, VBA offers a flexible and efficient solution. Incorporating error handling techniques and using the Option Explicit statement can improve code reliability.
6. Method 5: Using Third-Party Excel Comparison Tools
Several third-party Excel comparison tools are available that offer advanced features and capabilities. These tools often provide more comprehensive analysis, detailed reporting, and user-friendly interfaces. This section discusses some popular Excel comparison tools and their key features. This method is suitable for users who need advanced capabilities without extensive manual setup. Evaluating tool compatibility and considering data privacy are important factors.
6.1. Overview of Popular Excel Comparison Tools
Here are some popular Excel comparison tools:
-
Spreadsheet Compare (Microsoft): A built-in tool in some versions of Microsoft Office that allows you to compare two Excel files and see the differences in a detailed report. It highlights changes in formulas, values, and formatting.
-
Beyond Compare: A powerful comparison tool that supports various file types, including Excel. It offers features such as syntax highlighting, session management, and command-line scripting.
-
Araxis Merge: A visual comparison and merging tool that allows you to compare and merge text files, images, and binary files, including Excel files.
-
Excel Compare: A dedicated Excel comparison tool that offers features such as cell-by-cell comparison, formula auditing, and reporting.
-
Diffchecker: An online comparison tool that allows you to compare text files, images, and PDF files, including Excel files.
These tools offer a range of features and capabilities to suit different comparison needs. Evaluating tool compatibility and considering data privacy are important factors.
6.2. Key Features to Look for in a Comparison Tool
When choosing an Excel comparison tool, consider the following key features:
- Cell-by-Cell Comparison: The ability to compare data on a cell-by-cell basis and highlight the differences.
- Formula Auditing: The ability to audit formulas and identify changes in formulas.
- Reporting: The ability to generate detailed reports of the differences.
- User-Friendly Interface: A user-friendly interface that makes it easy to set up and run comparisons.
- Support for Large Files: The ability to handle large Excel files without performance issues.
- Integration with Excel: Seamless integration with Excel for easy access and use.
- Support for Different File Formats: The ability to compare different Excel file formats (e.g., .xls, .xlsx, .csv).
- Version Control Integration: Integration with version control systems such as Git for tracking changes.
By considering these key features, you can choose the Excel comparison tool that best meets your specific needs.
6.3. Advantages and Limitations of Using Third-Party Tools
Using third-party Excel comparison tools offers several advantages:
- Advanced Features: Provides advanced features and capabilities beyond what Excel offers.
- Comprehensive Analysis: Offers more comprehensive analysis and detailed reporting.
- User-Friendly Interface: Often has a user-friendly interface that makes it easy to use.
- Time Savings: Automates the comparison process, saving time and reducing errors.
However, it also has limitations:
- Cost: Requires purchasing a license or subscription.
- Compatibility: May not be compatible with all versions of Excel.
- Security Concerns: May raise security concerns, especially for sensitive data.
- Learning Curve: May require a learning curve to master the tool.
Despite these limitations, using third-party Excel comparison tools can be a valuable investment for users who need advanced capabilities and comprehensive analysis. Ensuring data security and regularly updating the tool are important considerations.
7. Best Practices for Comparing Workbooks in Excel 2010
To ensure accurate and efficient workbook comparisons, follow these best practices. These guidelines will help you streamline your workflow and avoid common pitfalls.
7.1. Preparing Workbooks for Comparison
- Standardize Data: Ensure that the data in both workbooks is standardized and consistent. This includes using the same data types, formatting, and naming conventions.
- Remove Unnecessary Data: Remove any unnecessary data or formatting that could interfere with the comparison process.
- Backup Your Files: Always create a backup of your Excel files before making any changes or performing comparisons.
- Check for Errors: Check for errors in the data and correct them before comparing the workbooks.
- Use Consistent Naming: Use consistent naming conventions for worksheets and ranges to make it easier to identify and compare data.
7.2. Ensuring Accuracy and Avoiding Common Mistakes
- Double-Check Formulas: Double-check the formulas you use for comparison to ensure that they are correct and accurate.
- Verify Data Ranges: Verify that the data ranges you are comparing are correct and include all the necessary data.
- Use Absolute and Relative References Carefully: Use absolute and relative references carefully in formulas to ensure that they are referencing the correct cells.
- Avoid Manual Errors: Avoid manual errors by automating the comparison process as much as possible.
- Test Your Comparisons: Test your comparisons on a small sample of data to ensure that they are working correctly before applying them to the entire dataset.
7.3. Optimizing Performance for Large Datasets
- Use Efficient Formulas: Use efficient formulas that minimize the amount of calculation required.
- Disable Automatic Calculations: Disable automatic calculations while performing comparisons to improve performance.
- Use VBA for Complex Tasks: Use VBA macros for complex comparison tasks to automate the process and improve performance.
- Close Unnecessary Workbooks: Close any unnecessary workbooks to free up memory and improve performance.
- Upgrade Your Hardware: Consider upgrading your computer hardware if you are working with very large datasets.
8. Addressing Common Issues and Troubleshooting
Even with the best techniques, you may encounter issues during workbook comparison. This section provides solutions to common problems and troubleshooting tips.
8.1. Handling Different Worksheet Structures
- Align Data: Ensure that the data in both worksheets is aligned correctly before comparing them.
- Use
VLOOKUPorINDEX/MATCH: Use theVLOOKUPorINDEX/MATCHfunctions to match data based on a common identifier. - Rearrange Data: Rearrange the data in one of the worksheets to match the structure of the other worksheet.
- Use VBA for Complex Transformations: Use VBA macros to perform complex data transformations and alignments.
8.2. Resolving Compatibility Issues
- Save Files in the Same Format: Save both Excel files in the same format (e.g., .xlsx) to avoid compatibility issues.
- Check for Add-ins: Check for add-ins that may be causing compatibility issues and disable them if necessary.
- Update Excel: Update your version of Excel to the latest version to ensure compatibility with the latest file formats.
- Use Compatibility Mode: Use compatibility mode to open older Excel files in newer versions of Excel.
8.3. Dealing with Large Files and Slow Performance
- Close Unnecessary Programs: Close any unnecessary programs to free up memory and improve performance.
- Increase Memory Allocation: Increase the amount of memory allocated to Excel to improve performance.
- Use a 64-bit Version of Excel: Use a 64-bit version of Excel to handle larger files and improve performance.
- Optimize Formulas: Optimize your formulas to reduce the amount of calculation required.
- Use Data Filters: Use data filters to reduce the amount of data that needs to be processed.
By addressing these common issues and troubleshooting tips, you can ensure accurate and efficient workbook comparisons in Excel 2010.
9. Case Studies: Real-World Applications of Workbook Comparison
To illustrate the practical applications of workbook comparison, let’s explore some real-world case studies. These examples demonstrate how different comparison techniques can be applied in various scenarios.
9.1. Financial Auditing: Detecting Discrepancies in Accounting Data
- Scenario: A financial auditor needs to compare two versions of a company’s general ledger to identify any discrepancies or unauthorized changes.
- Solution: The auditor uses a combination of conditional formatting and Excel formulas to compare the two workbooks. Conditional formatting highlights cells with different values, while formulas calculate the differences between corresponding entries.
- Outcome: The auditor quickly identifies several discrepancies, including unauthorized journal entries and incorrect account balances, allowing them to investigate further and ensure the accuracy of the financial statements.
9.2. Sales Analysis: Comparing Sales Data Across Regions
- Scenario: A sales manager needs to compare sales data across different regions to identify top-performing regions and areas for improvement.
- Solution: The sales manager uses the “View Side by Side” feature to compare the sales data in two workbooks simultaneously. They also use Excel formulas to calculate key metrics such as sales growth, market share, and customer acquisition cost.
- Outcome: The sales manager identifies that the Western region is outperforming other regions in terms of sales growth, while the Eastern region has a higher customer acquisition cost. This information helps them allocate resources more effectively and develop targeted strategies for each region.
9.3. Inventory Management: Reconciling Inventory Records
- Scenario: An inventory manager needs to reconcile inventory records from two different systems to ensure that the company has an accurate count of its inventory.
- Solution: The inventory manager uses VBA macros to automate the comparison process. The macro compares the inventory records from the two systems and generates a report of any discrepancies, such as missing items, incorrect quantities, or mismatched product codes.
- Outcome: The inventory manager identifies several discrepancies, allowing them to correct the inventory records and ensure that the company has an accurate count of its inventory. This helps them avoid stockouts, reduce waste, and improve overall inventory management.
10. The Future of Excel Comparison: Trends and Innovations
As technology evolves, so do the tools and techniques for comparing workbooks in Excel. This section explores emerging trends and innovations in Excel comparison.
10.1. AI-Powered Comparison Tools
- Trend: The integration of artificial intelligence (AI) and machine learning (ML) into Excel comparison tools.
- Innovation: AI-powered tools can automatically identify patterns, anomalies, and hidden relationships in data, making it easier to detect discrepancies and gain insights.
- Example: An AI-powered tool could automatically identify fraudulent transactions by analyzing patterns in financial data and flagging suspicious entries.
10.2. Cloud-Based Comparison Solutions
- Trend: The shift towards cloud-based solutions for Excel comparison.
- Innovation: Cloud-based tools offer several advantages, including accessibility from anywhere, collaboration features, and automatic updates.
- Example: A cloud-based Excel comparison tool could allow multiple users to collaborate on a comparison project in real-time, with all changes automatically saved and synchronized.
10.3. Enhanced Visualization and Reporting
- Trend: The increasing importance of visualization and reporting in Excel comparison.
- Innovation: Enhanced visualization tools make it easier to understand and communicate the results of a comparison.
- Example: An Excel comparison tool could generate interactive charts and graphs that highlight the key differences between two workbooks, making it easier to identify trends and patterns.